
![]()
🛠 为了提供最优支持,我们恳请您将任何问题提交到 [email protected]
提交问题时,请指定您的 AppsFlyer 注册(账户)电子邮件、您的应用 ID、生产步骤、日志、代码片段以及任何其他相关信息。
- 从版本
6.3.2开始,我们为 iOS 平台使用xcframework,因此您需要使用版本 >= 1.10 的 CocoaPods。
要安装 segment-appsflyer-ios 集成
- 只需将此行添加到您的 CocoaPods
Podfile。
生产版本
pod 'segment-appsflyer-ios', '6.14.4'严格模式 SDK 版本
pod 'segment-appsflyer-ios/Strict', '6.14.4'使用严格模式 SDK 可完全删除 IDFA 收集功能和使用 AdSupport 框架的依赖(例如,当为儿童应用开发时)。
- 在项目目录中运行
pod install。
在 XCode 中,转到 文件 > Swift 包 > 添加包依赖... 并将 https://github.com/AppsFlyerSDK/segment-appsflyer-ios 添加为包依赖的 URL。
从版本 6.8.0 开始,我们支持手动模式,以分离 AppsFlyer SDK 的初始化和 SDK 的启动。在这种情况下,AppsFlyer SDK 不会自动启动,这为开发者提供了更多自由来启动 AppsFlyer SDK。请注意,在手动模式下,开发者需要实现 API AppsFlyerLib.shared().start() 以启动 SDK。
如果您使用 CMP 收集同意数据,则此功能是必需的。有关说明,请参阅 此处。
SEGAppsFlyerIntegrationFactory* factoryWithManualMode = [SEGAppsFlyerIntegrationFactory createWithManualMode:YES]; let factoryWithManualMode = SEGAppsFlyerIntegrationFactory.create(withManualMode: true);请查看以下示例,了解如何使用带有代理的手动模式。
要启动 AppsFlyer SDK,请使用 start() API,如下所示
 [[AppsFlyerLib shared] start];
 [[NSNotificationCenter defaultCenter] addObserverForName:UIApplicationDidBecomeActiveNotification object:nil queue: nil usingBlock:^(NSNotification * _Nonnull note) {
     [[AppsFlyerLib shared] start];
}]; AppsFlyerLib.shared().start()
NotificationCenter.default.addObserver(forName: UIApplication.didBecomeActiveNotification, object: nil, queue: nil) { Notification in
AppsFlyerLib.shared().start()
}注意 - addObserver 调用确保正确记录每个应用的启动(从后台到前台)。
请参阅更详细的说明 此处
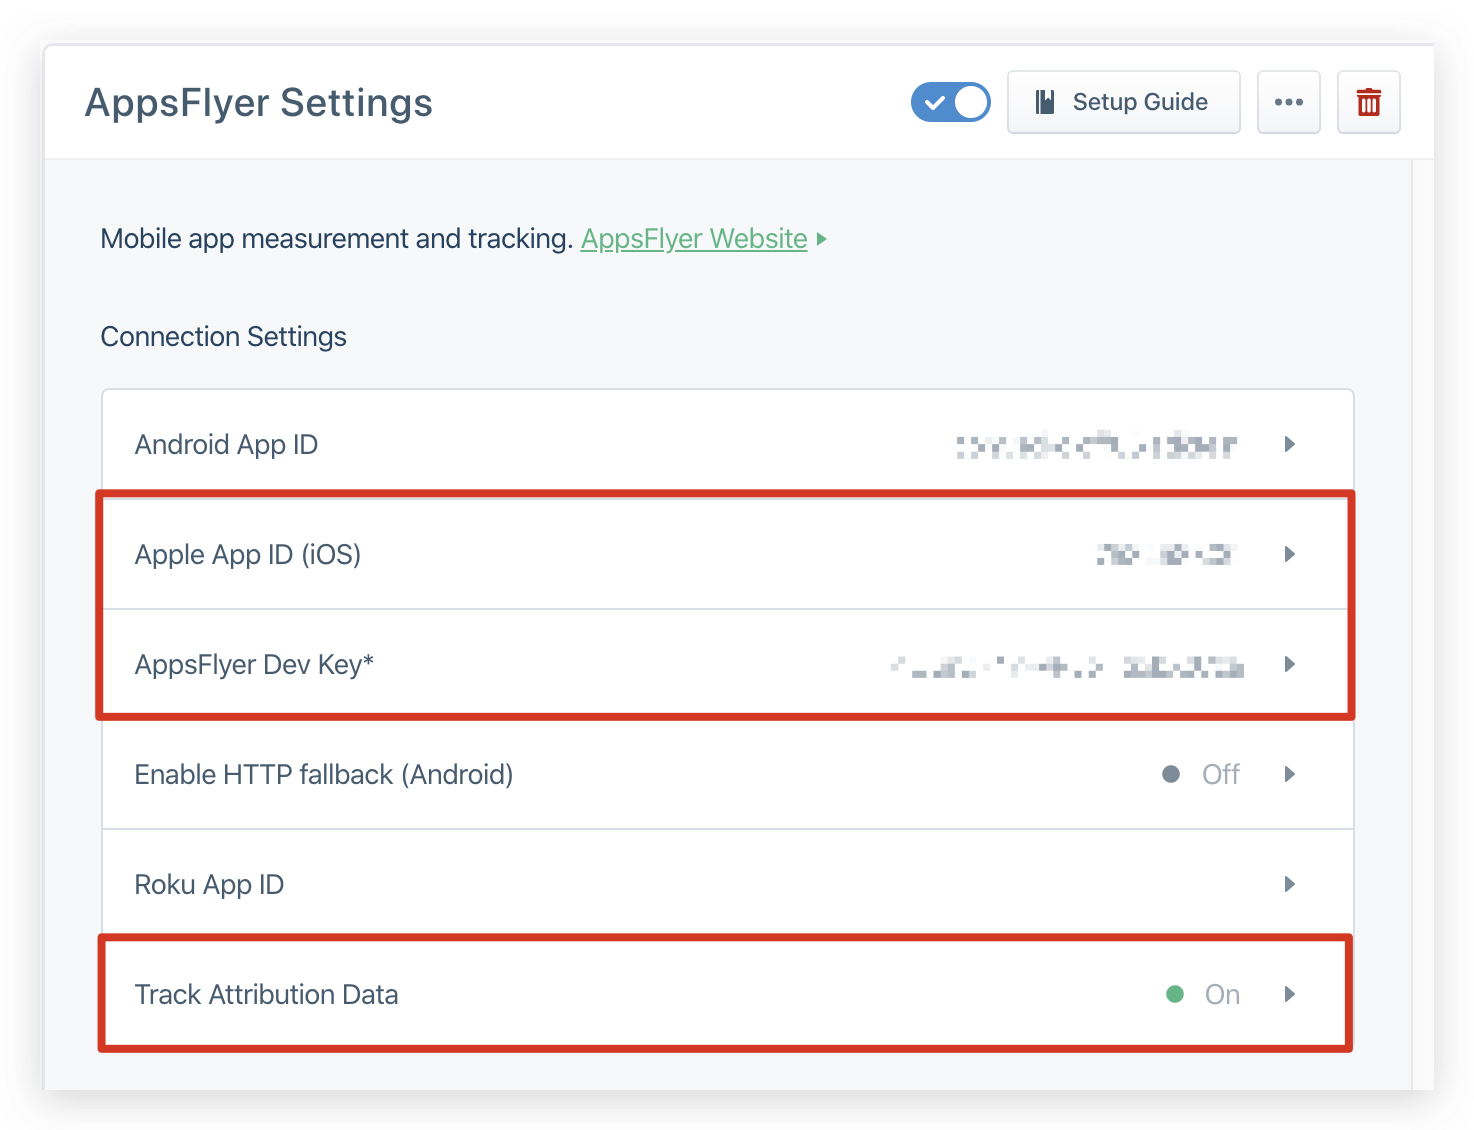
首先,您必须在 Segment 的 仪表板 中提供 AppsFlyer Dev Key、Apple App ID(iTunes)和客户端密码的值,以进行 AppsFlyer 集成。
打开 AppDelegate.h 并添加
#import "SEGAppsFlyerIntegrationFactory.h"在 AppDelegate.m 中的 didFinishLaunchingWithOptions
    // For ApsFlyer debug logs
    [AppsFlyerLib shared].isDebug = YES;

//    [[AppsFlyerLib shared] waitForATTUserAuthorizationWithTimeoutInterval:60];
    /*
     Based on your needs you can either pass a delegate to process deferred
     and direct deeplinking callbacks or disregard them.
     If you choose to use the delegate, see extension to this class below
     */
    SEGAppsFlyerIntegrationFactory* factoryNoDelegate = [SEGAppsFlyerIntegrationFactory instance];
//    SEGAppsFlyerIntegrationFactory* factoryWithDelegate = [SEGAppsFlyerIntegrationFactory createWithLaunchDelegate:self];

// To use the manual mode, use the following method
//    SEGAppsFlyerIntegrationFactory* factoryNoDelegate = [SEGAppsFlyerIntegrationFactory createWithManualMode:YES];
//    SEGAppsFlyerIntegrationFactory* factoryWithDelegate = [SEGAppsFlyerIntegrationFactory createWithLaunchDelegate:self andManualMode:YES];


    SEGAnalyticsConfiguration *config = [SEGAnalyticsConfiguration configurationWithWriteKey:@"SEGMENT_KEY"];
    [config use:factoryNoDelegate];
//    [config use:factoryWithDelegate];  // use this if you want to get conversion data in the app. Read more in the integration guide
    config.enableAdvertisingTracking = YES;       //OPTIONAL
    config.trackApplicationLifecycleEvents = YES; //OPTIONAL
    config.trackDeepLinks = YES;                  //OPTIONAL
    config.trackPushNotifications = YES;          //OPTIONAL
    [SEGAnalytics debug:YES];                     //OPTIONAL
    [SEGAnalytics setupWithConfiguration:config];
在 AppDelegate.m 中的 applicationDidBecomeActive
- (void)applicationDidBecomeActive:(UIApplication *)application {
    // Getting user consent dialog. Please read https://dev.appsflyer.com/hc/docs/integrate-ios-sdk#enabling-app-tracking-transparency-att-support
    if (@available(iOS 14, *)) {
        [ATTrackingManager requestTrackingAuthorizationWithCompletionHandler:^(ATTrackingManagerAuthorizationStatus status) {
            //....
        }];
    }
}- 打开/创建
<Your-App-name>-Bridging-Header.h并添加
#import "SEGAppsFlyerIntegrationFactory.h"
-
在“构建设置”>“Swift编译器-常规”>“Objective-C桥接头”下添加路径
-
打开
AppDelegate.swift并添加
import Segment
import AppsFlyerLib
import segment_appsflyer_ios- 在
didFinishLaunchingWithOptions中添加
    // For AppsFLyer debug logs uncomment the line below
    // AppsFlyerLib.shared().isDebug = true
//    AppsFlyerLib.shared().waitForATTUserAuthorization(withTimeoutInterval: 60)

    /*
     Based on your needs you can either pass a delegate to process deferred
     and direct deeplinking callbacks or disregard them.
     If you choose to use the delegate, see extension to this class below
     */
//    let factoryWithDelegate : SEGAppsFlyerIntegrationFactory = SEGAppsFlyerIntegrationFactory.create(withLaunch: self)
    let factoryNoDelegate = SEGAppsFlyerIntegrationFactory()

    /* If you want to use the manual mode, please use the following methods
      with or without delegate */
     //  let factoryWithDelegate : SEGAppsFlyerIntegrationFactory = SEGAppsFlyerIntegrationFactory.create(withLaunch: self, andManualMode:true)
   // let factoryNoDelegate = SEGAppsFlyerIntegrationFactory.create(withManualMode: true)


    // Segment initialization
    let config = AnalyticsConfiguration(writeKey: "SEGMENT_KEY")
//    config.use(factoryWithDelegate)  // use this if you want to get conversion data in the app. Read more in the integration guide
    config.use(factoryNoDelegate)
    config.enableAdvertisingTracking = true       //OPTIONAL
    config.trackApplicationLifecycleEvents = true //OPTIONAL
    config.trackDeepLinks = true                  //OPTIONAL
    config.trackPushNotifications = true          //OPTIONAL

    Analytics.debug(false)
    Analytics.setup(with: config)
在 applicationDidBecomeActive 中添加
func applicationDidBecomeActive(_ application: UIApplication) {
    // If you want to collect IDFA, please add the code below and read https://support.appsflyer.com//hc/en-us/articles/207032066#integration-35-support-apptrackingtransparency-att
    if #available(iOS 14, *) {
        ATTrackingManager.requestTrackingAuthorization(completionHandler: { (status) in
            // ...
        })
    }
}
AppsFlyer集成对 identify 调用做出响应。了解更多信息,请访问 Segment identify 方法文档。在 identify 调用中,在 traits 字典中使用 setCustomerUserID 和 currencyCode
为了将转换数据发送到Segment,请确保您已启用“跟踪归因数据”,并在AppsFlyer目标设置中指定了应用ID
要获取转换数据,您需要
- 将
SEGAppsFlyerLibDelegate协议添加到您的 AppDelegate.h(或其他)类中
#import <UIKit/UIKit.h>
#import "SEGAppsFlyerIntegrationFactory.h"

@interface AppDelegate : UIResponder <UIApplicationDelegate, SEGAppsFlyerLibDelegate>- 配置Segment分析和AppsFlyer时传递AppDelegate(或其他)类。将行
[config use:[SEGAppsFlyerIntegrationFactory instance]];改为[config use:[SEGAppsFlyerIntegrationFactory createWithLaunchDelegate:self]]; - 在上面的方法传递的类中(默认为AppDelegate.m)实现
SEGAppsFlyerLibDelegate协议的方法。请参见下面的示例代码
#import "AppDelegate.h"

@interface AppDelegate ()

@end

@implementation AppDelegate

-(void)onConversionDataSuccess:(NSDictionary*) installData {
    BOOL first_launch_flag = [[installData objectForKey:@"is_first_launch"] boolValue];
    NSString *status = [installData objectForKey:@"af_status"];

    if(first_launch_flag) {
        if ([status isEqualToString:@"Non-organic"]){
            NSString *sourceID = [installData objectForKey:@"media_source"];
            NSString *campaign = [installData objectForKey:@"campaign"];
            NSLog(@"This is a non-organic install. Media source: %@ Campaign: %@", sourceID, campaign);
        } else {
            NSLog(@"This is an organic install");
        }
    } else {
        NSLog(@"Not first launch");
    }
};

/**
 Any errors that occurred during the conversion request.
 */
-(void)onConversionDataFail:(NSError *) error {
    NSLog(@"%@", [error description]);
};

/**
 `attributionData` contains information about OneLink, deeplink.
 */
- (void)onAppOpenAttribution:(NSDictionary *)attributionData{
    NSLog(@"onAppOpenAttribution");
    for(id key in attributionData){
        NSLog(@"onAppOpenAttribution: key=%@ value=%@", key, [attributionData objectForKey:key]);
    }
};

/**
 Any errors that occurred during the attribution request.
 */
- (void)onAppOpenAttributionFailure:(NSError *)error{
    NSLog(@"%@", [error description]);
};

// Rest of your AppDelegate code要获取转换数据,您需要
- 将
SEGAppsFlyerLibDelegate协议添加到您的 AppDelegate(或其他)类中 - 配置Segment分析和AppsFlyer时传递AppDelegate(或其他)类。如果您使用上面的示例代码,将
config.use(factoryNoDelegate)修改为config.use(factoryWithDelegate) - 在作为代理传递的类中实现协议的方法。请参见以下示例代码,其中AppDelegate被用于此目的
class AppDelegate: UIResponder, UIApplicationDelegate, SEGAppsFlyerLibDelegate {

  var window: UIWindow?

  func onConversionDataSuccess(_ conversionInfo: [AnyHashable : Any]) {
      guard let first_launch_flag = conversionInfo["is_first_launch"] as? Int else {
          return
      }

      guard let status = conversionInfo["af_status"] as? String else {
          return
      }

      if(first_launch_flag == 1) {
          if(status == "Non-organic") {
              if let media_source = conversionInfo["media_source"] , let campaign = conversionInfo["campaign"]{
                  print("This is a Non-Organic install. Media source: \(media_source) Campaign: \(campaign)")
              }
          } else {
              print("This is an organic install.")
          }
      } else {
          print("Not First Launch")
      }
  }

  func onAppOpenAttribution(_ attributionData: [AnyHashable : Any]) {
      print("Deep Link Data goes here:")
      if let data = attributionData{
        print("\(data)")
      }
  }

 func onConversionDataFail(_ error: Error) {
      }

  func onAppOpenAttributionFailure(_ error: Error?) {
  }
  //rest of you AppDelegate code
}为了使用统一深度链接,您需要
- 将
SEGAppsFlyerDeepLinkDelegate协议添加到您的 AppDelegate(或其他)类中 - 配置Segment分析和AppsFlyer时传递AppDelegate(或其他)类。从上面的示例代码中,将
factoryWithDelegate修改为
let factoryWithDelegate: SEGAppsFlyerIntegrationFactory = SEGAppsFlyerIntegrationFactory.create(withLaunch: self, andDeepLinkDelegate: self)- 在作为代理传递的类中实现协议的方法。请参见以下示例代码,其中AppDelegate被用于此目的
extension AppDelegate: SEGAppsFlyerDeepLinkDelegate {
    func didResolveDeepLink(_ result: DeepLinkResult) {
        print(result)
    }
}如果您正在与不允许将用户级别数据传递给第三方的网络协作,您需要在调用之前应用代码以过滤掉这些网络
// [self.analytics track:@"Install Attributed" properties:[properties copy]];@import AppsFlyerLib;
...
@implementation AppDelegate
- (BOOL)application:(UIApplication *)application didFinishLaunchingWithOptions:(NSDictionary *)launchOptions {
[[NSNotificationCenter defaultCenter] addObserver:self selector:@selector(integrationDidStart:) name:SEGAnalyticsIntegrationDidStart object:nil];
...
}
...
- (void)integrationDidStart:(nonnull NSNotification *)notification {
NSString *integration = notification.object;
if ([integration isEqualToString:@"AppsFlyer"]) {
/// Additional AppsFlyer SDK setup goes below
/// All setup is optional
/// To set Apple App ID and AppsFlyer Dev Key use Segment dashboard
/// ...
/// Enable ESP support for specific URLs
[[AppsFlyerLib shared] setResolveDeepLinkURLs:@[@"afsdktests.com"]];
/// Disable printing SDK messages to the console log
[[AppsFlyerLib shared] setIsDebug:NO];
/// `OneLink ID` from OneLink configuration
[[AppsFlyerLib shared] setAppInviteOneLink:@"one_link_id"];
}
}有关DMA同意数据的简介,请参阅 此处。SDK提供两种收集同意数据的方法
- 通过同意管理平台(CMP):如果应用程序使用符合透明度和同意框架(TCF)v2.2协议的CMP,SDK可以自动检索同意详细信息。
或 - 通过专用SDK API:开发人员可以使用为该目的设计的特定API,直接将谷歌所需的同意数据传递到SDK中。
兼容TCF v2.2的CMP收集DMA同意数据,并存储在 NSUserDefaults 中。为了启用SDK访问此数据并将其包含在每个事件中,请按照以下步骤操作
- 调用
AppsFlyerLib.shared().enableTCFDataCollection(true)指示SDK从设备收集TCF数据。 - 使用手动模式初始化
SEGAppsFlyerIntegrationFactory。这将允许我们延迟转换调用,以便为SDK提供用户同意。 - 在
applicationDidBecomeActive生命周期方法中,使用CMP决定是否需要在当前会话中显示同意对话框以获取同意数据。如果您需要同意对话框,请转到步骤4;否则,请转到步骤5。 - 从CMP获取确认,用户已做出同意决定,数据已存储在
NSUserDefaults中。 - 调用
AppsFlyerLib.shared().start()。
func application(_ application: UIApplication, didFinishLaunchingWithOptions launchOptions: [UIApplication.LaunchOptionsKey: Any]?) -> Bool {

    // For AppsFLyer debug logs uncomment the line below
    AppsFlyerLib.shared().isDebug = true
    AppsFlyerLib.shared().waitForATTUserAuthorization(timeoutInterval: 60)
    AppsFlyerLib.shared().enableTCFDataCollection(true)
    let factoryWithDelegateAndManual: SEGAppsFlyerIntegrationFactory =SEGAppsFlyerIntegrationFactory.create(withLaunch: self, andDeepLinkDelegate: self, andManualMode: true)

    // Segment initialization
    let config = AnalyticsConfiguration(writeKey: "SEGMENT_KEY")
    config.use(factoryWithDelegateAndManual)
    config.enableAdvertisingTracking = true       //OPTIONAL
    config.trackApplicationLifecycleEvents = true //OPTIONAL
    config.trackDeepLinks = true                  //OPTIONAL
    config.trackPushNotifications = true          //OPTIONAL

    Analytics.debug(true)
    Analytics.setup(with: config)
    return true
}

func applicationDidBecomeActive(_ application: UIApplication) {
    if(cmpManager!.hasConsent()){
        //CMP manager already has consent ready - you can start
        AppsFlyerLib.shared().start()
    }else{
        //CMP doesn't have consent data ready yet
        //Waiting for CMP completion and data ready and then start
        cmpManager?.withOnCmpButtonClickedCallback({ CmpButtonEvent in
            AppsFlyerLib.shared().start()
        })
    }

    if #available(iOS 14, *) {
        ATTrackingManager.requestTrackingAuthorization { (status) in
            switch status {
            case .denied:
                print("AuthorizationSatus is denied")
            case .notDetermined:
                print("AuthorizationSatus is notDetermined")
            case .restricted:
                print("AuthorizationSatus is restricted")
            case .authorized:
                print("AuthorizationSatus is authorized")
            @unknown default:
                fatalError("Invalid authorization status")
            }
        }
    }
}如果您的应用程序未使用与 TCF v2.2 兼容的比较并合语言(CMP),请使用以下 SDK API,直接将同意数据传递给 SDK。
- 使用手动模式初始化
SEGAppsFlyerIntegrationFactory。这将允许我们延迟转换调用,以便为SDK提供用户同意。 - 在
applicationDidBecomeActive生命周期方法中确定 GDPR 是否适用于该用户。
- 如果 GDPR 适用于该用户,请执行以下操作- 鉴于 GDPR 适用于该用户,确定是否已经存储了此会话的同意数据。
- 如果没有存储同意数据,则显示同意对话框以捕获用户的同意决定。
- 如果已存储同意数据,请继续到下一步。
- 要传递同意数据到 SDK,请创建一个具有以下参数的 AppsFlyerConsent 对象
-forGDPRUserWithHasConsentForDataUsage- 指示用户是否同意将数据用于广告目的。-hasConsentForAdsPersonalization- 指示用户是否同意将数据用于个性化广告。 - 调用
AppsFlyerLib.shared().setConsentData(AppsFlyerConsent(forGDPRUserWithHasConsentForDataUsage: Bool, hasConsentForAdsPersonalization: Bool))。 - 调用
AppsFlyerLib.shared().start()。
- 如果 GDPR 不适用于该用户,请执行以下操作- 调用
AppsFlyerLib.shared().setConsentData(AppsFlyerConsent(nonGDPRUser: ()))。 - 使用手动模式初始化
SEGAppsFlyerIntegrationFactory是可选的,不再是之前的强制要求。
- 鉴于 GDPR 适用于该用户,确定是否已经存储了此会话的同意数据。
该项目包含针对 Objective-C 和 Swift(《带故障排除》)的 4 个示例。要尝试使用,请克隆此仓库,并从每个示例开始,首先运行 pod install 来安装项目依赖项。