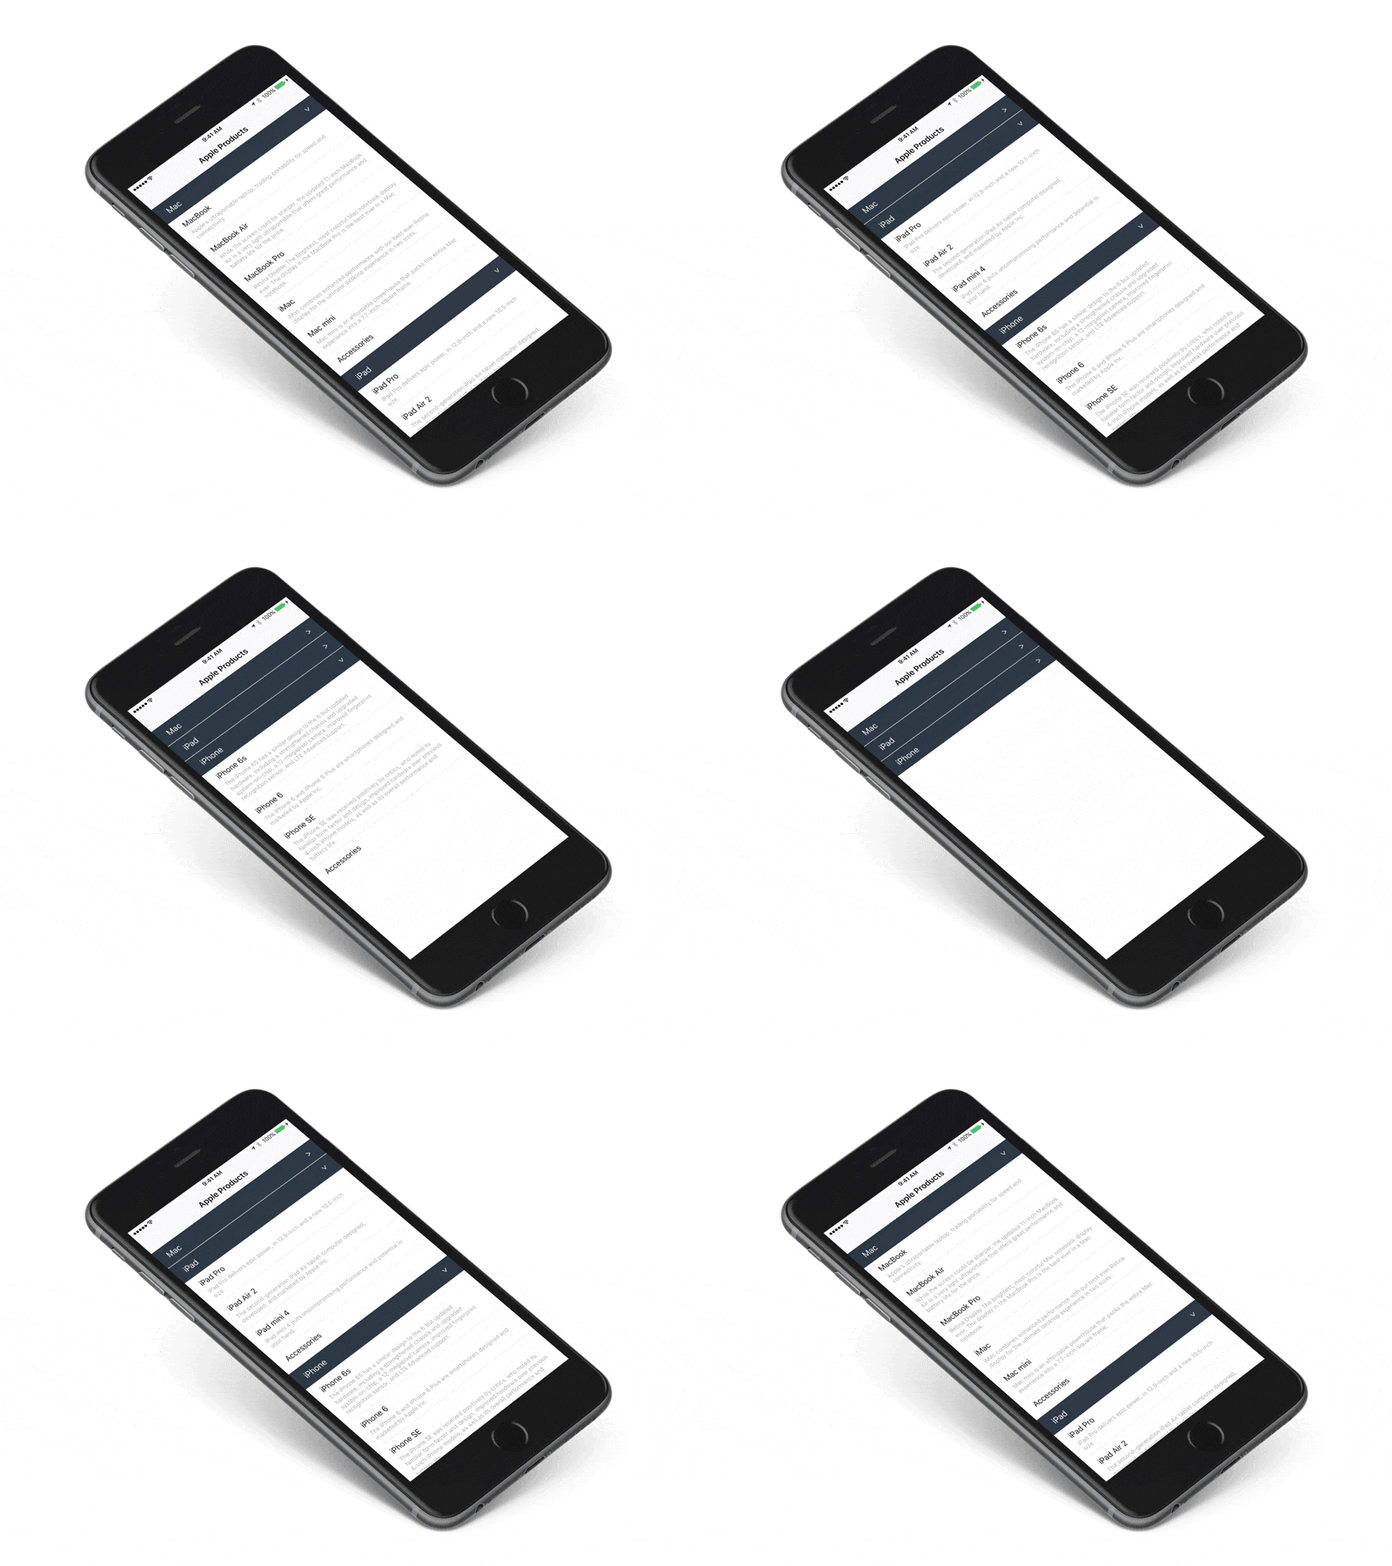
如何在 iOS 中实现可折叠表格视图部分?
一个简单的 iOS Swift 项目展示了如何通过编程实现可折叠表格部分,无需主Storyboard,无需XIB,无需注册 nib,只需纯 Swift!
在这个项目中,表格视图自动调整行高以匹配每个单元格的内容,自定义单元格也是通过编程实现的。
如何实现可折叠表格部分?
步骤 1. 准备数据
假设我们有以下数据,这些数据被分组到不同的部分,每个部分都是由一个 Section 对象表示
struct Section {
  var name: String
  var items: [String]
  var collapsed: Bool

  init(name: String, items: [Item], collapsed: Bool = false) {
    self.name = name
    self.items = items
    self.collapsed = collapsed
  }
}

var sections = [Section]()

sections = [
  Section(name: "Mac", items: ["MacBook", "MacBook Air"]),
  Section(name: "iPad", items: ["iPad Pro", "iPad Air 2"]),
  Section(name: "iPhone", items: ["iPhone 7", "iPhone 6"])
]
collapsed 表示当前部分是否已经折叠,默认为 false。
步骤 2. 设置TableView以支持自动调整大小
override func viewDidLoad() {
  super.viewDidLoad()

  // Auto resizing the height of the cell
  tableView.estimatedRowHeight = 44.0
  tableView.rowHeight = UITableViewAutomaticDimension

  ...
}

override func tableView(_ tableView: UITableView, heightForRowAtIndexPath indexPath: NSIndexPath) -> CGFloat {
  return UITableViewAutomaticDimension
}
步骤 3. 章节标题
根据Apple API参考[1],我们应该使用UITableViewHeaderFooterView。让我们创建一个子类并实现章节标题可折叠TableView头部
class CollapsibleTableViewHeader: UITableViewHeaderFooterView {
    let titleLabel = UILabel()
    let arrowLabel = UILabel()

    override init(reuseIdentifier: String?) {
        super.init(reuseIdentifier: reuseIdentifier)

        contentView.addSubview(titleLabel)
        contentView.addSubview(arrowLabel)
    }

    required init?(coder aDecoder: NSCoder) {
        fatalError("init(coder:) has not been implemented")
    }
}当用户点击头部时,我们需要折叠或展开章节,为了实现这一点,让我们借用UITapGestureRecognizer。同时,我们需要将此事件委托给表格视图以更新collapsed属性。
protocol CollapsibleTableViewHeaderDelegate {
    func toggleSection(_ header: CollapsibleTableViewHeader, section: Int)
}

class CollapsibleTableViewHeader: UITableViewHeaderFooterView {
    var delegate: CollapsibleTableViewHeaderDelegate?
    var section: Int = 0
    ...
    override init(reuseIdentifier: String?) {
        super.init(reuseIdentifier: reuseIdentifier)
        ...
        addGestureRecognizer(UITapGestureRecognizer(target: self, action: #selector(CollapsibleTableViewHeader.tapHeader(_:))))
    }
    ...
    func tapHeader(_ gestureRecognizer: UITapGestureRecognizer) {
        guard let cell = gestureRecognizer.view as? CollapsibleTableViewHeader else {
            return
        }
        delegate?.toggleSection(self, section: cell.section)
    }

    func setCollapsed(_ collapsed: Bool) {
        // Animate the arrow rotation (see Extensions.swf)
        arrowLabel.rotate(collapsed ? 0.0 : .pi / 2)
    }
}由于我们没有使用任何Storyboard或XIB,如何进行编程式自动布局?答案是约束锚点。
override init(reuseIdentifier: String?) {
  ...
  // Content View
  contentView.backgroundColor = UIColor(hex: 0x2E3944)

  let marginGuide = contentView.layoutMarginsGuide

  // Arrow label
  contentView.addSubview(arrowLabel)
  arrowLabel.textColor = UIColor.white
  arrowLabel.translatesAutoresizingMaskIntoConstraints = false
  arrowLabel.widthAnchor.constraint(equalToConstant: 12).isActive = true
  arrowLabel.topAnchor.constraint(equalTo: marginGuide.topAnchor).isActive = true
  arrowLabel.trailingAnchor.constraint(equalTo: marginGuide.trailingAnchor).isActive = true
  arrowLabel.bottomAnchor.constraint(equalTo: marginGuide.bottomAnchor).isActive = true

  // Title label
  contentView.addSubview(titleLabel)
  titleLabel.textColor = UIColor.white
  titleLabel.translatesAutoresizingMaskIntoConstraints = false
  titleLabel.topAnchor.constraint(equalTo: marginGuide.topAnchor).isActive = true
  titleLabel.trailingAnchor.constraint(equalTo: marginGuide.trailingAnchor).isActive = true
  titleLabel.bottomAnchor.constraint(equalTo: marginGuide.bottomAnchor).isActive = true
  titleLabel.leadingAnchor.constraint(equalTo: marginGuide.leadingAnchor).isActive = true
}
步骤 4. UITableView 数据源和代理
现在我们已经实现了头部视图,让我们回到表格视图控制器。
章节的数量是sections.count
override func numberOfSectionsInTableView(in tableView: UITableView) -> Int {
  return sections.count
}
实现可折叠表章节的关键在于,如果章节已折叠,则该章节不应该有任何行
override func tableView(_ tableView: UITableView, numberOfRowsInSection section: Int) -> Int {
    return sections[section].collapsed ? 0 : sections[section].items.count
}
注意到我们不需要为折叠的章节渲染任何单元格,如果在该章节中有大量单元格,这可以大大提高性能。
接下来,我们使用tableView的viewForHeaderInSection方法来连接我们的自定义头部
override func tableView(_ tableView: UITableView, viewForHeaderInSection section: Int) -> UIView? {
    let header = tableView.dequeueReusableHeaderFooterViewWithIdentifier("header") as? CollapsibleTableViewHeader ?? CollapsibleTableViewHeader(reuseIdentifier: "header")

    header.titleLabel.text = sections[section].name
    header.arrowLabel.text = ">"
    header.setCollapsed(sections[section].collapsed)

    header.section = section
    header.delegate = self

    return header
}
设置普通行单元格非常简单
override func tableView(_ tableView: UITableView, cellForRowAtIndexPath indexPath: NSIndexPath) -> UITableViewCell {
  let cell = tableView.dequeueReusableCell(withIdentifier: "Cell") as UITableViewCell? ?? UITableViewCell(style: .default, reuseIdentifier: "Cell")
  cell.textLabel?.text = sections[indexPath.section].items[indexPath.row]
  return cell
}在上面的代码中,我们使用了普通的UITableViewCell,如果您想了解如何制作自适单元格,请查看我们的源代码中的CollapsibleTableViewCell。CollapsibleTableViewCell是UITableViewCell的子类,它添加了名称和详细信息标签,最重要的是,它支持自适功能,关键是正确设置自动布局约束,确保在contentView中子视图被适当地拉伸到顶部和底部。
步骤 5. 如何切换折叠和展开
思路非常简单,反转该章节的collapsed标志,并告诉tableView重新加载该章节
extension CollapsibleTableViewController: CollapsibleTableViewHeaderDelegate {
  func toggleSection(_ header: CollapsibleTableViewHeader, section: Int) {
    let collapsed = !sections[section].collapsed

    // Toggle collapse
    sections[section].collapsed = collapsed
    header.setCollapsed(collapsed)

    // Reload the whole section
    tableView.reloadSections(NSIndexSet(index: section) as IndexSet, with: .automatic)
  }
}
章节重新加载后,该章节中单元格的数量将被重新计算并重新绘制。
就是这些,我们已经实现了可折叠表章节!请参考源代码查看详细的实现。
更多可折叠示例
有时你可能想在分组样式的表格中实现可折叠单元格,我在https://github.com/jeantimex/ios-swift-collapsible-table-section-in-grouped-section提供了一个单独的示例。实现方式基本相同,但略有不同。
我能将其用作 pod 吗?
支持

许可证
MIT 许可证
版权所有 (c) 2017 Yong Su @jeantimex
根据以下条件,兹授予任何人免费获取、使用本软件及其相关文档文件(“软件”)的权利,无需限制,包括但不限于使用、复制、修改、合并、发布、分发、再许可和/或出售软件副本,并允许提供给软件的人按以下条件进行操作
上述版权声明和本许可声明应包含在软件的副本或其中大部分内容中。
软件按“原样”提供,不提供任何明示或暗示保证,包括但不限于适销性、适用于特定目的和无侵权行为保证。在任何情况下,作者或版权所有者对任何索赔、损害或其他责任,无论基于合同、侵权或其他,均不承担责任,也不问由软件或其使用或操作引起的、与软件或其使用或操作有关的、或在这些方面的责任。

