![]()


描述
是您 iOS 应用的有益伴侣。
Yoshi 是一个方便的包装器,用于显示调试菜单所需的 UI 代码。
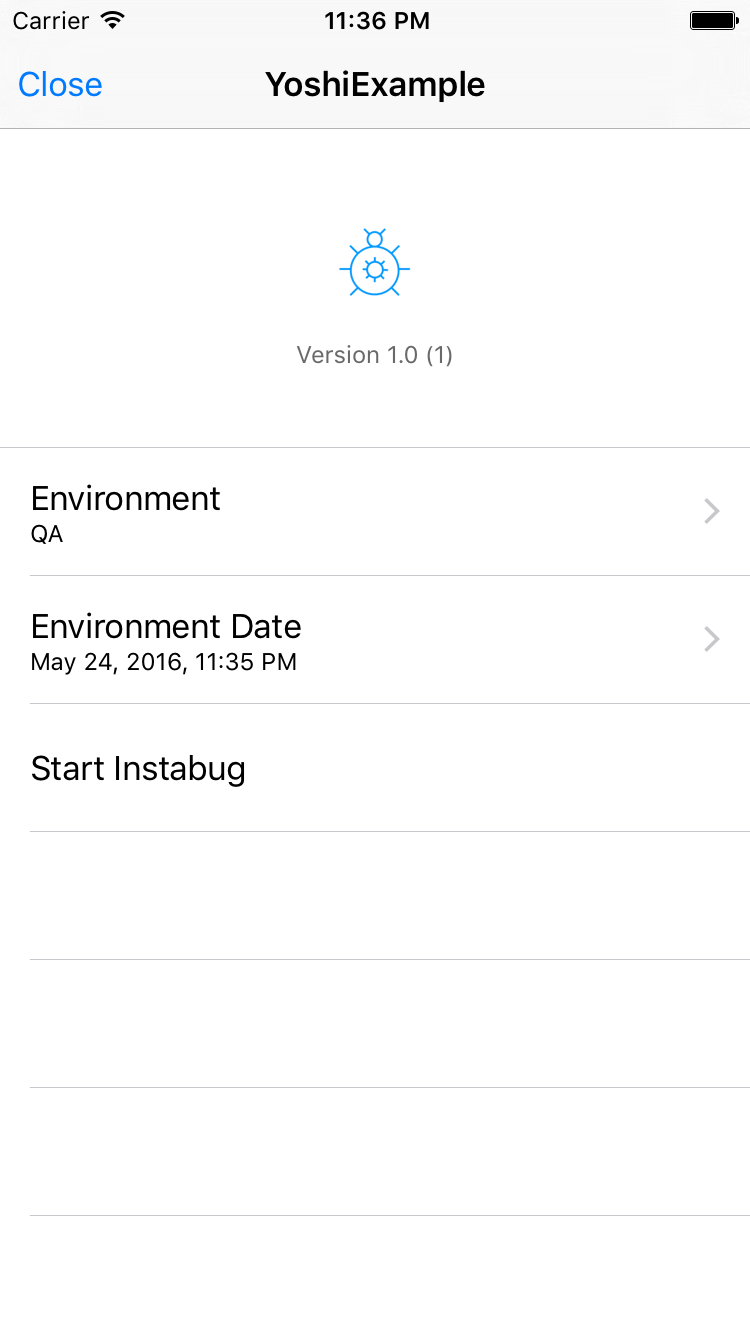
iPhone

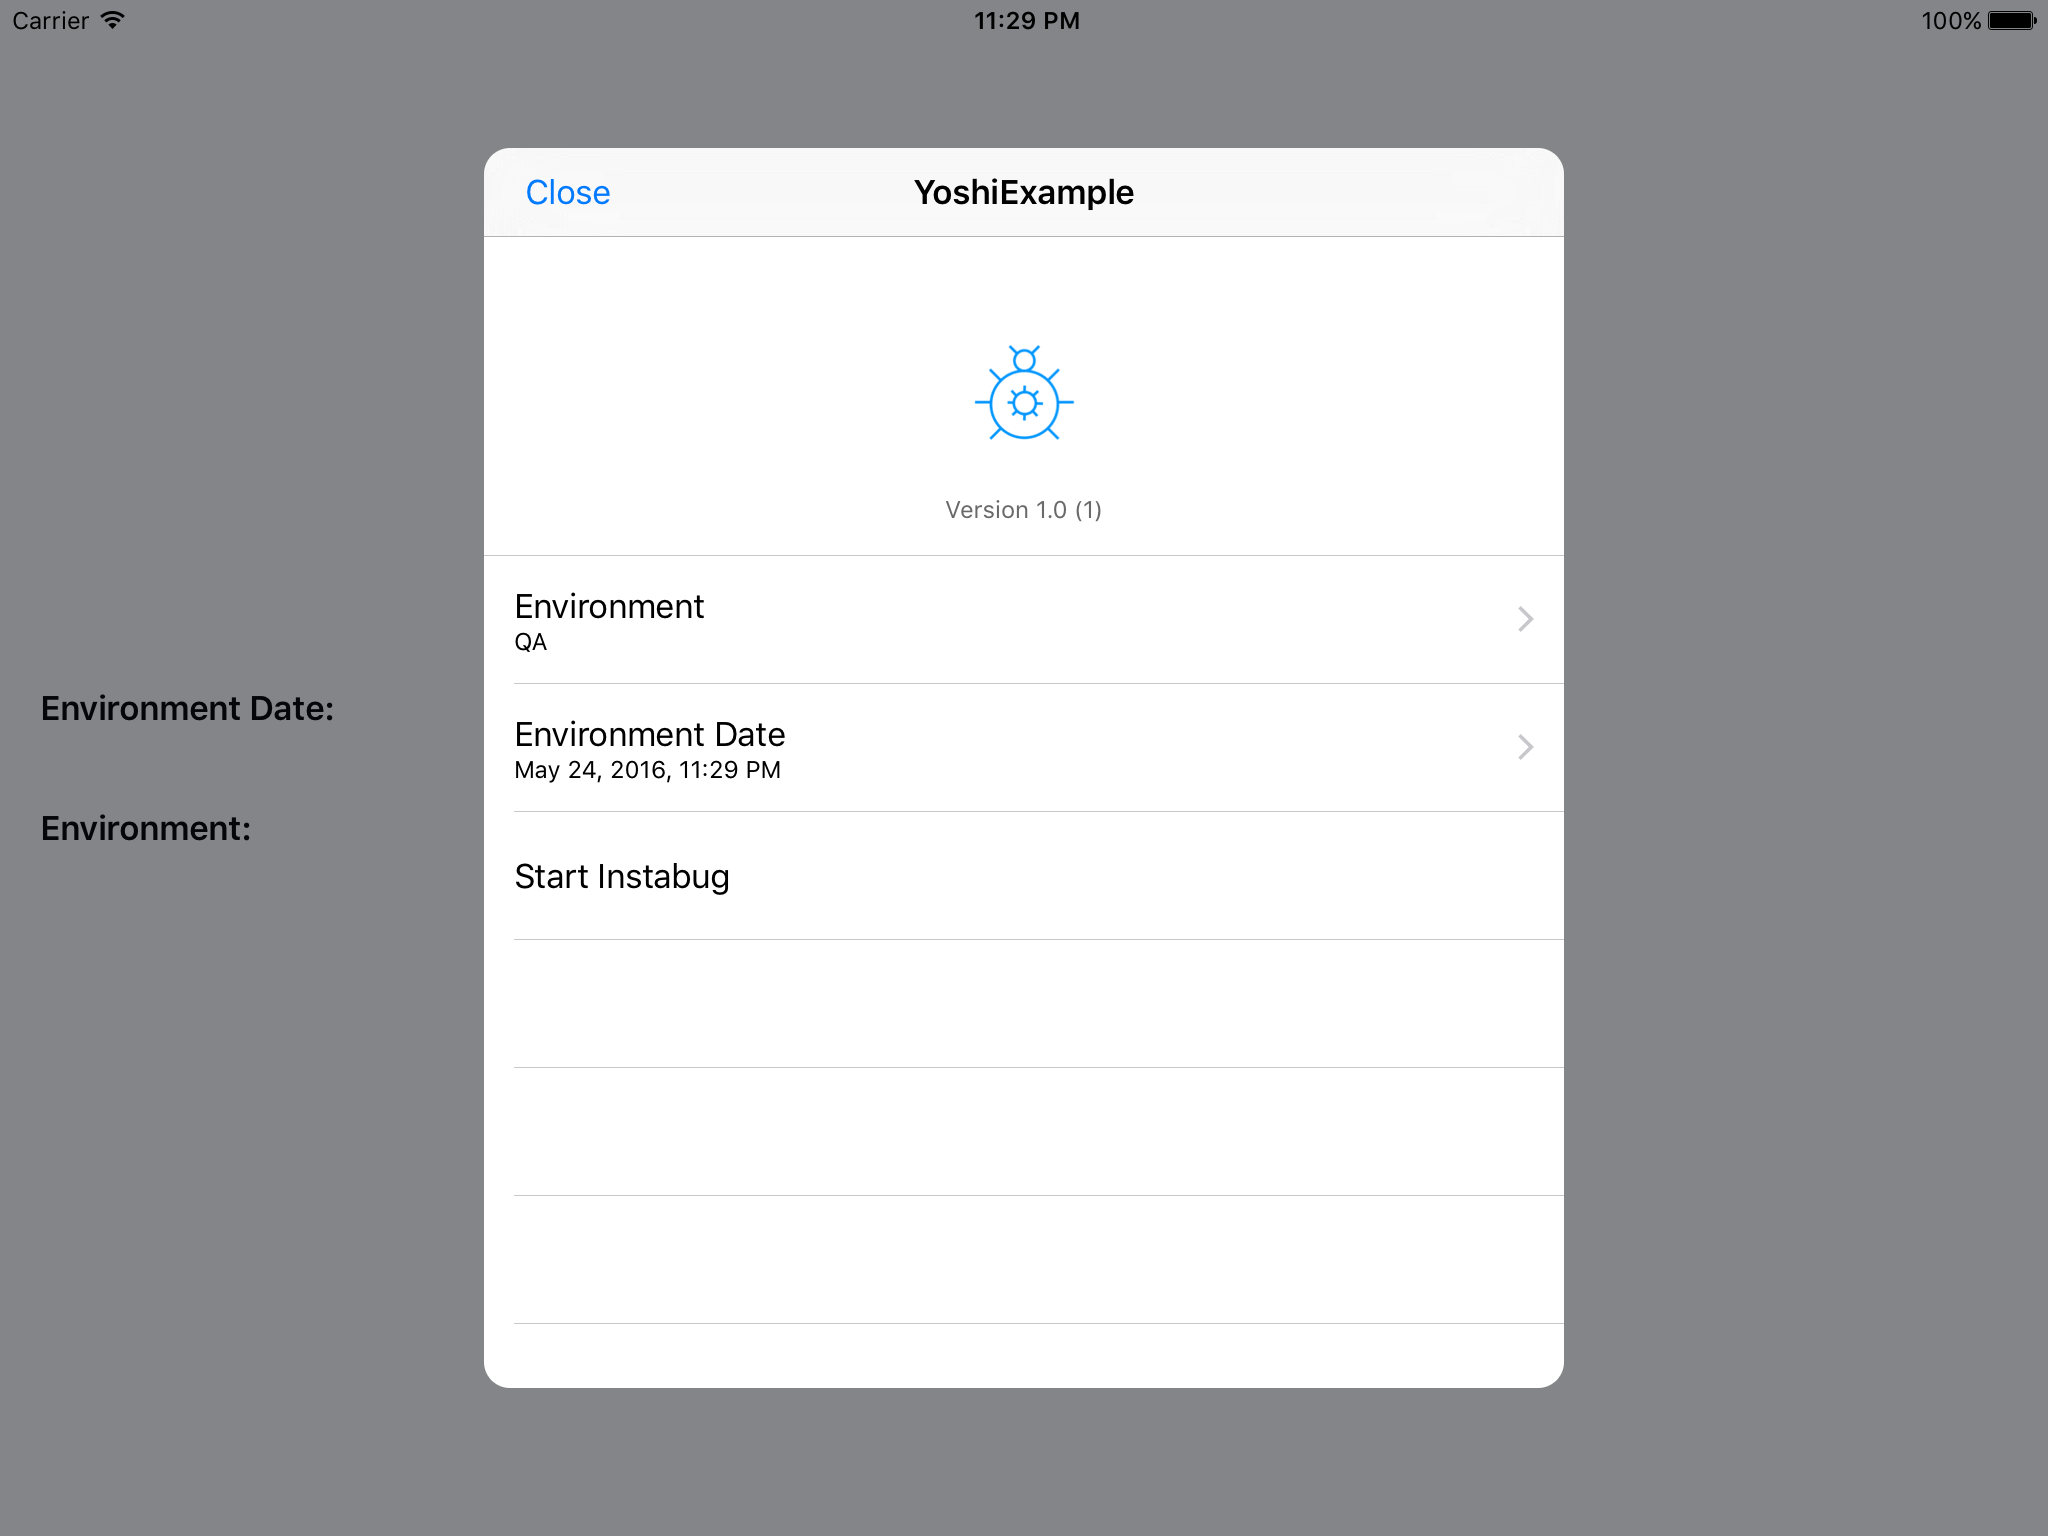
iPad

要求
- iOS 8.0+
- Xcode 8.0+
安装
CocoaPods
Yoshi可以通过CocoaPods获得。要安装它,只需将以下行添加到您的Podfile
Swift 4.2
pod 'Yoshi'Swift 3.0
pod 'Yoshi', '2.2.2'Swift 2.3
pod 'Yoshi', '1.1.1'Subspec
从版本3开始,Yoshi为一些常见的调试任务提供了实现,并将其归类到子spec中,包括
要安装,请在项目的Podfile中指定子spec
pod 'Yoshi', :subspecs => ['QAKit']Carthage
您还可以使用Carthage将Yoshi添加到项目中。将以下内容添加到您的Cartfile
github "prolificinteractive/Yoshi"Usage
要显示Yoshi,只需设置菜单并显示它。
// Setup the custom menus
Yoshi.setupDebugMenu([environmentMenu, instabugMenu, dateSelectionMenu])

// Invoke Yoshi
Yoshi.show()
默认情况下,Yoshi将显示您应用程序的图标,以及当前构建版本。
只要菜单对象符合YoshiGenericMenu规范,Yoshi就可以设置显示任何类型的菜单。直接提供的动作菜单和单选菜单非常容易配置,提供了高度的可定制性以供调整单元格。
动作菜单
动作菜单是Yoshi中最简单的菜单,当用户点击时能够执行自定义事件。
例如,当自定义菜单被选中时,我们可以调用Instabug。
let instabugMenu = YoshiActionMenu(title: "Start Instabug",
                                   subtitle: nil,
                                   completion: { Instabug.invoke() })
单选菜单
要显示单选菜单,只需构建以下必需信息的YoshiSingleSelectionMenu
// Build necessary options.
let option1 = YoshiSingleSelection(title: "Option1", subtitle: "Select to push")
let option2 = YoshiSingleSelection(title: "Option2", subtitle: "Select to present")
let option3 = YoshiSingleSelection(title: "Option3", subtitle: "Select to dismiss")
let options: [YoshiTableViewMenuItem] = [option1, option2, option3]

// Construct YoshiSingleSelectionMenu.
let singleSelectionMenu = YoshiSingleSelectionMenu(title: "Options",
                                                   options: options,
                                                   selectedIndex: 0,
                                                   didSelect: { selection in /*Select the option based on selection*/ })
当用户选择新的选项时,Yoshi将负责管理选择,并调用便捷的闭包函数回调。
日期选择菜单
要展示日期选择菜单,创建一个符合YoshiDateSelectorMenu规范的类型
final class DateSelectorMenu: YoshiDateSelectorMenu {

    var title: String
    var subtitle: String?
    var selectedDate: Date
    var didUpdateDate: (dateSelected: Date) -> ()

    init(title: String,
         subtitle: String? = nil,
         selectedDate: Date = Date(),
         didUpdateDate: (Date) -> ()) {
        self.title = title
        self.subtitle = subtitle
        self.selectedDate = selectedDate
        self.didUpdateDate = didUpdateDate
    }

}
let dateSelectorMenu = DateSelectorMenu(title: "Environment Date",
subtitle: nil,
didUpdateDate: { (dateSelected) in
// Do something with the selected date here
})子菜单
如果发现调试菜单很难管理,可以使用子菜单来组织它。要这样做,只需创建一个符合YoshiSubmenu规范的类型。
final class Submenu: YoshiSubmenu {

    let title: String

    let subtitle: String?

    let options: [YoshiGenericMenu] {

}
let integrationsSubmenu = Submenu(title: "Third Party Integrations",
subtitle: nil,
options: [
instabugMenu,
crashlyticsMenu
]
)调用选项
Yoshi可以通过多种选项进行调用。最简单的方法是以编程方式使用show()函数手动调用。
Yoshi.show()除了常规的调用选项外,Yoshi还可以响应3种不同的运动或触摸事件。
如果您想启用以下3个选项,只需将all选项传递给setupDebugMenu,尽管该选项已经是默认的。
Yoshi.setupDebugMenu([/* YoshiMenu items */], invocations: [.all])
/// Or simply
Yoshi.setupDebugMenu([/* YoshiMenu items */])要指定您想要的确切选项,只需将您想要的选项传递给setupDebugMenu函数,如下所示
- 要响应摇动动作触发Yoshi,请在
setupDebugMenu调用参数中添加shakeMotionGesture选项,如下所示。
Yoshi.setupDebugMenu([/* YoshiMenu items */], invocations: [.shakeMotionGesture])- 要响应多点触摸事件触发Yoshi,请在
setupDebugMenu调用参数中添加multiTouch选项,如下所示。
Yoshi.setupDebugMenu([/* YoshiMenu items */], invocations: [.multiTouch])- 最后,要响应3D触摸事件触发Yoshi,请在
setupDebugMenu调用参数中添加forceTouch选项,如下所示。
Yoshi.setupDebugMenu([/* YoshiMenu items */], invocations: [.forceTouch])额外功能
复制到剪贴板
按住Yoshi菜单中的任何单元格以复制子标题。
自定义单元格UI
您可以使用nib文件或以编程方式自定义Yoshi菜单单元格。
为此,只需创建一个YoshiGenericMenu和一个YoshiResuableCellDataSource
为了支持自定义UI,首先,提供一个引用您的自定义单元格的YoshiResuableCellDataSource实例。
- 使用Nib文件
private final class CustomMenuCellDataSource: YoshiResuableCellDataSource {

    static var nib: UINib? {
        // Return your Nib file here
        return UINib(nibName: "CustomCell", bundle: nil)
    }

    func cellFor(tableView: UITableView) -> UITableViewCell {
    	// Dequeue and cast the cell here like you would normally did
        guard let cell = (tableView.dequeueReusableCell(withIdentifier: CustomMenuCellDataSource.reuseIdentifier)) as? CustomCell else {
            fatalError()
        }
        // config your cell here
        cell.label.text = "This is a custom cell"
        return cell
    }
}- 不使用Nib文件
private final class CustomMenuCellDataSource: YoshiResuableCellDataSource {

	func cellFor(tableView: UITableView) -> UITableViewCell {
    	// Dequeue the cell here like you would normally did, handle the case when deque failed
        guard let cell = (tableView.dequeueReusableCell(withIdentifier: CustomMenuCellDataSource.reuseIdentifier) ??
            UITableViewCell(style: .subtitle, reuseIdentifier: CustomMenuCellDataSource.reuseIdentifier)) as? CustomCell else {
                fatalError()
        }
        // config your cell here
        cell.label.text = "This is a custom cell"
        return cell
    }
}然后,提供一个符合YoshiGenericMenu的菜单,引用数据源。
struct MenuWithCustomUI: YoshiGenericMenu {

    var cellSource: YoshiResuableCellDataSource {
        return CustomMenuCellDataSource()
    }

    func execute() -> YoshiActionResult {
        // Do soomething here when the cell is tapped
        return .Handled
    }
}
最后,像正常Yoshi菜单一样显示此自定义菜单。
Yoshi.setupDebugMenu([MenuWithCustomUI()])
Yoshi.show()
为Yoshi贡献力量
要报告错误或增强请求,请在该相应标题下提交一个问题。
如果您想为该项目贡献力量,请Fork此存储库并提交一个拉取请求。代码贡献应遵循Prolific Swift风格指南中指定的标准。
许可证
版权所有 © 2017 Prolific Interactive
Yoshi 由 Prolific Interactive 维护和赞助。可以根据LICENSE文件中的规定进行重新分发。