Dropbox for Swift
10.0.0 beta 版与 SDK 的早期版本有很大差异。请查看 10.0.0 版本的变化,并在需要时,请参阅 从 dropbox-sdk-obj-c 迁移。
官方 Dropbox Swift SDK,用于与 iOS 或 macOS 中的 Dropbox API v2 集成。
完整文档这里。
内容表
系统要求
- iOS 11.0+
- macOS 10.13+
- Xcode 13.3+
- Swift 5.6+
开始使用
注册您的应用程序
在使用此SDK之前,您应该在Dropbox应用控制台中注册您的应用程序。这将创建与Dropbox关联的应用程序记录,并将与您进行的API调用相关联。
获取 OAuth 2.0 令牌
所有请求都需使用 OAuth 2.0 访问令牌进行。OAuth 令牌代表 Dropbox 应用与 Dropbox 用户账户或团队之间已验证的链接。
创建应用后,您可以去 App 控制台手动生成一个访问令牌,以便授权您的应用访问您自己的 Dropbox 账户。否则,您可以使用 SDK 预定义的 auth 流程以编程方式获取 OAuth 令牌。更多信息,请参考下文。
SDK 分布
您可以使用多种方法之一将 Dropbox Swift SDK 集成到项目中。
Swift 包管理器
您可以使用 Swift 包管理器 通过指定 Dropbox Swift SDK 仓库网址来将 Dropbox Swift SDK 集成到项目中。
https://github.com/dropbox/SwiftyDropbox.git
有关更多信息,请参阅 Apple 的“将包依赖项添加到您的应用”文档。
CocoaPods
要使用 CocoaPods —— Cocoa 项目依赖项管理器,您应首先使用以下命令安装它。
$ gem install cocoapods然后导航到包含您的项目的目录,并创建一个名为 Podfile 的新文件。您可以通过 pod init 来完成此操作,或者打开现有的 Podfile,然后向主循环添加 pod 'SwiftyDropbox'。您的 Podfile 应该看起来像这样:
use_frameworks!

target '<YOUR_PROJECT_NAME>' do
    pod 'SwiftyDropbox'
end
如果您的项目包含需要访问 Dropbox SDK 的 Objective-C 代码,还有一个名为 SwiftyDropboxObjC 的独立 pod,它包含 SDK 的 Objective-C 兼容层。将此 pod 添加到您的 Podfile(除了 SwiftyDropbox 或其本身)。有关更多信息,请参阅本 README 的 Objective-C 部分。
然后,运行以下命令来安装依赖项:
$ pod install一旦您的项目集成了 Dropbox Swift SDK,您可以使用以下命令 pulling SDK 更新:
$ pod update配置您的项目
一旦将 Dropbox Swift SDK 集成到您的项目中,在您可以开始执行 API 调用之前,还需要采取一些额外的步骤。
应用程序 .plist 文件
如果您正在为 iOS SDK 9.0 编译,您需要修改应用程序的 .plist 以处理 Apple 对 canOpenURL 函数的 新安全更改。您应该在应用程序的 .plist 文件中添加以下代码:
<key>LSApplicationQueriesSchemes</key>
    <array>
        <string>dbapi-8-emm</string>
        <string>dbapi-2</string>
    </array>
这允许 Swift SDK 确定当前设备是否安装了官方 Dropbox iOS 应用。如果已安装,则可以使用官方 Dropbox iOS 应用通过编程方式获取 OAuth 2.0 访问令牌。
此外,您的应用程序需要注册以处理 OAuth 2.0 授权流程完成后重定向的唯一 Dropbox URL 模式。此 URL 模式的格式应为 db-<APP_KEY>,其中 <APP_KEY> 是您的 Dropbox 应用程序的 app key,可在 应用控制台 中找到。
您应该在 .plist 文件中添加以下代码(但请确保将 <APP_KEY> 替换为您的应用程序 app key):
<key>CFBundleURLTypes</key>
    <array>
        <dict>
            <key>CFBundleURLSchemes</key>
            <array>
                <string>db-<APP_KEY></string>
            </array>
            <key>CFBundleURLName</key>
            <string></string>
        </dict>
    </array>
完成了上述更改后,您的应用程序的 .plist 文件应该看起来像这样:

处理授权流程
有三种方法可以以编程方式检索OAuth 2.0访问令牌
- 直接认证(仅限iOS):这会启动已安装的官方Dropbox iOS应用,通过官方应用进行认证,然后重定向回SDK
- Safari视图控制器认证(仅限iOS):这会启动一个
SFSafariViewController来方便认证流程。这是优选的,因为它对最终用户更安全,可以利用现有的会话数据来避免要求用户再次输入Dropbox凭证。 - 重定向到外部浏览器(仅限macOS):这会启动用户的默认浏览器来方便认证流程。这也是优选的,因为它对最终用户更安全,可以利用现有的会话数据来避免要求用户再次输入Dropbox凭证。
为了便利上述授权流程,您应采取以下步骤
初始化一个DropboxClient实例
从您的应用代理
SwiftUI注意:如果您的应用中没有应用代理,您可能需要创建一个。
iOS
import SwiftyDropbox

func application(_ application: UIApplication, didFinishLaunchingWithOptions launchOptions: [UIApplication.LaunchOptionsKey: Any]?) -> Bool {
    DropboxClientsManager.setupWithAppKey("<APP_KEY>")
    return true
}
macOS
import SwiftyDropbox

func applicationDidFinishLaunching(_ aNotification: Notification) {
    DropboxClientsManager.setupWithAppKeyDesktop("<APP_KEY>")
}
开始授权流程
您可以通过在应用程序的视图控制器中调用 authorizeFromController:controller:openURL 方法来开始默许流程。请注意,控制器引用将被弱引用。对于 SwiftUI 应用程序,可以将控制器参数传递为 nil,并使用应用程序的根视图控制器来呈现流程。
从您的视图控制器
iOS
import SwiftyDropbox

func myButtonInControllerPressed() {
    // OAuth 2 code flow with PKCE that grants a short-lived token with scopes, and performs refreshes of the token automatically.
    let scopeRequest = ScopeRequest(scopeType: .user, scopes: ["account_info.read"], includeGrantedScopes: false)
    DropboxClientsManager.authorizeFromControllerV2(
        UIApplication.shared,
        controller: self,
        loadingStatusDelegate: nil,
        openURL: { (url: URL) -> Void in UIApplication.shared.open(url, options: [:], completionHandler: nil) },
        scopeRequest: scopeRequest
    )

    // Note: this is the DEPRECATED authorization flow that grants a long-lived token.
    // If you are still using this, please update your app to use the `authorizeFromControllerV2` call instead.
    // See https://dropbox.tech/developers/migrating-app-permissions-and-access-tokens
    // DropboxClientsManager.authorizeFromController(UIApplication.shared,
    //                                               controller: self,
    //                                               openURL: { (url: URL) -> Void in
    //                                                 UIApplication.shared.open(url, options: [:], completionHandler: nil)
    //                                               })
}
macOS
import SwiftyDropbox
func myButtonInControllerPressed() {
// OAuth 2 code flow with PKCE that grants a short-lived token with scopes, and performs refreshes of the token automatically.
let scopeRequest = ScopeRequest(scopeType: .user, scopes: ["account_info.read"], includeGrantedScopes: false)
DropboxClientsManager.authorizeFromControllerV2(
sharedApplication: NSApplication.shared,
controller: self,
loadingStatusDelegate: nil,
openURL: {(url: URL) -> Void in NSWorkspace.shared.open(url)},
scopeRequest: scopeRequest
)
// Note: this is the DEPRECATED authorization flow that grants a long-lived token.
// If you are still using this, please update your app to use the `authorizeFromControllerV2` call instead.
// See https://dropbox.tech/developers/migrating-app-permissions-and-access-tokens
// DropboxClientsManager.authorizeFromController(sharedApplication: NSApplication.shared,
// controller: self,
// openURL: { (url: URL) -> Void in
// NSWorkspace.shared.open(url)
// })
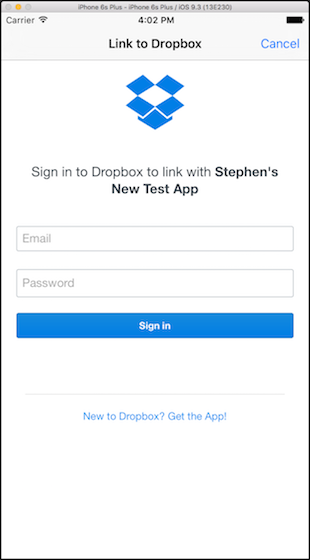
}通过应用程序中的内嵌网页开始认证流程将启动一个类似这样的窗口
处理回SDK的重定向
要处理认证流程完成后跳转回 Swift SDK,请在应用程序的代理中添加以下代码。
SwiftUI注意:如果您的应用中没有应用代理,您可能需要创建一个。
iOS
import SwiftyDropbox

func application(_ app: UIApplication, open url: URL, options: [UIApplication.OpenURLOptionsKey : Any] = [:]) -> Bool {
    let oauthCompletion: DropboxOAuthCompletion = {
      if let authResult = $0 {
          switch authResult {
          case .success:
              print("Success! User is logged into DropboxClientsManager.")
          case .cancel:
              print("Authorization flow was manually canceled by user!")
          case .error(_, let description):
              print("Error: \(String(describing: description))")
          }
      }
    }
    let canHandleUrl = DropboxClientsManager.handleRedirectURL(url, includeBackgroundClient: false, completion: oauthCompletion)
    return canHandleUrl
}
如果您的应用是iOS13+,或者您的应用也支持场景,将以下代码添加到应用程序的主体场景代理中。
注意:如果您的应用程序没有场景代理,您可能需要创建一个场景代理。
import SwiftyDropbox

func scene(_ scene: UIScene, openURLContexts URLContexts: Set<UIOpenURLContext>) {
     let oauthCompletion: DropboxOAuthCompletion = {
      if let authResult = $0 {
          switch authResult {
          case .success:
              print("Success! User is logged into DropboxClientsManager.")
          case .cancel:
              print("Authorization flow was manually canceled by user!")
          case .error(_, let description):
              print("Error: \(String(describing: description))")
          }
      }
    }

    for context in URLContexts {
        // stop iterating after the first handle-able url
        if DropboxClientsManager.handleRedirectURL(context.url, includeBackgroundClient: false, completion: oauthCompletion) { break }
    }
}
macOS
import SwiftyDropbox

func applicationDidFinishLaunching(_ aNotification: Notification) {
    ...... // code outlined above goes here

    NSAppleEventManager.shared().setEventHandler(self,
                                                 andSelector: #selector(handleGetURLEvent),
                                                 forEventClass: AEEventClass(kInternetEventClass),
                                                 andEventID: AEEventID(kAEGetURL))
}

func handleGetURLEvent(_ event: NSAppleEventDescriptor?, replyEvent: NSAppleEventDescriptor?) {
    if let aeEventDescriptor = event?.paramDescriptor(forKeyword: AEKeyword(keyDirectObject)) {
        if let urlStr = aeEventDescriptor.stringValue {
            let url = URL(string: urlStr)!
            let oauthCompletion: DropboxOAuthCompletion = {
                if let authResult = $0 {
                    switch authResult {
                    case .success:
                        print("Success! User is logged into Dropbox.")
                    case .cancel:
                        print("Authorization flow was manually canceled by user!")
                    case .error(_, let description):
                        print("Error: \(String(describing: description))")
                    }
                }
            }
            DropboxClientsManager.handleRedirectURL(url, includeBackgroundClient: false, completion: oauthCompletion)
            // this brings your application back the foreground on redirect
            NSApp.activate(ignoringOtherApps: true)
        }
    }
}
最终用户通过应用内网页使用Dropbox登录凭证登录后,将看到一个类似于这样的窗口。
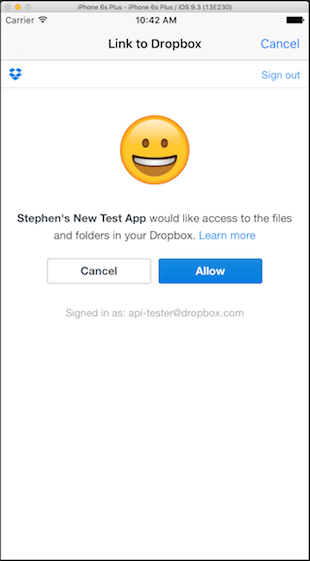
如果他们按下“允许”或“取消”,将在网页中启动`db<APP_KEY>`重定向URL,并将由您的应用程序代理的`application:handleOpenURL`方法处理,您可以从其中解析授权结果。
现在您已准备好开始进行API请求了!
尝试一些API请求
一旦您获得了OAuth 2.0令牌,您就可以尝试使用Swift SDK进行一些API v2调用。
Dropbox客户端实例
首先创建一个对您用于进行API调用的`DropboxClient`或`DropboxTeamClient`实例的引用。
import SwiftyDropbox

// Reference after programmatic auth flow
let client = DropboxClientsManager.authorizedClient
或者:
import SwiftyDropbox

// Initialize with manually retrieved auth token
let client = DropboxClient(accessToken: "<MY_ACCESS_TOKEN>")
处理API响应
Dropbox的用户API和业务API有三种类型的请求:RPC、上传和下载。
每种类型请求的响应处理程序彼此相似。处理程序块的参数如下
- 路由结果类型(如果路由没有返回类型,则为
Void) - 网络错误(特定于路由的错误或通用网络错误)
- 输出内容(仅适用于下载样式端点的下载输出引用
URL/Data)
注意:所有端点都需要响应处理程序。另一方面,进度处理程序对所有端点是可选的。
请求类型
RPC风格请求
client.files.createFolder(path: "/test/path/in/Dropbox/account").response { response, error in
    if let response = response {
        print(response)
    } else if let error = error {
        print(error)
    }
}
上传风格请求
let fileData = "testing data example".data(using: String.Encoding.utf8, allowLossyConversion: false)!

let request = client.files.upload(path: "/test/path/in/Dropbox/account", input: fileData)
    .response { response, error in
        if let response = response {
            print(response)
        } else if let error = error {
            print(error)
        }
    }
    .progress { progressData in
        print(progressData)
    }

// in case you want to cancel the request
if someConditionIsSatisfied {
    request.cancel()
}
下载样式请求
// Download to URL
let fileManager = FileManager.default
let directoryURL = fileManager.urls(for: .documentDirectory, in: .userDomainMask)[0]
let destination = directoryURL.appendingPathComponent("myTestFile")

client.files.download(path: "/test/path/in/Dropbox/account", overwrite: true, destination: destination)
    .response { response, error in
        if let response = response {
            print(response)
        } else if let error = error {
            print(error)
        }
    }
    .progress { progressData in
        print(progressData)
    }


// Download to Data
client.files.download(path: "/test/path/in/Dropbox/account")
    .response { response, error in
        if let response = response {
            let responseMetadata = response.0
            print(responseMetadata)
            let fileContents = response.1
            print(fileContents)
        } else if let error = error {
            print(error)
        }
    }
    .progress { progressData in
        print(progressData)
    }
处理响应和错误
Dropbox API v2 主要处理两种数据类型:结构体和联合体。广义上讲,大多数路由参数是结构体类型,而大多数路由错误是联合体类型。
注意:在此语境中,“结构体”和“联合体”是针对Dropbox API的特定术语,而不是用于查询API的任何语言的术语,因此您应避免在Swift定义的术语中思考它们。
结构体类型是“传统”的对象类型,即由一个或多个实例字段组成的复合类型。所有公共实例字段都可在运行时访问,不受运行时状态的影响。
联合体类型另一方面,代表一个可以采取多个值类型的单个值,这取决于状态。我们将所有这些不同类型的场景都归入一个“联合对象”中,但该对象在运行时只存在一种类型。每个联合状态类型或标签都可能有一个相关值(如果没有,该联合状态类型称为空)。相关值类型可以是原始类型、结构体或联合体。尽管Swift SDK会将联合体类型表示为具有多个实例字段的对象,但在运行时,最多只能访问一个实例字段,具体取决于标签状态。
例如,/delete端点返回一个错误,Files.DeleteError,这是一个联合体类型。Files.DeleteError联合体可以采取两种不同的标签状态:path_lookup(如果存在查找路径的问题)或path_write(如果有写入或删除到该路径的问题)。在这里,这两种标签状态都有非空的关联值(分别为Files.LookupError和Files.WriteError)。
这样,一个联合对象就可以捕获许多不同的场景,每个场景都有自己的值类型。
为了正确处理联合体类型,您应通过switch语句传递每个联合体,并检查与联合体相关的每个可能的标签状态。一旦确定了联合体的当前标签状态,您就可以访问与该标签状态关联的值(如果存在关联值类型,即它不是空的)。
路由特定错误
client.files.deleteV2(path: "/test/path/in/Dropbox/account").response { response, error in
    if let response = response {
        print(response)
    } else if let error = error {
        switch error as CallError {
        case .routeError(let boxed, let userMessage, let errorSummary, let requestId):
            print("RouteError[\(requestId)]:")

            switch boxed.unboxed as Files.DeleteError {
            case .pathLookup(let lookupError):
                switch lookupError {
                case .notFound:
                    print("There is nothing at the given path.")
                case .notFile:
                    print("We were expecting a file, but the given path refers to something that isn't a file.")
                case .notFolder:
                    print("We were expecting a folder, but the given path refers to something that isn't a folder.")
                case .restrictedContent:
                    print("The file cannot be transferred because the content is restricted...")
                case .malformedPath(let malformedPath):
                    print("Malformed path: \(malformedPath)")
                case .other:
                    print("Unknown")
                }
            case .pathWrite(let writeError):
                print("WriteError: \(writeError)")
                // you can handle each `WriteError` case like the `DeleteError` cases above
            case .tooManyWriteOperations:
                print("Another write operation occurring at the same time prevented this from succeeding.")
            case .tooManyFiles:
                print("There are too many files to delete.")
            case .other:
                print("Unknown")
            }
        case .internalServerError(let code, let message, let requestId):
            ....
            ....
            // a not route-specific error occurred
        ....
        ....
        ....
        }
    }
}
通用网络请求错误
在网络错误的情况下,错误要么是特定于端点的(如上所示),要么是更通用的错误。
要确定一个错误是否是路由特定错误,应将错误对象转换为CallError,并根据错误的类型,在适当的switch语句中进行处理。
client.files.deleteV2(path: "/test/path/in/Dropbox/account").response { response, error in
    if let response = response {
        print(response)
    } else if let error = error {
        switch error as CallError {
        case .routeError(let boxed, let userMessage, let errorSummary, let requestId):
            // a route-specific error occurred
            // see handling above
            ....
            ....
            ....
        case .internalServerError(let code, let message, let requestId):
            print("InternalServerError[\(requestId)]: \(code): \(message)")
        case .badInputError(let message, let requestId):
            print("BadInputError[\(requestId)]: \(message)")
        case .authError(let authError, let userMessage, let errorSummary, let requestId):
            print("AuthError[\(requestId)]: \(userMessage) \(errorSummary) \(authError)")
        case .accessError(let accessError, let userMessage, let errorSummary, let requestId):
            print("AccessError[\(requestId)]: \(userMessage) \(errorSummary) \(accessError)")
        case .rateLimitError(let rateLimitError, let userMessage, let errorSummary, let requestId):
            print("RateLimitError[\(requestId)]: \(userMessage) \(errorSummary) \(rateLimitError)")
        case .httpError(let code, let message, let requestId):
            print("HTTPError[\(requestId)]: \(code): \(message)")
        case .clientError(let error):
            print("ClientError: \(error)")
        }
    }
}
响应处理边缘情况
一些路由返回联合类型作为结果类型,因此您应准备好以处理联合路由错误相同的方式处理这些结果。请查阅每个端点的文档,以确保您正确处理路由的响应类型。
一些路由返回具有子类型的datatypes(即可以采取多个状态类型如联合的结构体)的结果类型。
例如,/delete 端点返回一个通用的 Metadata 类型,它可以是 FileMetadata 结构体、FolderMetadata 结构体或 DeletedMetadata 结构体。要确定在运行时 Metadata 类型存在为哪个子类型,请通过switch语句传递对象,并针对每个可能的类进行检查,相应地转换结果。以下是如何做到这一点的示例。
client.files.deleteV2(path: "/test/path/in/Dropbox/account").response { response, error in
    if let response = response {
        switch response {
        case let fileMetadata as Files.FileMetadata:
            print("File metadata: \(fileMetadata)")
        case let folderMetadata as Files.FolderMetadata:
            print("Folder metadata: \(folderMetadata)")
        case let deletedMetadata as Files.DeletedMetadata:
            print("Deleted entity's metadata: \(deletedMetadata)")
        }
    } else if let error = error {
        switch error as CallError {
        case .routeError(let boxed, let userMessage, let errorSummary, let requestId):
            // a route-specific error occurred
            // see handling above
        case .internalServerError(let code, let message, let requestId):
            ....
            ....
            // a not route-specific error occurred
            // see handling above
        ....
        ....
        ....
        }
    }
}
这个 Metadata 对象在我们的 API v2 文档中被称作具有子类型的datatypes。
具有子类型的datatypes是通过结合结构体和联合实现的方式。具有子类型的datatypes是包含标签的struct对象,该标签指定对象在运行时存在为哪个子类型。我们之所以有这个结构,就像联合一样,是为了能够用一个对象捕获多种场景。
在上面的例子中,Metadata类型可以存在为FileMetadata、FolderMetadata或DeleteMetadata。每种类型都有常见的实例字段,如"name"(文件、文件夹或删除类型的名称),但也有一些特定于特定子类型的实例字段。为了利用继承,我们设置了一个通用的超类型名为Metadata,它捕捉了所有的通用实例字段,还有一个标签实例字段,用于指定对象当前存在的子类型。
因此,具有子类型的数据类型是结构和联合的混合体。只有少数几个路由返回这种类型的结果。
自定义网络调用
配置网络客户端
可以配置SDK使用的网络客户端进行API调用。您可以提供自定义字段,例如自定义用户代理或自定义会话配置,或自定义身份验证挑战处理程序。请参见下文
iOS
import SwiftyDropbox

let transportClient = DropboxTransportClientImpl(accessToken: "<MY_ACCESS_TOKEN>",
                                             baseHosts: nil,
                                             userAgent: "CustomUserAgent",
                                             selectUser: nil,
                                             sessionConfiguration: mySessionConfiguration,
                                             longpollSessionConfiguration: myLongpollSessionConfiguration,
                                             authChallengeHandler: nil)

DropboxClientsManager.setupWithAppKey("<APP_KEY>", transportClient: transportClient)
macOS
import SwiftyDropbox

let transportClient = DropboxTransportClientImpl(accessToken: "<MY_ACCESS_TOKEN>",
                                             baseHosts: nil,
                                             userAgent: "CustomUserAgent",
                                             selectUser: nil,
                                             sessionConfiguration: mySessionConfiguration,
                                             longpollSessionConfiguration: myLongpollSessionConfiguration,
                                             authChallengeHandler: nil)

DropboxClientsManager.setupWithAppKeyDesktop("<APP_KEY>", transportClient: transportClient)
指定API调用响应队列
默认情况下,响应/进度处理代码在主线程上运行。您可以通过response方法为每个API调用设置自定义响应队列,如果希望响应/进度处理代码在不同的线程上运行。
let client = DropboxClientsManager.authorizedClient!

client.files.listFolder(path: "").response(queue: DispatchQueue(label: "MyCustomSerialQueue")) { response, error in
    if let result = response {
        print(Thread.current)  // Output: <NSThread: 0x61000007bec0>{number = 4, name = (null)}
        print(Thread.main)     // Output: <NSThread: 0x608000070100>{number = 1, name = (null)}
        print(result)
    }
}
测试中模拟API响应
在测试依赖于SDK的代码时,模拟任意API响应可以从JSON fixtures中很有用。我们建议使用依赖注入而不是通过方便的单例访问客户端。
let transportClient = MockDropboxTransportClient()
let dropboxClient = DropboxClient(transportClient: transportClient)

// your feature under test
let commentClient = CommentClient(apiClient: dropboxClient)

let expectation = expectation(description: "added comment")

// function of your feature that relies upon Dropbox api response
commentClient.addComment(
    forIdentifier: identifier,
    commentId: "pendingCommentId",
    threadId: nil,
    message: "hello world",
    mentions: [],
    annotation: nil
) { result in
    XCTAssertEqual(result.commentId, "thread-1")
    XCTAssertNil(result.error)
    addCommentExpectation.fulfill()
}

let mockInput: MockInput = .success(
    json: ["id": "thread-1", "status": 1]
)

let request = try XCTUnwrap(transportClient.getLastRequest())
try request.handleMockInput(mockInput)

wait(for: [expectation], timeout: 1.0)
支持后台网络
版本10.0及以上支持iOS应用及其扩展的后台网络。
初始化
要创建后台客户端,请提供一个后台会话标识符。要使用共享容器,也请指定此配置。
import SwiftyDropbox

DropboxClientsManager.setupWithAppKey(
    "<APP_KEY>",
    backgroundSessionIdentifier: "<BACKGROUND_SESSION_IDENTIFIER>"
)
如果您从应用扩展设置后台客户端,您将需要指定共享容器标识符,并相应地配置和设置应用组或密钥库共享。
DropboxClientsManager.setupWithAppKey(
    "<APP_KEY>",
    backgroundSessionIdentifier: "<BACKGROUND_SESSION_IDENTIFIER>"
    sharedContainerIdentifier: "<SHARED_CONTAINER_IDENTIFIER>"
)
属于应用组的App自动具有密钥库共享。当您使用扩展中的后台会话下载文件时,需要应用组,因为这是必要的。请参阅
- https://developer.apple.com/documentation/xcode/configuring-app-groups
- https://developer.apple.com/documentation/xcode/configuring-keychain-sharing
发送请求
与前台客户端相同的方式发送请求。
let client = DropboxClientsManager.authorizedBackgroundClient!

client.files.download(path: path, overwrite: true, destination: destinationUrl) {
    if let result = response {
        print(result)
    }
}
定制请求
通过在请求上设置后台会话相关属性来精细控制。
client.files.download(path: path, overwrite: true, destination: destinationUrl)
    .persistingString(string: "<DATA_AVAILABLE_ACROSS_APP_SESSIONS>")
    .settingEarliestBeginDate(date: .addingTimeInterval(fiveSeconds))
    .response { response, error in
{
    if let result = response {
        print(result)
    }
})
在应用会话间重新连接请求
由于后台请求可能跨越应用会话,应用在唤醒来处理事件时将接收到 AppDelegate.application(_:handleEventsForBackgroundURLSession:completionHandler:)。SwiftyDropbox 可以将完成处理程序重新连接到请求。在尝试重新连接之前,应用程序必须设置 authorizedBackgroundClient。
在接收到的重新连接块中,你会收到后台会话中请求的路由异构集合。处理响应可能需要跨会话保留的上下文。您可以在请求上使用 .persistingString(string:) 和 .clientPersistedString 来存储此上下文。根据您的用例,您可能需要在应用程序中保留其他上下文。
    func application(_ application: UIApplication, handleEventsForBackgroundURLSession identifier: String, completionHandler: @escaping () -> Void) {
        DropboxClientsManager.handleEventsForBackgroundURLSession(
            with: identifier,
            creationInfos: [],
            completionHandler: completionHandler,
            requestsToReconnect: { requestResults in
                processReconnect(requestResults: RequestResults)
            }
        )
    }

    static func processReconnect(requestResults: ([Result<DropboxBaseRequestBox, ReconnectionError>])) {
        let successfulReturnedRequests = requestResults.compactMap { result -> DropboxBaseRequestBox? in
            switch result {
            case .success(let requestBox):
                return requestBox
            case .failure(let error):
                // handle error
                return nil
            }
        }

        for request in successfulReturnedRequests {
            switch request {
            case .download(let downloadRequest):
                downloadRequest.response { response, error in
                    // handle response
                }
            case .upload(let uploadRequest):
                uploadRequest.response { response, error in
                    // handle response
                }
            // or .downloadZip, .paperCreate, .getSharedLinkFile etc.
            }
        }
    }
如果请求来自 App 扩展,SwiftyDropbox 必须重新创建扩展后的后台客户端,以便重新连接请求。
    func application(_ application: UIApplication, handleEventsForBackgroundURLSession identifier: String, completionHandler: @escaping () -> Void) {
        let extensionCreationInfo: BackgroundExtensionSessionCreationInfo = .init(defaultInfo: .init(
            backgroundSessionIdentifier: "<EXTENSION_BACKGROUND_SESSION_IDENTIFIER>",
            sharedContainerIdentifier: "<EXTENSION_SHARED_CONTAINER_IDENTIFIER>"
        ))

        DropboxClientsManager.handleEventsForBackgroundURLSession(
            with: identifier,
            creationInfos: [extensionCreationInfo],
            completionHandler: completionHandler,
            requestsToReconnect: { requestResults in
                processReconnect(requestResults: RequestResults)
            }
        )
    }
调试
后台会话调试困难。模拟器和Xcode调试器都会使应用程序以有意义的不同的方式表现 - 应该始终在未连接调试器的物理设备上验证正确的重新连接行为。日志可以通过Xcode -> 窗口 -> 设备和模拟器查看,这有助于在这里获得洞见。强制退出应用程序将使其无法继续在后台执行工作。
关于这个问题的良好讨论,参阅https://developer.apple.com/forums/thread/14855。
持久性
SwiftyDropbox通过将JSON字符串写入URLSessionTask.taskDescription属性(这是URLSession在应用会话中持续保留的属性)来跟踪状态和协调重新连接。
以上示例展示了SwiftyDropbox客户端保留自身任意字符串的能力,同时SwiftyDropbox私有地使用该字段。这可以用来存储存储在重新连接后重建任务完成处理程序所需的信息。
根据应用程序的需求,这种轻量级解决方案可能在长期的持久化簿记中不够,应用程序可能需要构建独立的私有持久化映射状态到存储在请求中的id。这可能在URLSession本身失去对传输跟踪的情况下发生失败,需要重新创建它。
有关进一步讨论,参阅https://developer.apple.com/forums(thread/11554)。
DropboxClientsManager类
Swift SDK包括一个便利类DropboxClientsManager,用于将SDK的不同功能集成到一个类中。
单个Dropbox用户案例
对于大多数应用,我们假设一次只需要管理一个Drobox账号(以及访问令牌)。在这种情况下,DropboxClientsManager的工作流程如下:
- 在集成应用的app delegate中调用
setupWithAppKey/setupWithAppKeyDesktop(或setupWithTeamAppKey/setupWithTeamAppKeyDesktop) - 客户端管理器将确定是否存储任何访问令牌--如果存在,将随意选择一个令牌使用
- 如果没有找到令牌,则调用
authorizeFromController/authorizeFromControllerDesktop来启动OAuth流程 - 如果启动了认证流程,则调用集成应用的app delegate中的
handleRedirectURL(或handleRedirectURLTeam)来处理认证重定向并存储获取到的访问令牌(使用DropboxOAuthManager实例) - 客户端管理器实例化一个
DropboxTransportClient(如果用户未提供) - 客户端管理器使用传输客户端作为字段实例化一个
DropboxClient(或DropboxTeamClient)
然后使用DropboxClient(或DropboxTeamClient)来执行所有所需的API调用。
- 在
DropboxClientsManager上,调用unlinkClients来登出Drobox用户并清除所有访问令牌。
管理多个Drobox用户的情况
对于某些应用,一次需要管理多个Drobox账号(以及访问令牌)。在这种情况下,DropboxClientsManager的工作流程如下:
- 访问令牌uid由集成SDK的应用管理,以供稍后查找
- 在集成应用的app delegate中调用
setupWithAppKeyMultiUser/setupWithAppKeyMultiUserDesktop(或setupWithTeamAppKeyMultiUser/setupWithTeamAppKeyMultiUserDesktop)- SwiftUI注意:如果您的应用中没有应用代理,您可能需要创建一个。
- 客户端管理器将确定是否有一个以
tokenUid为键的访问令牌被存储--如果存在,则选择此令牌来使用 - 如果没有找到令牌,则调用
authorizeFromController/authorizeFromControllerDesktop来启动OAuth流程 - 如果启动了认证流程,则调用集成应用的app delegate中的
handleRedirectURL(或handleRedirectURLTeam)来处理认证重定向并存储获取到的访问令牌(使用DropboxOAuthManager实例)- SwiftUI注意:如果您的应用中没有应用代理,您可能需要创建一个。
- 此时,集成SDK的应用应该将
tokenUid从从handleRedirectURL(或handleRedirectURLTeam)方法返回的DropboxOAuthResult对象的DropboxAccessToken字段中持久化保存 tokenUid可以重用来在应用程序的生命周期中授权新用户,通过reauthorizeClient(或reauthorizeTeamClient)方法或通过setupWithAppKeyMultiUser/setupWithAppKeyMultiUserDesktop(或setupWithTeamAppKeyMultiUser/setupWithTeamAppKeyMultiUserDesktop)方法- 客户端管理器实例化一个
DropboxTransportClient(如果用户未提供) - 客户端管理器使用传输客户端作为字段实例化一个
DropboxClient(或DropboxTeamClient)
然后使用DropboxClient(或DropboxTeamClient)来执行所有所需的API调用。
- 在
DropboxClientsManager上调用resetClients来登出Drobox用户但不清除任何访问令牌 - 如果需要删除特定的访问令牌,请使用
DropboxOAuthManager中的clearStoredAccessToken方法
Objective-C
如果您需要在 Objective-C 代码中与 Dropbox SDK 交互,SDK 提供了一个可用于此目的的 Objective-C 兼容层。
Objective-C 兼容层分发
Swift 包管理器
Objective-C 兼容层位于与SDK 分发中相同的包中。添加包后,您将看到名为 SwiftyDropboxObjC 的目标,可以通过与 Swift SDK 相同的方式将其添加,并在其中使用。
CocoaPods
CocoaPods 的 Podfile 中,只需指定(或与) SwiftyDropbox 之外的 SwiftyDropboxObjC。
use_frameworks!

target '<YOUR_PROJECT_NAME>' do
    pod 'SwiftyDropboxObjC', '~> 10.0.0-beta.3'
end
使用Objective-C兼容层
Objective-C接口的设计是为了在尽量模仿Swift接口的同时,仍然保持良好的Objective-C编程模式和最佳实践(例如使用完整的详细名称而不是Swift中依赖的命名空间)。除了命名和一些针对Objective-C的微小调整之外,SDK的使用在这两种语言中应当非常相似,因此上述说明在使用Objective-C时同样适用。
Swift与Objective-C之间差异的示例
Swift
import SwiftyDropbox

let userSelectArg = Team.UserSelectorArg.email("[email protected]")
DropboxClientsManager.team.membersGetInfo(members: [userSelectArg]).response { response, error in
    if let result = response {
        // Handle result
    } else {
        // Handle error
    }
}
Objective-C
@import SwiftyDropboxObjC;

DBXTeamUserSelectorArgEmail *selector = [[DBXTeamUserSelectorArgEmail alloc] init:@"[email protected]"]
[[DBXDropboxClientsManager.authorizedTeamClient.team membersGetInfoWithMembers:@[selector]] responseWithCompletionHandler:^(NSArray<DBXTeamMembersGetInfoItem *> * _Nullable result, DBXTeamMembersGetInfoError * _Nullable routeError, DBXCallError * _Nullable error) {
    if (result) {
        // Handle result
    } else {
        // Handle error
    }
}];
从dropbox-sdk-obj-c迁移
如果您之前与https://github.com/dropbox/dropbox-sdk-obj-c集成,迁移到Swift SDK和Objective-C层将需要代码更改,但在大多数情况下应该相对简单。
为了尽量在SDK中保持Swift和Objective-C之间的接口一致性,接口确实需要相对于dropbox-sdk-obj-c有所不同。主要差异如下
1.) 类型名称是从SwiftyDropbox类型前面加上DBX派生而来的。与dropbox-sdk-obj-c相比,命名上通常有一些差异,并且Swift有更精细的访问控制,因此一些先前可访问的类型现在仅对SDK内部是内部的。请参阅常见类型迁移参考。
2.) 一些函数名称略有变化,以更详细地说明参数并/或更好地匹配Swift接口。在以下示例中注意createFolderV2与createFolderV2WithPath以及responseWithCompletionHandler与setResponseBlock。
dropbox-sdk-obj-c
[[[DBClientsManager authorizedClient].filesRoutes createFolderV2:@"/some/folder/path"]
  setResponseBlock:^(DBFILESCreateFolderResult * _Nullable result, DBFILESCreateFolderError * _Nullable routeError, DBRequestError * _Nullable networkError) {
    // Handle response
}];
SwiftyDropboxObjC
[[DBXDropboxClientsManager.authorizedClient.files createFolderV2WithPath:@"some/folder/path"] responseWithCompletionHandler:^(DBXFilesCreateFolderResult * _Nullable result, DBXFilesCreateFolderError * _Nullable routeError, DBXCallError * _Nullable error) {
    // Handle response
}];
3.) 许多类的大写规则有所变化。
dropbox-sdk-obj-c: DBUSERSBasicAccount
SwiftyDropboxObjC: DBXUsersBasicAccount
4.) 从服务器传递或返回的枚举现在在类名中明确设置了类型。
dropbox-sdk-obj-c
DBTEAMUserSelectorArg *userSelectArg = [[DBTEAMUserSelectorArg alloc] initWithEmail:@"[email protected]"];SwiftyDropboxObjC
DBXTeamUserSelectorArgEmail *userSelectArg = [[DBXTeamUserSelectorArgEmail alloc] init:@"[email protected]"];5.) 在处理任务时,不再需要手动start任务。它们在创建时自动启动。
6.) SwiftyDropbox依赖于泛型在请求上的有类型完成处理器。这无法与Objective-C桥接。相反,为每个路由,都有一个带有正确类型完成处理器的额外请求类型。例如,DownloadRequestFile<Files.FileMetadataSerializer, Files.DownloadErrorSerializer>在Objective-C中表示为DBXFilesDownloadDownloadRequestFile。
通用类型迁移参考
| dropbox-sdk-objc-c | SwiftyDropbox | SwiftyDropbox |
|---|---|---|
| DBAppClient | DropboxAppClient | DBXDropboxAppBase |
| DBClientsManager | DropboxClientsManager | DBXDropboxClientsManager |
| DBTeamClient | DropboxTeamClient | DBXDropboxTeamClient |
| DBUserClient | DropboxClient | DBXDropboxClient |
| DBRequestErrors | CallError | DBXCallError |
| DBRpcTask | RpcRequest | DBXRpcRequest |
| DBUploadTask | UploadRequest | DBXUploadRequest |
| DBDownloadUrlTask | DownloadRequestFile | DBXDownloadRequestFile |
| DBDownloadDataTask | DownloadRequestMemory | DBXDownloadRequestMemory |
| DBTransportBaseClient/DBTransportDefaultClient | DropboxTransportClientImpl | DBXDropboxTransportClient |
| DBTransportBaseHostnameConfig | BaseHosts | DBXBaseHosts |
| DBAccessTokenProvider | AccessTokenProvider | DBXAccessTokenProvider |
| DBLongLivedAccessTokenProvider | LongLivedAccessTokenProvider | DBXLongLivedAccessTokenProvider |
| DBShortLivedAccessTokenProvider | ShortLivedAccessTokenProvider | DBXShortLivedAccessTokenProvider |
| DBLoadingStatusDelegate | LoadingStatusDelegate | DBXLoadingStatusDelegate |
| DBOAuthManager | DropboxOAuthManager | DBXDropboxOAuthManager |
| DBAccessToken | DropboxAccessToken | DBXDropboxAccessToken |
| DBAccessTokenRefreshing | AccessTokenRefreshing | DBXAccessTokenRefreshing |
| DBOAuthResult | DropboxOAuthResult | DBXDropboxOAuthResult |
| DBOAuthResultCompletion | DropboxOAuthCompletion | (DBXDropboxOAuthResult?) -> Void |
| DBScopeRequest | ScopeRequest | DBXScopeRequest |
| DBSDKKeychain | SecureStorageAccess | DBXSecureStorageAccess / DBXSecureStorageAccessDefaultImpl |
| DBDelegate | n/a | n/a |
| DBGlobalErrorResponseHandler | n/a | n/a |
| DBSDKReachability | n/a | n/a |
| DBSessionData | n/a | n/a |
| DBTransportDefaultConfig | n/a | n/a |
| DBURLSessionTaskResponseBlockWrapper | n/a | n/a |
| DBURLSessionTaskWithTokenRefresh | n/a | n/a |
| DBOAuthPKCESession | n/a | n/a |
| DBOAuthTokenRequest | n/a | n/a |
版本 10.0.0 的变更
SwiftyDropbox 10.0.0 版本与 9.2.0 版版有很大差异。它旨在支持 Objective-C,移除 AlamoFire 作为依赖项,支持后台网络,替换序列化期间的致命错误,添加单元测试,并更好地支持测试。
这些额外功能是最大差异,但即使是那些没有利用这些新功能的简单升级也应该考虑到其他显著的变化。
-
现在在调用时必须指定文件下载的目标位置。不能再提供在请求完成后评估的闭包。
-
AlamoFire提供的旧版SSL证书固定API现已不可用。此版本公开了URLSession认证挑战API。此外,先前的SDK版本中的可选SessionDelegate已被移除,没有直接替代品。如果您的工作流程依赖这些特定功能,而这些又无法实现,请通知我们,以便我们更好地了解并解决任何潜在问题。
-
之前会导致致命错误的序列化不一致性现在作为错误通过请求的完成处理程序传递。如何处理这些错误取决于调用应用程序。
-
Carthage不再受支持,请使用Swift Package Manager或CocoaPods。
-
SDK类不能再被继承。如果这破坏了您的使用,请告诉我们。
-
由于重写工作范围广泛,以及对SDK新版本中新功能的应用,在过渡到SDK新版本时,对您的代码库进行彻底测试非常重要。SDK新版本中的重大更改和增强可能引入了先前的SDK版本中不存在的微妙行为变化或边缘案例。
新功能
有关对Objective-C的说明,请参阅从dropbox-sdk-obj-c迁移
SDK的后台网络支持简化了将完成处理程序连接到URLSession任务的过程。请参阅TestSwiftyDropbox/DebugBackgroundSessionViewModel中的代码,以在测试中执行各种后台网络场景。请参阅TestSwiftDropbox/ActionRequestHandler中的应用程序扩展使用方式。
测试支持
使用MockDropboxTransportClient初始化DropboxClient,以在测试中方便地模拟路由响应。供给要测试的代码,执行代码,然后按以下示例传递响应,并针对代码的行为进行断言。
let transportClient = MockDropboxTransportClient()

let client = DropboxClient(
    transportClient: transportClient
)

let feature = SystemUnderTest(client: client)

let json: [String: Any] = ["fileNames": ["first"]]

let request = transportClient.getLastRequest()

request.handleMockInput(.success(json: json))

XCTAssert(<state of feature>, <expected state>)
示例
- PhotoWatch - 浏览Dropbox中的照片。支持Apple Watch。
文档
Stone
我们所有路由和数据类型都是通过名为 Stone 的框架自动生成的。
stone 仓库包含了所有Swift特定的生成逻辑,而 spec 仓库则包含了语言无关的API端点规格,这些规格作为语言特定生成器的输入。
修改
如果您想修改SDK代码库,应采取以下步骤
- 将此GitHub仓库克隆到本地文件系统
- 运行
git submodule init,然后执行git submodule update - 导航至
TestSwifty_[iOS|macOS] - 检查已安装的CocoaPods版本(通过
pod --version)是否与TestSwifty_[iOS|macOS]/Podfile.lock中的“locked”相同 - 运行
pod install - 在Xcode中打开
TestSwifty_[iOS|macOS]/TestSwifty_[iOS|macOS].xcworkspace - 对SDK源代码进行修改。
为确保您的更改没有破坏现有功能,可以运行一系列集成测试。
- 在 https://www.dropbox.com/developers/apps/ 创建一个新的应用,并授予“Full Dropbox”访问权限。注意记录应用密钥。
- 打开 Info.plist,并配置“URL types > 项目 0 (编辑器) > URL Schemes > 项目 0”密钥为 db-"App key"。
- 打开 AppDelegate.swift 文件,并将 "FULL_DROPBOX_APP_KEY" 替换为应用密钥。
- 在您的设备上运行测试应用,并按照屏幕上的指示操作。
要运行和发展针对单元测试而不是集成测试,请用 Xcode 打开克隆的仓库的根目录。开发完成后,请运行集成测试。
App Store Connect 隐私标签
为协助使用 Dropbox SDK 的开发者填写 Apple 的隐私实践问卷调查,我们提供了以下关于 Dropbox 可能收集和使用的个人信息的信息。
在完成问卷调查时,请注意以下信息具有一般性。Dropbox SDK 设计由开发者配置,以便将 Dropbox 功能融入其应用程序。由于 Dropbox SDK 的可定制性,我们无法提供有关每个应用程序实际数据收集和使用的详细信息。我们建议开发人员参考我们的 Dropbox for HTTP 开发者文档,获取有关每个 Dropbox API 如何收集数据的详细信息。
此外,请注意,以下信息仅识别 Dropbox 收集和使用的数据。您有责任识别自己的应用程序中收集和使用的数据,这可能导致与以下不同的问卷调查答案。
| 数据 | 由 Dropbox 收集 | 数据用途 | 与用户相关的数据 | 跟踪 |
|---|---|---|---|---|
| 联系方式 | ||||
| • 姓名 | 不收集 | 不适用 | 不适用 | 不适用 |
| • 电子邮件地址 | 可能收集 (如果您启用了通过电子邮件地址进行身份验证的认证) |
• 应用程序功能 | 是 | 否 |
| 健康 & 健身 | 不收集 | 不适用 | 不适用 | 不适用 |
| 财务信息 | 不收集 | 不适用 | 不适用 | 不适用 |
| 位置 | 不收集 | 不适用 | 不适用 | 不适用 |
| 敏感信息 | 不收集 | 不适用 | 不适用 | 不适用 |
| 联系人 | 不收集 | 不适用 | 不适用 | 不适用 |
| 用户内容 | ||||
| • 音频数据 | 可能收集 | • 应用程序功能 | 是 | 否 |
| • 图片或视频 | 可能收集 | • 应用程序功能 | 是 | 否 |
| • 其他用户内容 | 可能收集 | • 应用程序功能 | 是 | 否 |
| 浏览历史记录 | 不收集 | 不适用 | 不适用 | 不适用 |
| 搜索历史记录 | ||||
| • 搜索历史记录 | 可能收集 (如果您使用了搜索功能) |
• 应用程序功能 • 分析 |
是 | 否 |
| 标识符 | ||||
| • 用户 ID | 收集 | • 应用程序功能 • 分析 |
是 | 否 |
| 购买 | 不收集 | 不适用 | 不适用 | 不适用 |
| 使用数据 | ||||
| • 产品交互 | 收集 | • 应用程序功能 • 分析 • 产品个性化 |
是 | 否 |
| 诊断 | ||||
| • 其他诊断数据 | 收集 (API 调用日志) |
• 应用程序功能 | 是 | 否 |
| 其他数据 | 不适用 | 不适用 | 不适用 | 不适用 |
错误
请将任何错误贴在 GitHub 页面上的项目问题跟踪器 issue tracker 上。
请随问题附带以下内容
- 描述了哪些地方不正常工作
- 示例代码,帮助复制问题
谢谢!