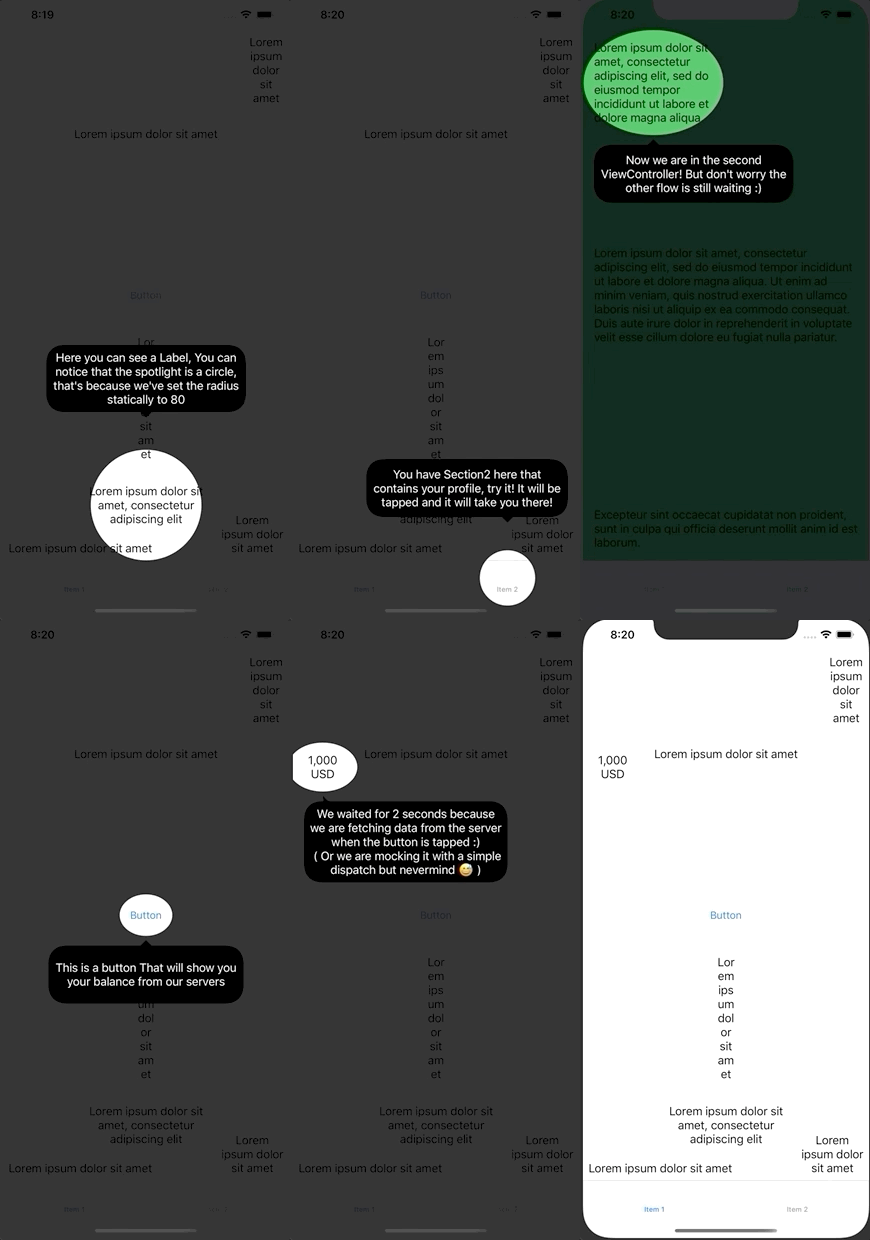
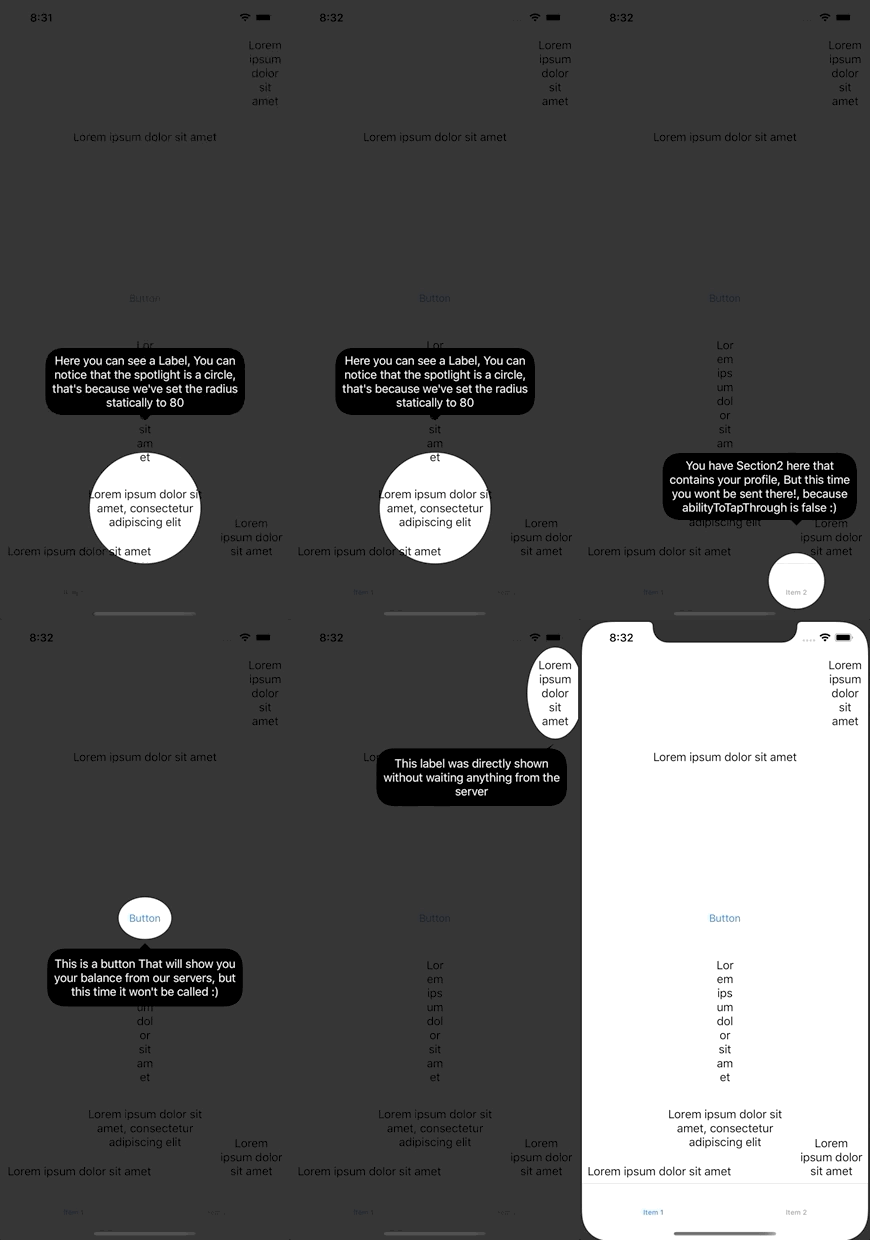
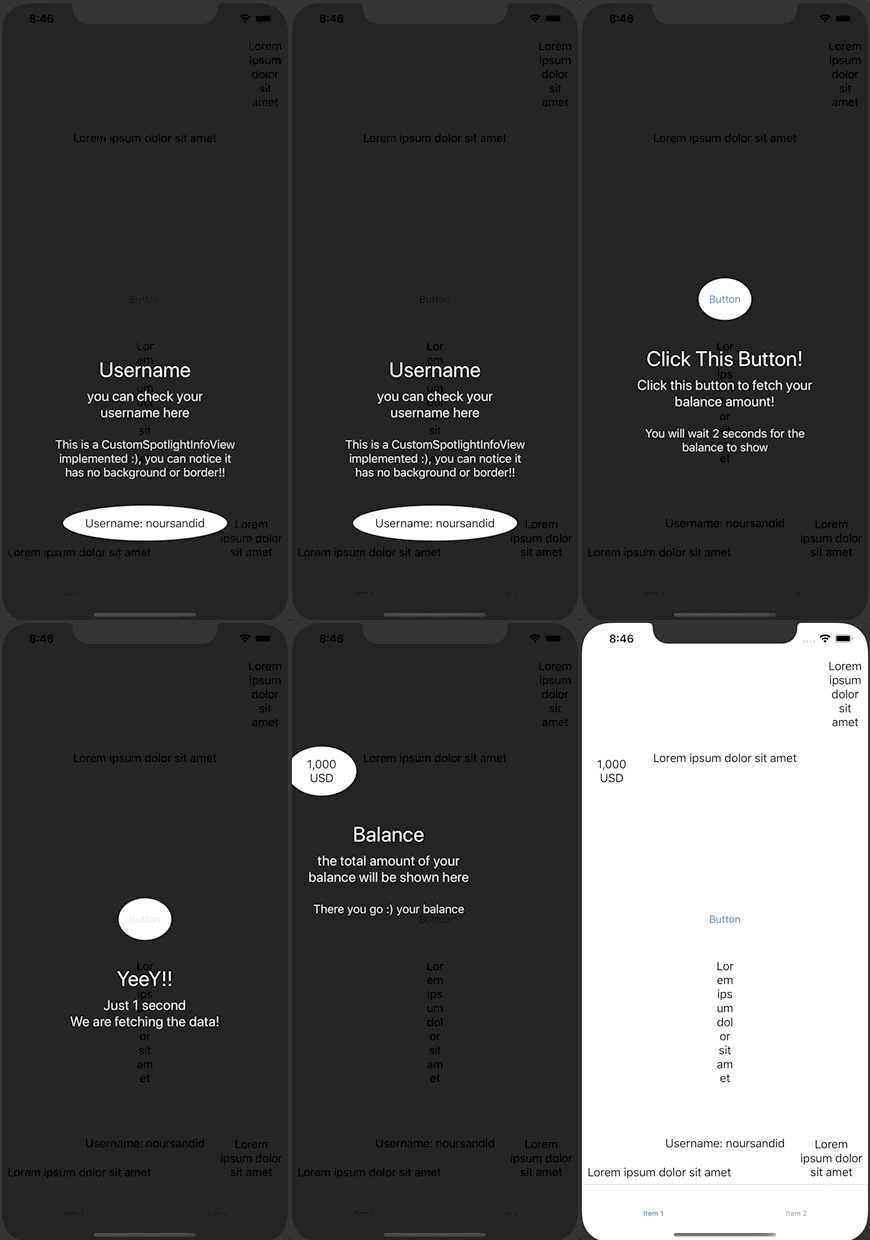
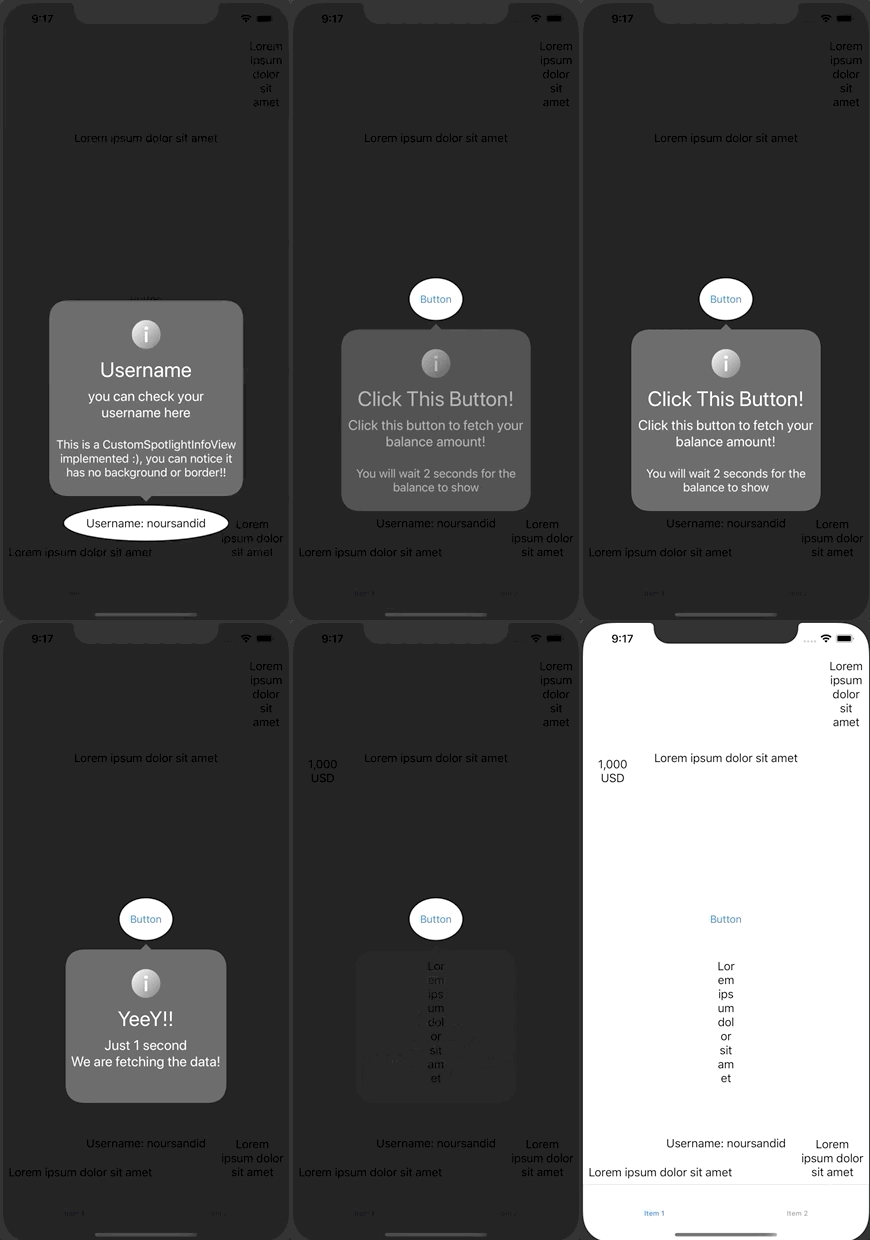
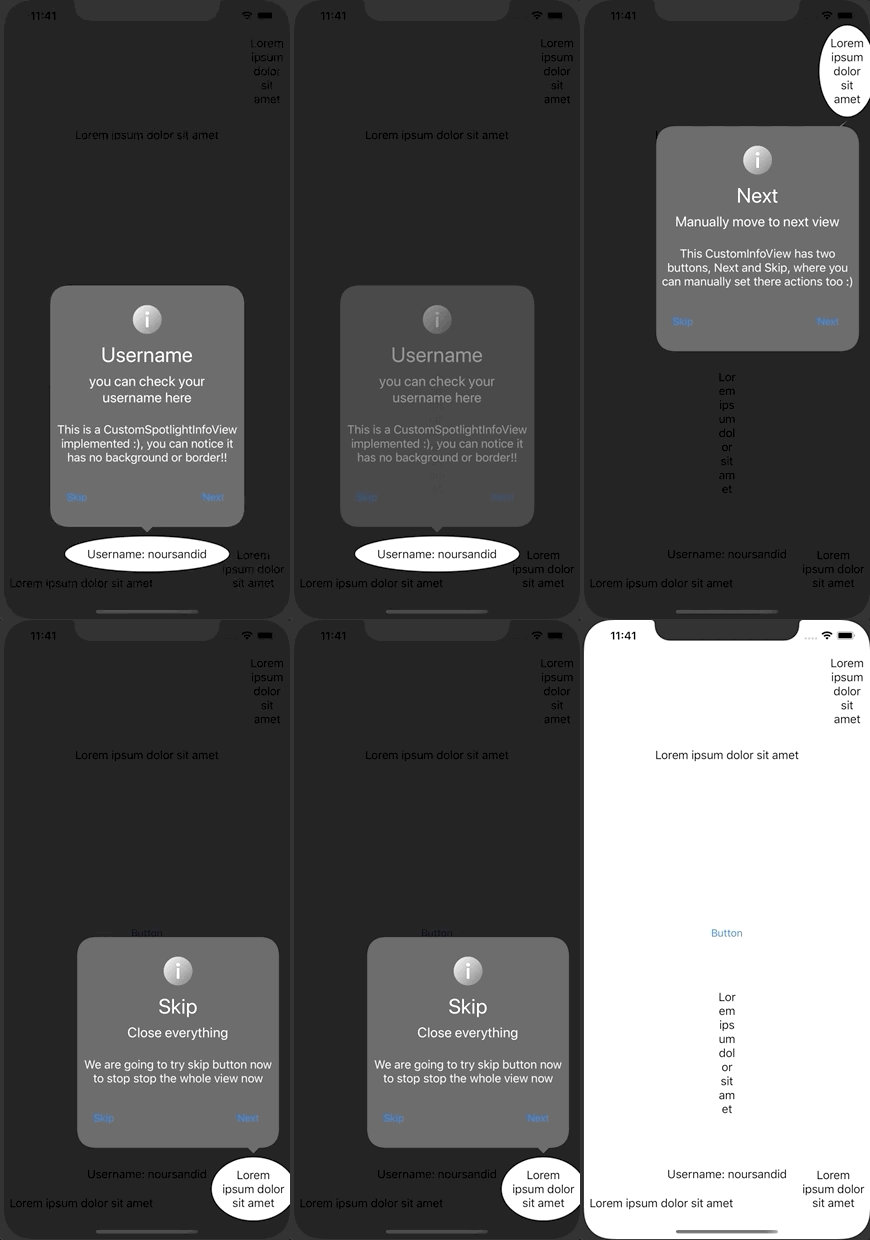
SundeedSpotlight 是一个易于实现的突出显示库,用于引导用户了解其功能
需求
安装
通过CocoaPods安装
SundeedSpotlight可以通过CocoaPods获得。CocoaPods是一个依赖管理器,它自动化并简化了在项目中使用第三方库(如MarkdownKit)的过程。您可以使用以下命令安装CocoaPods:
gem install cocoapods要将SundeedSpotlight集成到Xcode项目中使用CocoaPods,只需将以下行添加到您的Podfile中:
pod "SundeedSpotlight"之后,运行以下命令:
pod install功能
- withAbilityToTapThroughSpotlight(_ passthrough: Bool):用于声明是否启用用户与突出显示视图的交互。
- 参数
- passthrough (Bool):
- True:突出显示的视图(例如:UIButton)会在突出显示时执行其动作
- False:突出显示的视图(例如:UIButton)不会收到已被触摸的通知
- passthrough (Bool):
- 参数
- withInfoCornerRadius(_ cornerRadius: CGFloat):用于指定信息视图的圆角半径
- 参数
- cornerRadius:一个用于指定信息视图圆角半径的数字
- 参数
- withBackgroundColor(_ color: UIColor):用于指定模糊视图的背景颜色
- 参数
- color:一个用于全视图背景颜色的颜色(例如:UIColor.black.withAlphaComponent(0.7))
- 参数
- withCustomInfoView(_ view: CustomSpotlightInfoView):用于显示自定义信息视图
- 参数
- view:一个实现了自定义 SpotlightInfoView 协议、用于监听更改发生的视图。(例如:didMoveToItem)
- 参数
- addView(_ view: UIView, withInfo info: String? = nil, withUserInfo: [String: Any?] = [:], withCustomRadius radius: CGFloat? = nil):添加一个带有自定义参数的突出显示视图(UIView)
- 参数
- view:一个将会位于突出显示中间的视图
- info:在 DefaultInfoView 中显示的字符串值
- userInfo:一个字典,其中包含任何将被传递到 CustomSpotlightInfoView 的对象,以实现最大化的自定义
- radius:如果指定,聚光灯将以所选半径形成一个完整的圆,否则聚光灯将形成一个椭圆,精确地围绕被突出的视图旋转。
- 参数
- addTabBarItem(at index: Int, in tabBar: UITabBar?, withInfo info: String? = nil, withUserInfo: [String: Any?] = [:], withCustomRadius radius: CGFloat? = nil):通过传递一个具有特定索引的tabBar来添加tabBarItem。
- 参数
- index:一个整数,表示要高亮显示的所选tabBarItem的索引。
- tabBar:包含要高亮显示的tabBarItem的tabBar。
- info:在 DefaultInfoView 中显示的字符串值
- userInfo:一个字典,其中包含任何将被传递到 CustomSpotlightInfoView 的对象,以实现最大化的自定义
- radius:如果指定,聚光灯将以所选半径形成一个完整的圆,否则聚光灯将形成一个椭圆,精确地围绕被突出的视图旋转。
- 参数
- wait(for string: String): 告诉库它应该等待某个事件发生(例如:API调用)然后再继续旅程。
- 参数
- string:要等待的标识符,将在'继续'函数中发送。
- 参数
- func
continue(for string: String): 告诉库它等待的事件已经完成(例如:AI调用)。- 参数
- string:用于等待的标识符,以便库知道它可以继续旅程。
- 参数
- waitForInsertion(): 告诉库其他突出显示的视图将被插入,并且它应该等待它们(例如:在在具有突出显示视图的ViewControllers之间导航时)。
- insertView(_ view: UIView, withInfo info: String? = nil, withUserInfo: [String: Any?] = [:], withCustomRadius radius: CGFloat? = nil): 将一个突出显示的视图(UIView)插入到已经运行的Spotlight旅程中,并使用参数对其进行定制。
- 参数
- view:一个将会位于突出显示中间的视图
- info:在 DefaultInfoView 中显示的字符串值
- userInfo:一个字典,其中包含任何将被传递到 CustomSpotlightInfoView 的对象,以实现最大化的自定义
- radius:如果指定,聚光灯将以所选半径形成一个完整的圆,否则聚光灯将形成一个椭圆,精确地围绕被突出的视图旋转。
- 参数
- insertTabBarItem(at index: Int, in tabBar: UITabBar?, withInfo info: String? = nil, withUserInfo: [String: Any?] = [:], withCustomRadius radius: CGFloat? = nil): 通过传递一个具有特定索引的tabBar,在已经运行的Spotlight旅程中插入一个tabBarItem。
- 参数
- index:一个整数,表示要高亮显示的所选tabBarItem的索引。
- tabBar:包含要高亮显示的tabBarItem的tabBar。
- info:在 DefaultInfoView 中显示的字符串值
- userInfo:一个字典,其中包含任何将被传递到 CustomSpotlightInfoView 的对象,以实现最大化的自定义
- radius:如果指定,聚光灯将以所选半径形成一个完整的圆,否则聚光灯将形成一个椭圆,精确地围绕被突出的视图旋转。
- 参数
- show(): 将之前添加的视图和tabBarItem添加到Spotlight旅程中,无论是添加在开头还是通过插入函数插入在中间。
支持的项目
- UIView
- 标签栏项目
文档
import UIKit

class ViewController: UIViewController {
    @IBOutlet weak var label: UILabel!
    @IBOutlet weak var label1: UILabel!
    @IBOutlet weak var button: UIButton!
    static let sundeedWalkthrough = SundeedWalkthrough()
    override func viewDidLoad() {
        super.viewDidLoad()
        ViewController.sundeedWalkthrough
            .withAbilityToTapThroughSpotlight(true)
            .withInfoCornerRadius(40)
            .withBackgroundColor(UIColor.black.withAlphaComponent(0.8))
            .withCustomInfoView(WalkthroughCustomView())
            .addView(label, withInfo: "1",
                            withCustomRadius: 80)
            .addTabBarItem(at: 1,
                           in: self.tabBarController?.tabBar,
                           withInfo: "2",
                           withCustomRadius: 40) // This will make the user tap on the second item in the tabBar, thus you will move to the secondViewController
            .waitForInsertion() // This will tell the library that second ViewController will insert some of its spotlightedViews here
            .addView(button, withInfo: "7")
            .wait(for: "label1")
            .addView(label1, withInfo: "8")
            .show()
    }

    @IBAction func didPress(_ sender: Any) {
        print("button pressed")  // This will be printed because abilityToTapThroughSpotlight was set to true
        DispatchQueue.main.asyncAfter(deadline: .now()+2) {
            self.label1.isHidden = false
            ViewController.sundeedWalkthrough.continue(for: "label1") // This shal tell the library to continue the flow after waiting 2 seconds
        }
    }
}

class SecondViewController: UIViewController {
    @IBOutlet weak var label1: UILabel!

    override func viewDidLoad() {
        super.viewDidLoad()
        ViewController.sundeedWalkthrough
            .insertView(self.label1, withInfo: "3")
            .insertTabBarItem(at: 0,
                              in: self.tabBarController?.tabBar,
                              withInfo: "6",
                              withCustomRadius: 40) // This will make the user tap on the tabBarItem at 0 and go back to the first ViewController
        .show() // This will tell the library to add label1 and tabBarItem at 0 to the flow in the current flow
    }
}
自定义 Spotlight 信息视图
一个自定义信息视图的示例,而不是默认视图
class WalkthroughCustomView: UIView, CustomWalkthroughInfoView {
    @IBOutlet weak var titleLabel: UILabel!
    @IBOutlet weak var subtitleLabel: UILabel!
    @IBOutlet weak var descriptionLabel: UILabel!

    //manager variable is optional, you only need to add it if you wish to have a "Next" or "Skip" buttons and to control the flow manually.
    var manager: SpotlightInfoViewManager? = InfoViewManager()

    override init(frame: CGRect) {
        super.init(frame: frame)
        commonInit()
    }
    required public init?(coder: NSCoder) {
        super.init(coder: coder)
        commonInit()
    }
    private func commonInit() {
        fromNib()
        self.backgroundColor = .clear // set to Clear to remove the borders and the small arrow pointing to the spotlighted view
    }
    func walkthroughIsWaitingForInsertion() {
        self.titleLabel.text = "Waiting..."
        self.subtitleLabel.text = ""
        self.descriptionLabel.text = ""
    }
    func walkthroughDoneWaitingForInsertion() {
        print("walkthroughDoneWaitingForInsertion")
    }
    func walkthroughDidMoveToItem(at index: Int,
                                  withInfo info: String?,
                                  withUserInfo userInfo: [String : Any?]) {
        self.descriptionLabel.text = info
        if let title = userInfo["title"] as? String,
            let subtitle = userInfo["subtitle"] as? String {
                self.titleLabel.text = title
                self.subtitleLabel.text = subtitle
        }
    }
    func walkthroughIsWaiting(for identifier: String) {
        print("waiting for API")
    }
    func walkthroughDidContinue(for identifier: String) {
        print("api responded and the flow continued")
    }
    @IBAction func skipButtonPressed(_ sender: Any) {
        self.manager?.skip()
    }

    @IBAction func nextButtonPressed(_ sender: Any) {
        self.manager?.next()
    }
}
许可协议
MIT


