StackLayout


StackLayout 建立在 Auto Layout 的基础上,使一些常见的布局更容易管理。它创建所需的约束,并允许您使用具有语义方法名称(如 setTopMargin: 或 setHorizontalAlignment:)来编辑它们。它与 UIStackView 类似,但与 UIStackView 不同,它不是 UIView 的子类。您可以使用任何视图来使用它。这有几个优点:
- 一个视图中的多个布局。
- 布局中包装视图更少。
- 与 iOS 8+ 兼容
基础知识
三个垂直堆叠的标签,之间有间距。
let verticalLayout = container.addSubviewsWithVerticalLayout([headerLabel, subtitleLabel, bodyLabel]) { layout in
    layout.verticalAlignment = .Top
    layout.horizontalAlignment = .Fill
}
上述布局通常需要约 10 个约束,这可能会很麻烦。布局对象为您管理这些约束,并允许您轻松地稍后更改它们。但是,如果您不需要布局对象,则不需要保留对布局对象的引用。
更多示例
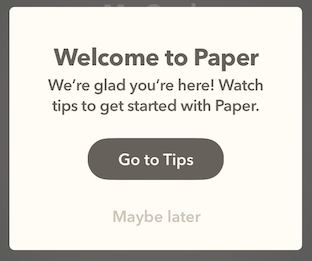
tipView.addSubviewsWithVerticalLayout([titleLabel, bodyLabel, tipsButton, laterButton]) { layout in
    layout.verticalAlignment = .Fill
    layout.verticalMargins = 46
    layout.topMargin = 34
    layout.bottomMargin = 17
    layout.spacing = 28
	layout.setSpacing(10, between: titleLabel, and: bodyLabel)
}

// Constrain the width of the tip view so the text will wrap.
tipView.widthAnchor.constraintEqualToConstant(290).active = true

toolbar.addSubviewsWithHorizontalLayout([trashButton]) { layout in
    layout.horizontalAlignment = .Leading
    layout.verticalAlignment = .Center
    layout.leadingMargin = 15
}

toolbar.addSubviewsWithHorizontalLayout([resizeButton, spotlightButton]) { layout in
    layout.verticalAlignment = .Center
    layout.horizontalAlignment = .Center
}
最常用属性
间距
setSpacing:betweenView:andView
(垂直)(水平)对齐
(垂直)(水平)外边距
(顶部)(底部)(前边距)(水平)外边距
对齐
通常您需要同时选择垂直和水平对齐。
- SLAlignmentFill
- 当您想使子视图完全填充容器(不包括外边距空间)时使用此参数。这也可以使容器收缩,直到刚好足够容纳子视图。这是最常用的对齐方式。
- SLAlignmentTop/Bottom/Leading/Trailing
- 正如其名。视图(们)将被固定到容器视图的边缘。
- SLAlignmentCenter
- 这会将视图拉向中间。布局可能会创建不可见的“辅助”视图以实现这一点。您可以通过使用
centeringPriority来控制中心对齐约束的强度。
- 这会将视图拉向中间。布局可能会创建不可见的“辅助”视图以实现这一点。您可以通过使用
- SLAlignmentNone
- 这是默认设置。没有对齐,视图可以位于容器边缘内的任何地方。当您想要相对于视图层次结构中的其他元素对齐视图时,这很有用。
间距
相邻的子视图都有一个为它们之间空间设置的“空间”限制。在Auto Layout可视格式语言中,它看起来像“[first]-space-[second]”。默认情况下,这个空间设置为0,因此所有子视图都是边缘对边缘的。您可以通过调用setSpacing:betweenView:andView:来设置两个相邻子视图之间的空间。您还可以通过设置spacing来一次性调整空间限制,这将覆盖以前的任何setSpacing:betweenView:andView:调用。
空间限制默认是必需的,但可以通过设置spacingPriority来弱化。
记住的规则
如果您在使用布局时这些规则妨碍了您,不要害怕放弃Stack Layout,而是自己创建约束! PureLayout 或 NSLayoutAnchor (iOS 9+) 可以更容易地做到这一点。
同时设置垂直和水平对齐
如果您未设置对齐,子视图可能出现的位置有很多。在这个布局中:container.addSubviewsWithVerticalLayout([redButton, blueButton]),红色和蓝色按钮组可以在容器的右上角或右下角(或之间的任何位置)。如果您想使视图相对于另一个视图进行布局,这可能是很有用的。但通常您想同时设置verticalAlignment和horizontalAlignment。
子视图保留在边距内
子视图通常保持在包含视图的边界范围内,即使没有设置垂直或水平对齐。这通过“margin”(边距)约束来完成。您可以将其设置为负数或通过设置marginsPriority来减少边距约束的优先级以覆盖此行为。
子视图需要大小约束
StackLayout不控制子视图相对于彼此的大小。例如,这个布局是不确定的:
container.addSubviewsWithVerticalLayout([redView, blueView]) { layout in
    layout.verticalAlignment = .Fill
    layout.horizontalAlignment = .Fill
}
红色视图和蓝色视图一起填充容器,但您需要另一个约束来指定它们相对于彼此的大小。要使它们各自占用容器的一半,您需要一个补充约束:[[redView heightAnchor] constraintEqualToAnchor:[blueView heightAnchor]].active = YES;
通常,子视图已经有了自己的大小,无论是从intrinsicContentSize还是从它们的子视图和约束中获得。
示例项目
示例项目尚未构建。如果您想做出贡献,您可以在示例项目中构建示例。
克隆仓库,并首先从Example目录运行pod install。
需求
安装
StackLayout可通过CocoaPods获得。要安装,只需将以下行添加到您的Podfile
pod "StackLayout"作者
Bridger Maxwell,[email protected]
许可证
StackLayout遵循MIT许可证。更多详细信息请参阅LICENSE文件。