SpreadButton 0.2.2
| 测试已测试 | ✗ |
| 语言语言 | SwiftSwift |
| 许可证 | MIT |
| 发布最后发布 | 2016年12月 |
| SwiftSwift版本 | 3.0 |
| SPM支持SPM | ✗ |
由liuzhiyi1992维护。
SpreadButton 0.2.2
- 由
- zhiyi
SpreadButton
摘要
当点击它时,按钮像花朵或镰刀(两种展开方式)一样展开其子路径按钮,再次点击,关闭。您还可以在固定模式与触摸边缘模式之间切换SpreadPositionMode,而一种像墙上的弹珠固定,另一种像iPhone上的辅助触控。
顾名思义,这是一个会散开的功能按钮,主体按钮被点击后,启动目录按钮的展开,选择一个功能子按钮或点击任何地方,启动子按钮的收缩隐藏。SpreadButton设计了2种展开方式,2种位置模式,8种展开方向。
近期更新:
- 0.2.1: 适配Swift 3.0
- 0.2.0: 更新Swift 2.2语法,OC版对CGPoint的稳定性更高
- 0.1.6: 更新Objective-C版本
- 0.1.5: SpreadPositionModeTouchBorder(您可以像在应用内使用iOS辅助触控一样使用它)
- 0.1.4: SpreadPositionModeFixed增加物理吸附效果(可拖动,送开回弹),突出层次感,告别生硬的坐标约束

个人博客原文:http://zyden.vicp.cc/zyspreadbutton/
欢迎转载,请注明出处,谢谢


两种展开模式(SpreadMode):镰刀模式 & 花朵模式
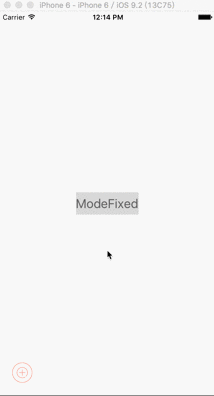
两种位置模式(SpreadPositionMode):锁定模式 & 粘连边缘模式。在粘连边缘模式下,根据主体按钮的位置,会实时更新展开模式
联系
您可以在appetize.io上在线试玩演示
在这里可以在线试玩这个应用
安装
从我的GitHub仓库分叉
您可以在相应的文件夹中选择由objc或swift编写的SpreadButton
目前已支持oc和swift两种语言,可以根据需要在相应的文件夹中找到
定制
属性:
- animationDuring:分配‘animationDuring’也可以更改‘animationDuringSpread’ & ‘animationDuringClose’,默认为0.2
- coverAlpha
- coverColor
- mode:
case SpreadModeSickleSpread case SpreadModeFlowerSpread
- radius: 展开 Radius
- direction:
case SpreadDirectionTop case SpreadDirectionBottom case SpreadDirectionLeft case SpreadDirectionRight case SpreadDirectionLeftUp case SpreadDirectionLeftDown case SpreadDirectionRightUp case SpreadDirectionRightDown
- touchBorderMargin: 在SpreadPositionModeTouchBorder中的边界边距
- buttonWillSpreadBlock
- buttonDidSpreadBlock
- buttonWillCloseBlock
- buttonDidCloseBlock
private static
—您可以在源代码中编辑默认设置—
- private static let sickleSpreadAngleDefault: CGFloat = 90.0
- private static let flowerSpreadAngleDefault: CGFloat = 120.0
- private static let spredaDirectionDefault: SpreadDirection = .SpreadDirectionTop
- private static let spreadRadiusDefault: CGFloat = 100.0
- private static let coverAlphaDefault: CGFloat = 0.1
- private static let touchBorderMarginDefault: CGFloat = 10.0
- private static let touchBorderAnimationDuringDefault = 0.5
- private static let animationDuringDefault = 0.2
使用方法
以Swift为例:
1.通过SpreadButton的构造方法创建一个SpreadButton对象,传入主按钮的背景图片,高亮图片(非必须),位置,如果传入的UIImage为nil,放心,编译时会报错
let spreadButton = SpreadButton(image: UIImage(named: "powerButton"),
                       highlightImage: UIImage(named: "powerButton_highlight"),
                             position: CGPointMake(40, UIScreen.mainScreen().bounds.height - 40))
2.创建子按钮(SpreadSubButton),传入背景图片,高亮图片(非必须),还有一个尾随闭包,子按钮被点击后我们这个闭包会被调用,同样的,如果传入的UIImage为nil,编译时会报错
let btn1 = SpreadSubButton(backgroundImage: UIImage(named: "clock"),
                            highlightImage: UIImage(named: "clock_highlight")) { (index, sender) -> Void in
     print("first button be clicked!!!")
}

let btn2 = SpreadSubButton(backgroundImage: UIImage(named: "pencil"),
                            highlightImage: UIImage(named: "pencil_highlight")) { (index, sender) -> Void in
     print("second button be clicked!!!")
}
//像这样你可以创建更多3.通过-setSubButtons为SpreadButton设置子按钮,这里你可以传入nil或者SpreadButton?试试,没关系,里面做了保险,会排除,哈哈扯远了,用到的知识可以看看我的这篇文章
spreadButton?.setSubButtons([btn1, btn2, btn3, btn4, btn5])4.根据你的需求,去定制这个SpreadButton,具体可以选什么参数,看看上面的Custom-made
spreadButton?.mode = SpreadMode.SpreadModeSickleSpread
spreadButton?.direction = SpreadDirection.SpreadDirectionRightUp
spreadButton?.positionMode = SpreadPositionMode.SpreadPositionModeFixed

/*  and you can assign a newValue to change the default
spreadButton?.animationDuring = 0.2
spreadButton?.animationDuringClose = 0.25
spreadButton?.radius = 180
spreadButton?.coverAlpha = 0.3
spreadButton?.coverColor = UIColor.yellowColor()
spreadButton?.touchBorderMargin = 10.0
*/
5.每种动作的前后,都有对应的Block供使用,像这样给他们赋值
spreadButton?.buttonWillSpreadBlock = { print(CGRectGetMaxY($0.frame)) }
spreadButton?.buttonDidSpreadBlock = { _ in print("did spread") }
spreadButton?.buttonWillCloseBlock = { _ in print("will closed") }
spreadButton?.buttonDidCloseBlock = { _ in print("did closed") }
6.最后加到你的view里面,ok,可以开始玩耍
if spreadButton != nil {
    self.view.addSubview(spreadButton!)
}
关联信息
@liuzhiyi1992 在 Github
SpreadButton 在我的博客
许可
SpreadButton遵循MIT许可证发布。有关详细信息,请参阅LICENSE文件。