SmileTouchID 0.1.8
| 测试已测试 | ✗ |
| 语言语言 | Obj-CObjective C |
| 许可 | MIT |
| 发布上次发布 | 2016年10月 |
由 ‘Rain --description=’11 macbook air 维护。


SmileTouchID 0.1.8
- 由
- Rain
一个使集成 Touch ID & 密码到 iOS 应用变得方便的库。

它能为您做什么?
1. 处理所有关于 Touch ID & 密码的复杂问题。您只需编写一些简单的代码即可将 Touch ID & 密码集成到您的应用中。
例如,处理不支持 Touch ID 的设备,而不是使用 Touch ID,使用密码进行认证。
处理确保应用安全(用户更改密码或关闭密码)的全过程,
if ([SmileAuthenticator hasPassword]) {
        [SmileAuthenticator sharedInstance].securityType = INPUT_TOUCHID;
        [[SmileAuthenticator sharedInstance] presentAuthViewController];
    }
2. 自动获得优雅的动画和自适应用户界面。
3. 可以自定义颜色、Touch ID 图标和背景图像以适应您的应用风格。例如,您可以按照下面的图像进行自定义。
[SmileAuthenticator sharedInstance].tintColor = [UIColor purpleColor];
[SmileAuthenticator sharedInstance].touchIDIconName = @"my_Touch_ID";
[SmileAuthenticator sharedInstance].appLogoName = @"my_Logo";
[SmileAuthenticator sharedInstance].navibarTranslucent = YES;
[SmileAuthenticator sharedInstance].backgroundImage = [UIImage imageNamed:@"backgroundImage"];

您可以使用 nightMode 属性将所有 UI 元素更改为黑色风格,如下面的图像所示。
[SmileAuthenticator sharedInstance].nightMode = YES;
[SmileAuthenticator sharedInstance].backgroundImage = [UIImage imageNamed:@"nightMode_BG"];

4. 可以将密码位数自定义为 6 或 10 或任何其他数字,并自动为您处理其他事物。
[SmileAuthenticator sharedInstance].passcodeDigit = 6;如果您想在演示应用中尝试此功能,在尝试将 passcodeDigit 更改为新数字之前,请确保关闭密码开关,因为即使您删除应用,密钥链也会保存您的旧密码,因此您必须在密钥链中清除旧密码,然后更改新数字进行测试。

5. 支持 iOS7 及更高版本。
在 iOS7 中,因为苹果尚未向开发者提供 TouchID API,因此仅使用密码进行认证。
理论介绍
主要类是 SmileAuthenticator。它有一个属性 SecurityType,该属性有四种类型:INPUT_ONCE、INPUT_TWICE、INPUT_THREE、INPUT_TOUCHID。这样的命名是为了显示用户输入的次数。
INPUT_ONCE: 当用户关闭密码开关时,用户只需输入一次密码即可关闭密码。
INPUT_TWICE: 当用户开启密码开关时,用户需要输入一次密码,并重新输入一次以确认匹配。
INPUT_THREE: 当用户更改密码时,用户需要输入一次旧密码,然后输入一次新密码,再重新输入一次以确认,总共三次。
INPUT_TOUCHID: 当用户打开应用时,用户可以使用指纹识别或输入密码来解锁。
使用 [[SmileAuthenticator sharedInstance] presentAuthViewController] 来显示认证视图。
如何将其用于您自己的项目?
步骤 1. SmileTouchID 通过 CocoaPods 可用。要安装它,请在您的 Podfile 中添加以下行
pod 'SmileTouchID'
或者,您可以将 SmileAuth 文件夹拖到您的项目中。
步骤 2. 将 SmileAuthenticator.h 导入到您的 AppDelegate.m 中,并在 didFinishLaunchingWithOptions 中添加以下行。
[SmileAuthenticator sharedInstance].rootVC = self.window.rootViewController;
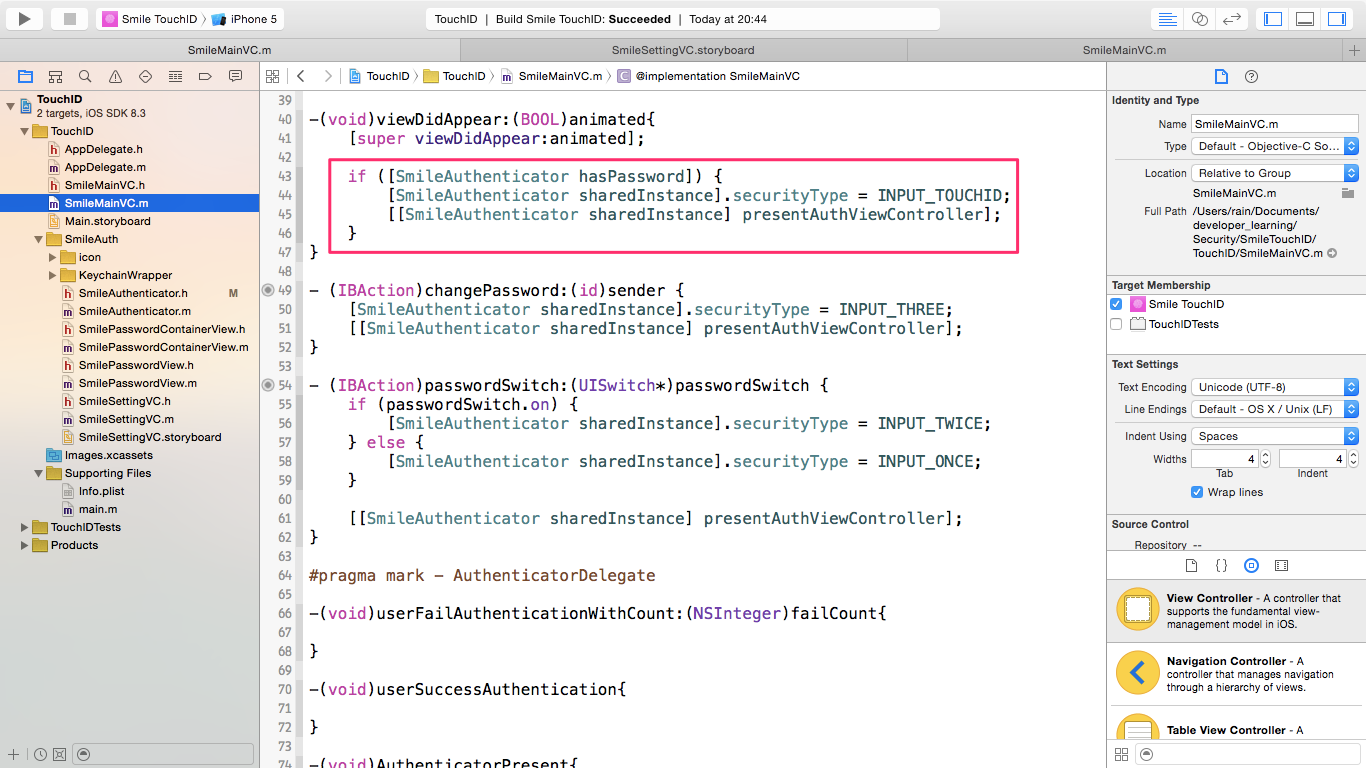
步骤 3. 在您项目的主视图控制器中,在 viewDidAppear: 中添加以下行。
if ([SmileAuthenticator hasPassword]) {
        [SmileAuthenticator sharedInstance].securityType = INPUT_TOUCHID;
        [[SmileAuthenticator sharedInstance] presentAuthViewController];
    }
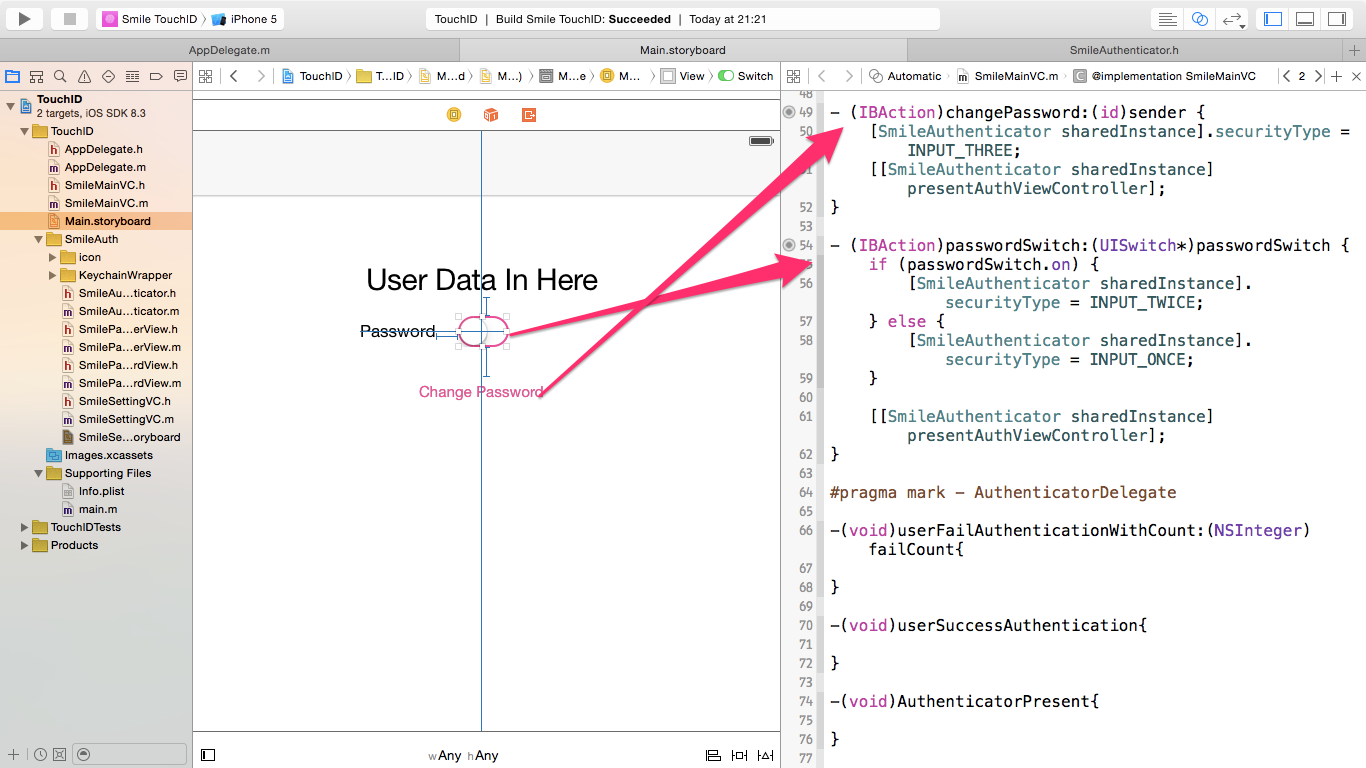
步骤 4. 使用交互式 UI 组件进行配置,设置适当的 securityType,然后调用 presentAuthViewController。
例如,以下图片展示了开关切换密码的开/关功能,当开关开启时,securityType 是 INPUT_TWICE,当关闭时,securityType 是 INPUT_ONCE。一个更改密码的按钮,其 securityType 是 INPUT_THREE。
- (IBAction)changePassword:(id)sender {
    [SmileAuthenticator sharedInstance].securityType = INPUT_THREE;
    [[SmileAuthenticator sharedInstance] presentAuthViewController];
}

- (IBAction)passwordSwitch:(UISwitch*)passwordSwitch {
    if (passwordSwitch.on) {
        [SmileAuthenticator sharedInstance].securityType = INPUT_TWICE;
    } else {
        [SmileAuthenticator sharedInstance].securityType = INPUT_ONCE;
    }

    [[SmileAuthenticator sharedInstance] presentAuthViewController];
}
在 viewWillAppear 中更新交互式 UI 组件。
例如,以下代码基于 [SmileAuthenticator hasPassword] 来更新开关和按钮。
-(void)viewWillAppear:(BOOL)animated{
    [super viewWillAppear:animated];

    if ([SmileAuthenticator hasPassword]) {
        self.mySwitch.on = YES;
        self.changePasswordButton.hidden = NO;
    } else {
        self.mySwitch.on = NO;
        self.changePasswordButton.hidden = YES;
    }
}
步骤 5. 构建您的项目,非常简单 :)
关于委托回调
SmileAuthenticator 有一个委托,可以获取更多关于认证过程的信息。
委托名称是 SmileAuthenticatorDelegate。它有四个可选方法。
@protocol SmileAuthenticatorDelegate <NSObject>
@optional
/*!The method is called when AuthViewController be presented*/
-(void)AuthViewControllerPresented;
@optional
/*!The method is called when AuthViewController be dismissed*/
-(void)AuthViewControllerDismssed;
@optional
/*!The method is called when user success authentication by using Touch ID & Passcode*/
-(void)userSuccessAuthentication;
@optional
/*!The method is called when authentication failed*/
-(void)userFailAuthenticationWithCount:(NSInteger)failCount;
@optional
/*!The method is called when user turn password on.*/
-(void)userTurnPasswordOn;
@optional
/*!The method is called when user turn password off.*/
-(void)userTurnPasswordOff;
@optional
/*!The method is called when user change password.*/
-(void)userChangePassword;
本地化
对此我们感到抱歉,但您需要自己完成。将以下行添加到您的 Localizable.strings。有关详细信息,请参阅示例演示应用。
/*
 UNIVERSAL PARTS
 */
"SMILE_REASON" = "Are you device owner?";
"SMILE_INPUT_FAILED" = "%ld Failed Passcode Attempt. Try again.";
"SMILE_INPUT_DESCRIPTION" = "Enter %ld digit passcode";
"SMILE_INPUT_NOT_MATCH" = "Passcode not match. Try again.";
"SMILE_INPUT_RE-ENTER" = "Re-enter your %ld digit Passcode";

/*
 INPUT_TOUCHID
 */
"SMILE_INPUT_TOUCHID_TITLE" = "Enter Passcode";


/*
 INPUT_ONCE
 */
"SMILE_INPUT_ONCE_TITLE" = "Turn off Passcode";


/*
 INPUT_TWICE
 */
"SMILE_INPUT_TWICE_TITLE" = "Set Passcode";


/*
 INPUT_THREE
 */
"SMILE_INPUT_THREE_TITLE" = "Change Passcode";
"SMILE_INPUT_THREE_STEP_1_DESCRIPTION" = "Enter your old %ld digit Passcode";
"SMILE_INPUT_THREE_STEP_2_DESCRIPTION" = "Enter your new %ld digit Passcode";
安全提示
由于 iOS 会自动截屏,因此当应用退出活动状态且用户已开启密码时,您可以使用覆盖图像遮盖 UI,以在用户双击主屏幕按钮,或应用进入后台时保护用户数据。
有关更多详细信息,请检查 示例项目。
- (void)applicationWillResignActive:(UIApplication *)application {
    if ([SmileAuthenticator hasPassword] && [SmileAuthenticator sharedInstance].isShowingAuthVC == NO) {
        [self showCoverImageView];
    }
}

- (void)applicationDidBecomeActive:(UIApplication *)application {
    if ([SmileAuthenticator hasPassword]) {
        //if now is authenticated, remove the cover image.
        if([SmileAuthenticator sharedInstance].isAuthenticated){
            [self removeCoverImageView];
        }
    }
}
贡献
- 热烈欢迎提交拉取请求。
联系方式
- 如果您有任何建议或发现问题,请与我联系。
- 电子邮件 liu044100@gmail.com
感谢
感谢 raywenderlich 关于 保护 iOS 用户数据 的教程,我从这篇教程中得到了启发。
许可协议
SmileTouchID 在 MIT 许可证下提供。有关更多信息,请参阅 LICENSE 文件。