ShapeView 


ShapeView 同时支持创建具有自定义形状、阴影和透明背景的视图。
安装
ShapeView 通过 CocoaPods 提供。要安装它,只需将以下行添加到您的 Podfile 中:
pod 'ShapeView'使用 ShapeView
ShapeView 支持以下属性。
path: ShapePath?outerShadow: ShapeShadowinnerShadow: ShapeShadoweffect: UIVisualEffect?effectAlpha: CGFloatbackgroundColor: UIColor?
要创建一个自定义形状,使用 .custom 按以下方式绘制形状。
view.path = .custom { [unowned view] in
    let labelHeight = view.frame.height - Const.height
    let radius = labelHeight / 2

    $0.move(to: CGPoint(x: radius, y: 0))
    $0.addArc(
        withCenter: CGPoint(x: view.frame.width - radius, y: radius),
        radius: radius,
        startAngle: -.pi / 2,
        endAngle: .pi / 2,
        clockwise: true
    )
    $0.addLine(to: CGPoint(x: Const.left + Const.height, y: labelHeight))
    $0.addLine(to: CGPoint(x: Const.left + Const.height / 2, y: view.frame.height))
    $0.addLine(to: CGPoint(x: Const.left, y: labelHeight))
    $0.addArc(
        withCenter: CGPoint(x: radius, y: radius),
        radius: radius,
        startAngle: .pi / 2,
        endAngle: -.pi / 2,
        clockwise: true
    )
}
使用准备好的形状
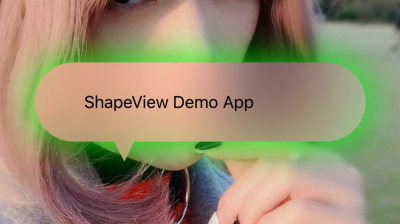
在演示应用中,使用上述代码创建了一个对话框视图。
以下形状已准备就绪。
corner(radius: CGFloat, bounds: @escaping GetBounds)
dialog(radius: CGFloat, arrowPosition: DialogArrowPosition, bounds: @escaping GetBounds)
cuteDialog(radius: CGFloat, arrowPosition: CuteDialogArrowPosition, bounds: @escaping GetBounds)
star(vertex: Int, extrusion: CGFloat = 10, bounds: GetBounds)
以下是创建对话框视图的演示。
view.path = .dialog(radius: 10, arrowPosition: .right(center: 50, width: 40, height: 20)) { [unowned self] in
    return self.bounds
}
view.outerShadow = ShapeShadow(
    radius: 10,
    color: .green,
    opacity: 1,
    offset: .zero
)
多个形状
ShapeView支持使用.multiple()方法添加多个形状,如下所示。
view.path = .multiple(
    .hollowCorner(radius: 12, outlineWidth: 2) { [unowned view] in
        view.bounds
    },
    .star(vertex: 5, extrusion: 20) { [unowned view] in
        view.bounds
    },
    .custom { [unowned view] in
        // Add a custom shape here.
    }
)
运行演示应用程序以获取更多信息。
使用ShapeLayer
我们为开发者提供了ShapeLayer,可以直接将其应用于自定义视图。
layerPath: ShapePath?var outerShadow: ShapeShadow?var innerShadow: ShapeShadow?effect: UIVisualEffect?effectAlpha: CGFloatvar didUpdateLayer: ((CAShapeLayer) -> Void)?var backgroundColor: CGColor?
当形状层完成绘制时,它会调用didUpdateLayer闭包来通知父视图。开发者可以使用闭包中的第一个参数来更新父视图。
关于实现
这部分介绍了我们如何实现ShapeView,如果不感兴趣,可以跳过。
为什么要自己实现
使用Apple提供的SDK在UIView中创建带有阴影和不透明背景的定制形状很困难。我们尝试直接在以下代码中将阴影添加到定制形状层中。
let shapeLayer = CAShapeLayer()
shapeLayer.path = shapePath.cgPath
shapeLayer.shadow = UIColor.green.cgColor
shapeLayer.shadowRadius = 10
shapeLayer.shadowOffset = .zero
shapeLayer.shadowOpacity = 1

ShapeShadow(
    radius: 10,
    color: .green,
    opacity: 1,
    offset: .zero
)
layer.masksToBounds = true- 使用遮罩
layer.mask = shapeLayer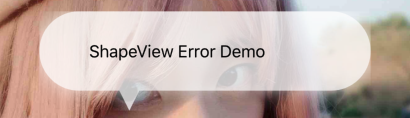
- 添加子层
layer.addSublayer(shapeLayer)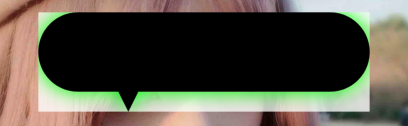
使用遮罩或添加子层无法实现我们演示屏幕截图中的效果。
结构
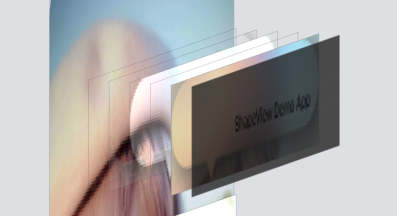
在ShapeLayer中,我们为形状和特效添加了阴影层,并为存储子视图添加了容器视图。如果开发者通过方法addSubview(_ view)将子视图添加到ShapeView中,我们会将其移动到容器视图中。
创建空心遮罩层
为了解决这个问题,我们需要自己创建一个空心遮罩层。首先,我们创建一个阴影层,并将其插入到shapeLayerView中。
let shadowLayer = CAShapeLayer()
shadowLayer.path = shapePath.cgPath
if shadowRadius > 0 && shadowColor != .clear {
    shadowLayer.shadowRadius = shadowRadius
    shadowLayer.shadowColor = shadowColor.cgColor
    shadowLayer.shadowOpacity = shadowOpacity
    shadowLayer.shadowOffset = shaowOffset
    shadowLayer.fillColor = shadowColor.cgColor
}
shadowLayerView.layer.sublayers?.forEach { $0.removeFromSuperlayer() }
shadowLayerView.layer.insertSublayer(shadowLayer, at: 0)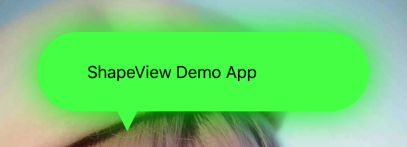
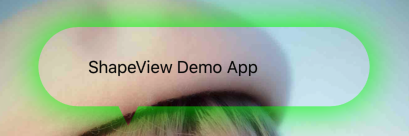
CAShapeLayer创建的阴影层是一个实心层。我们需要创建一个切割层,如以下屏幕截图中的红色区域,作为一个遮罩层来创建空心遮罩层。
let cutLayer = CAShapeLayer()
cutLayer.path = { () -> UIBezierPath in
    let path = UIBezierPath()
    path.append(shapePath)
    path.append(screenPath)
    path.usesEvenOddFillRule = true
    return path
}().cgPath
cutLayer.fillRule = .evenOdd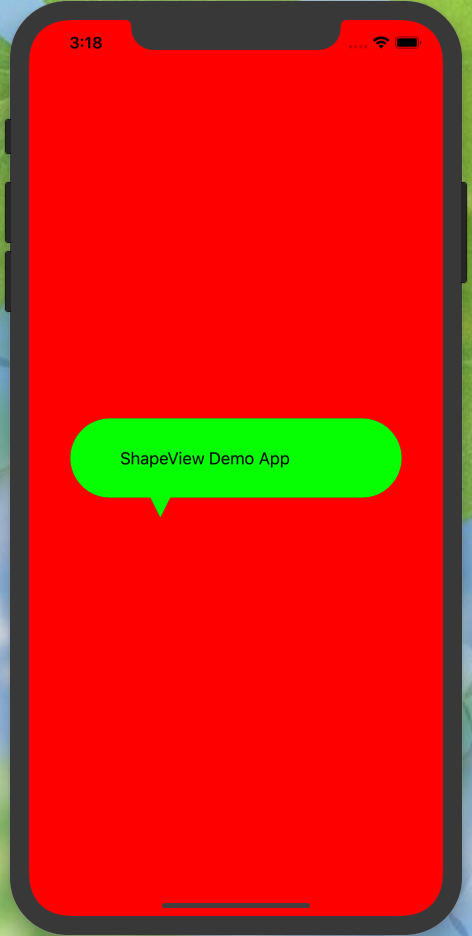
切割层的范围在形状的边界之外和屏幕的边界之内。创建切割层后,我们将它设置为阴影层视图的遮罩。
shadowLayerView.layer.mask = cutLayer通过为阴影层视图设置切割层,我们得到了一个带有阴影的空心形状视图,如图中所示。
接下来,我们在阴影视图上方创建一个容器视图,并使用相同的形状路径创建一个形状层,作为这个容器视图的遮罩。
let shapeLayer = CAShapeLayer()
shapeLayer.path = shapePath.cgPath
containerView.layer.mask = shapeLayer
上述介绍展示了如何创建外部阴影,创建内部阴影的方法与外部阴影相同。最后,我们得到了一个带有透明背景和阴影的自定义形状视图,如图例屏幕截图所示。
作者
lm2343635, [email protected]
许可
ShapeView可在MIT许可下获得。更多信息请参阅LICENSE文件。