Sceyt Chat UIKit for iOS
Sceyt Chat UIKit 是一个用于聊天集成的综合工具包。它包含了预建和可定制的 UI 组件,允许您以最少的编码量快速将功能丰富的聊天集成到您的 iOS 应用程序中。
目录
特性
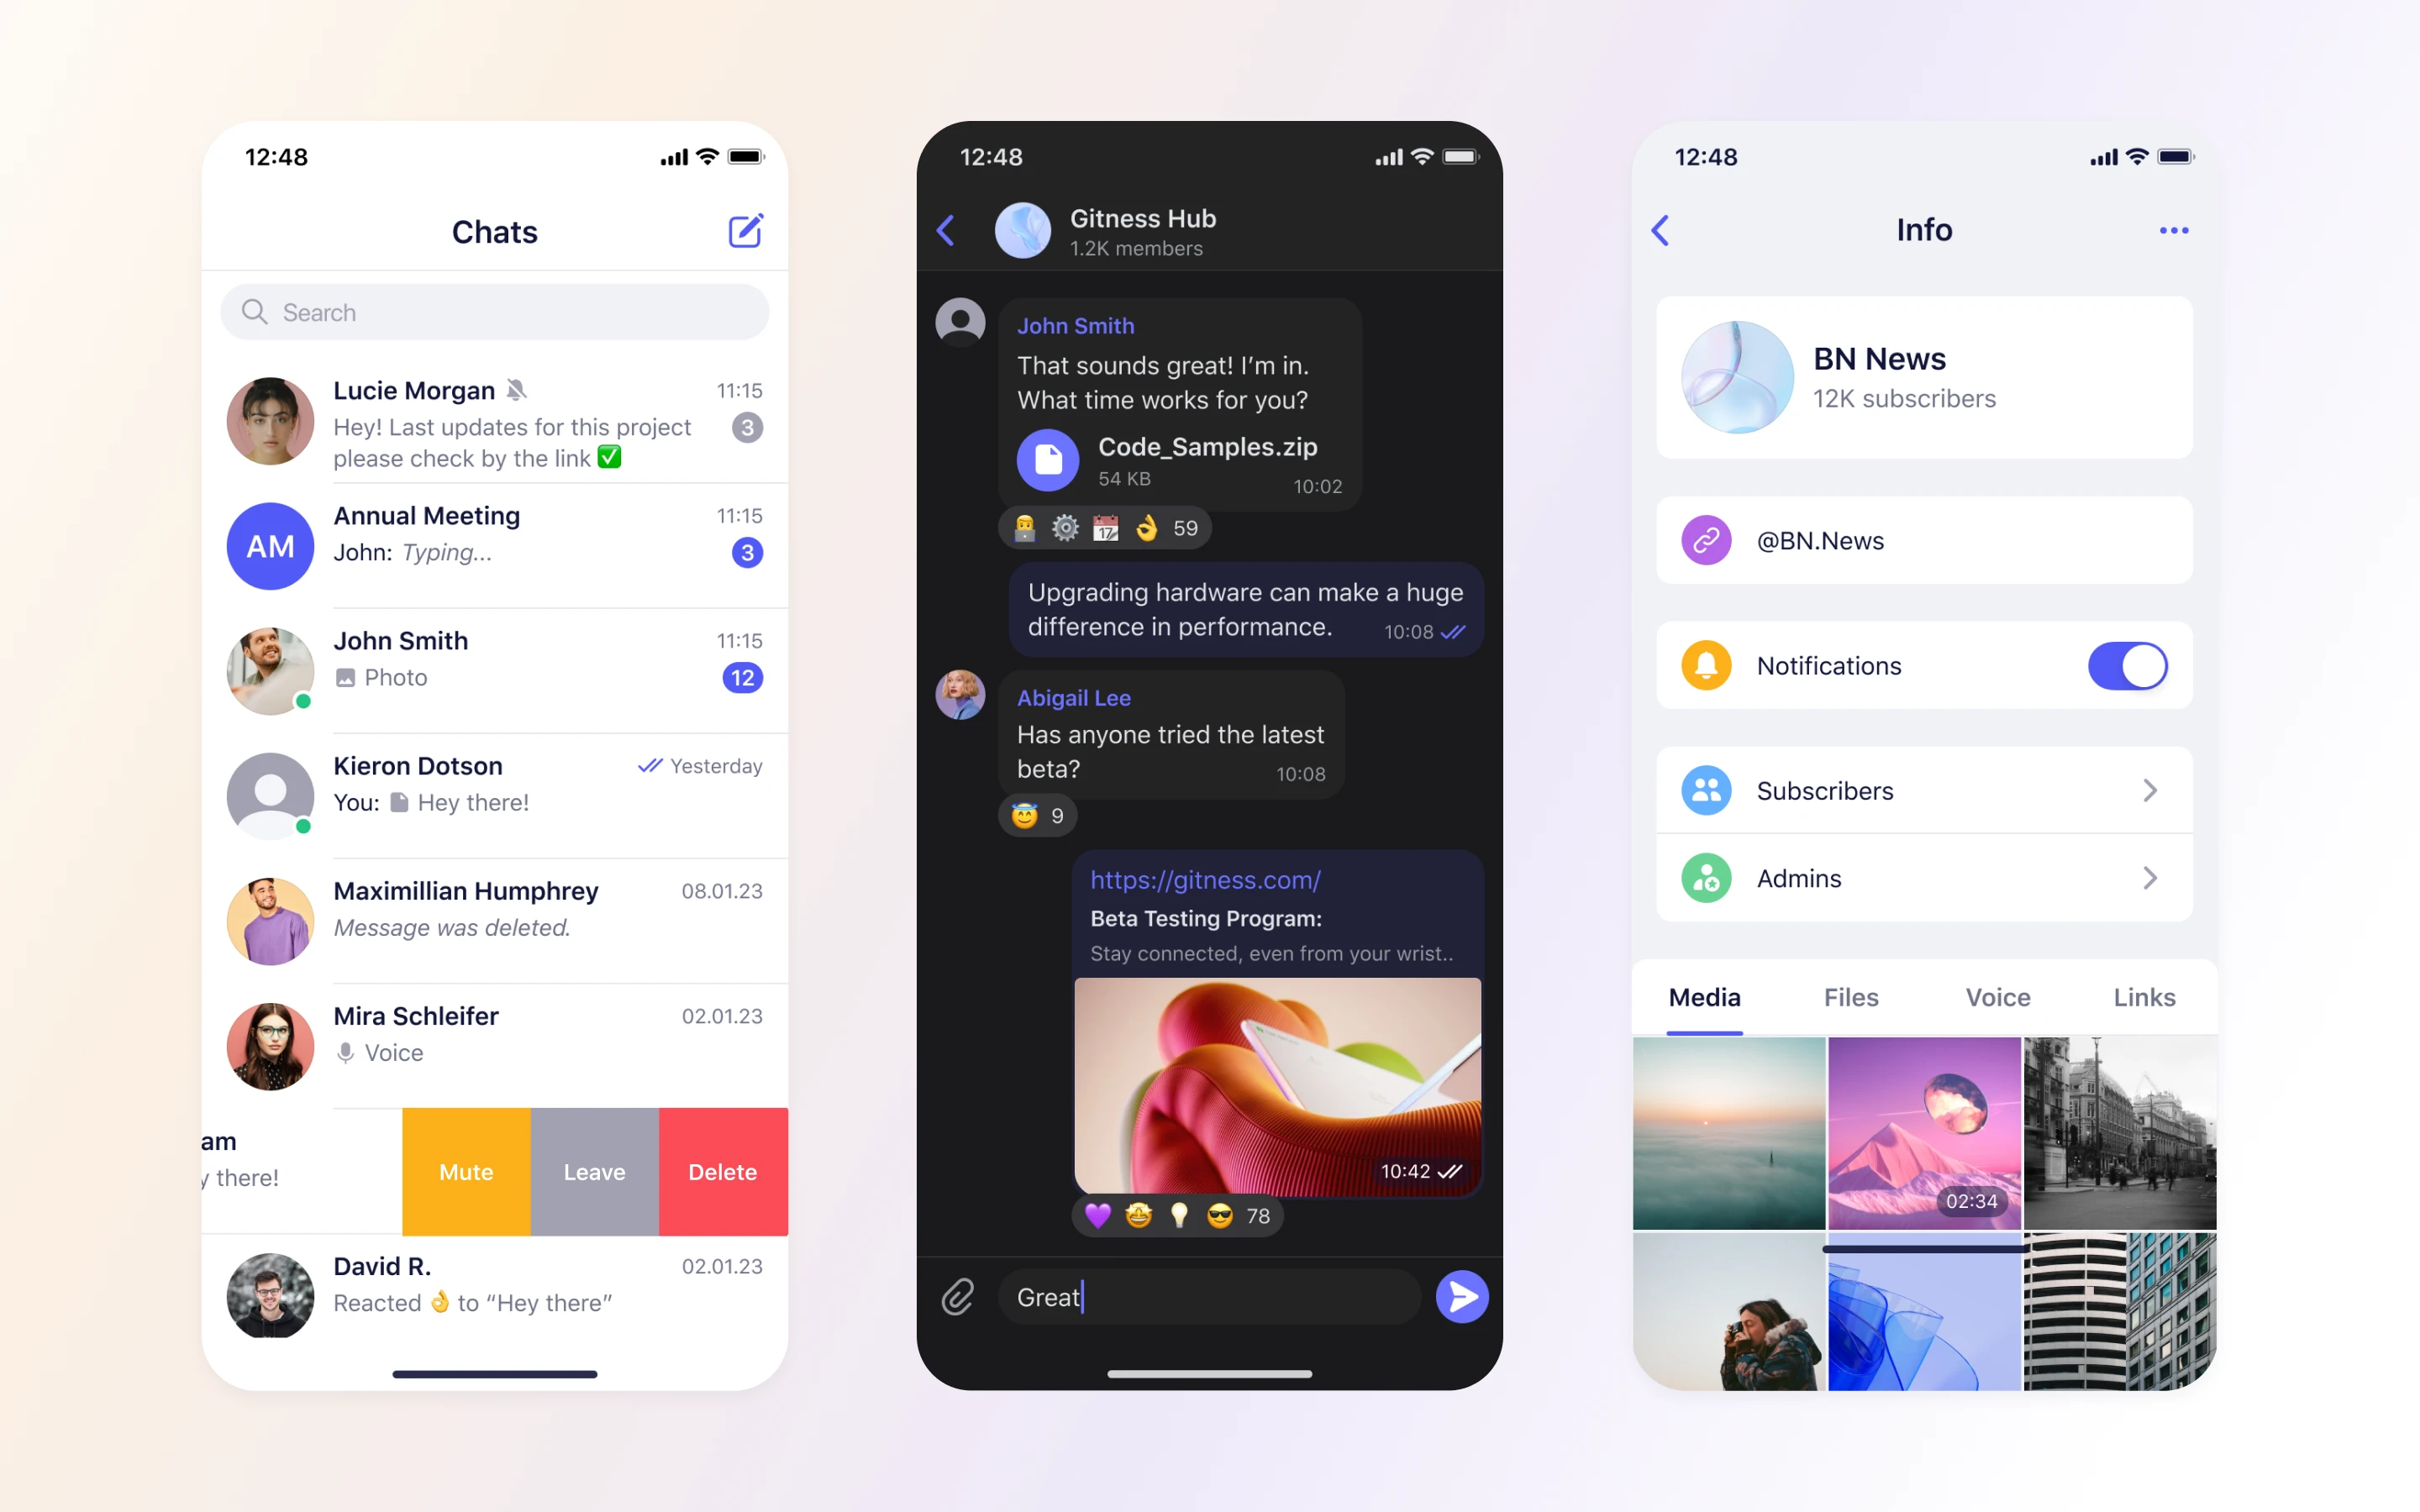
- 离线支持:当离线时自动存储消息和新聊天,并在重新连接时同步。
- 照片和视频缩放器:用于设备上的照片和视频缩放器,以便更快地发送,具有可调整的质量参数。
- 语音消息:内置语音消息录音和播放支持。
- 浅色和深色模式:支持两种主题,适应用户偏好以提供一致的用户体验。
需求
最低的iOS和Swift版本要求
- iOS 13+
- Swift 5.7+
安装
您可以使用多种依赖管理器将Sceyt Chat UI Kit集成到Swift iOS项目中。
Swift 包管理器
Sceyt Chat UI Kit作为Swift包提供。要将它添加到项目中,请按照以下步骤操作:
- 在Xcode中打开您的项目。
- 导航到您的项目设置。
- 转到“包依赖”选项卡。
- 单击"+"按钮添加新的包依赖。
- 输入以下URL:
https://github.com/sceyt/sceyt-chat-ios-uikit.git。 - 将Sceyt Chat UI Kit包添加到项目中。
CocoaPods
要使用CocoaPods将Sceyt Chat UIKit作为依赖项添加,请按照以下步骤操作:
- 确保您的系统已安装CocoaPods。
- 运行以下命令,在项目目录中创建一个Podfile(如果尚未创建):
pod init- 编辑Podfile以包含Sceyt Chat UIKit
platform :ios, '13.0'  # Specify your minimum iOS version if different

target 'YourApp' do
  use_frameworks!

  # Add Sceyt Chat UIKit as a dependency
  pod 'SceytChatUIKit', :git => 'https://github.com/sceyt/sceyt-chat-ios-uikit.git'
end- 运行以下命令安装依赖项:
pod install使用
在开始集成之前,强烈建议您探索我们的示例应用,了解Sceyt Chat UIKit如何在真实应用中初始化和使用。这些示例为集成过程提供了宝贵 insights。
- 在您的应用中的
AppDelegate或合适的位置使用您的Sceyt应用程序的API URL和应用ID初始化Sceyt Chat UIKit
func application(_ application: UIApplication, didFinishLaunchingWithOptions launchOptions: [UIApplication.LaunchOptionsKey: Any]?) -> Bool {

        // The URL of the Sceyt Chat application where UIKit app connects.
        let apiUrl = "API_URL"
        // The ID of the Sceyt Chat application used by the UIKit app.
        let appId = "APP_ID"

        SCTUIKitConfig.initialize(apiUrl: apiUrl, appId: appId)

        // Set the current user's ID.
        SCTUIKitConfig.currentUserId = "CURRENT_USER_ID"

        return true
}- 初始化Sceyt Chat UIKit并设置配置后,下一步是建立与Sceyt Chat API的连接。
func application(_ application: UIApplication, didFinishLaunchingWithOptions launchOptions: [UIApplication.LaunchOptionsKey: Any]?) -> Bool {

        // The user's access token for the Sceyt Chat API.
        let accessToken = "USER_ACCESS_TOKEN"

        SCTUIKitConfig.connect(accessToken: accessToken)

        return true
    }
自定义
基本
自定义Sceyt Chat UIKit的外观非常简单,可以使您根据自己的应用设计进行调整。您可以自定义字体、颜色、图标以及任何组件,包括频道和消息单元、消息输入文本框等。
以下的自定义可以在Sceyt Chat UIKit初始化期间应用,确保您的首选设置从开始就设置好了。以下是如何自定义各个方面的说明
func application(_ application: UIApplication, didFinishLaunchingWithOptions launchOptions: [UIApplication.LaunchOptionsKey: Any]?) -> Bool {

        ...

        SCTUIKitConfig.initialize(apiUrl: apiUrl, appId: appId)

        // Set the current user's ID.
        SCTUIKitConfig.currentUserId = "CURRENT_USER_ID"

        ...

        // To change the fonts used in the UIKit, you can use the `Appearance.Fonts` property.
        // For example, to set a custom font:
        Appearance.Fonts.regular = UIFont(name: "CUSTOM_FONT", size: 10)

        // Customizing colors is straightforward with the Appearance.Colors property.
        // For instance, to change the kit's blue color:
        Appearance.Colors.kitBlue = UIColor.blue

        // You can also replace icons or images by using the Appearance.Images property.
        // For example, to change the chat action camera icon:
        Appearance.Images.chatActionCamera = UIImage(named: "camera")

        return true
    }
综合
为了实现全面自定义,请在UIKit初始化期间创建自定义子类并重写相关函数。这允许您根据您的偏好调整默认值和外观。
class DemoChannelCell: ChannelCell {

    override func setupAppearance() {

        super.setupAppearance()

        messageLabel.textColor = .green
        subjectLabel.font = UIFont.systemFont(ofSize: 14)

    }

    override func deliveryStatusImage(message: ChatMessage?) -> UIImage? {

        guard let message = message, !message.incoming else { return nil }

        switch message.deliveryStatus {
        case .pending:
            return UIImage(named: "pendingMessage")
        case .sent:
            return UIImage(named: "sentMessage")
        case .received:
            return UIImage(named: "deliveredMessage")
        case .displayed:
            return UIImage(named: "readMessage")
        case .failed:
            return UIImage(named: "failedMessage")
        }
    }
}