SCRecorder 2.7.0
- 由
- Simon CORSIN
Objective-C中像Vine/Instagram一样的音频/视频录制和滤镜框架。
简要来说,以下是一些您可以做的事情的列表:
- 录制多个视频片段
- 轻松缩放/聚焦
- 移除您不希望保留的任何录制片段
- 将结果显示在方便的视频播放器中
- 使用可序列化的NSDictionary(在NSUserDefaults中工作)保存录制会话以供将来使用
- 使用Core Image添加可配置和可动画的视频滤镜
- 添加UIView作为叠加层,可以在视频上方渲染任何内容
- 使用您选择的微调合并和导出视频
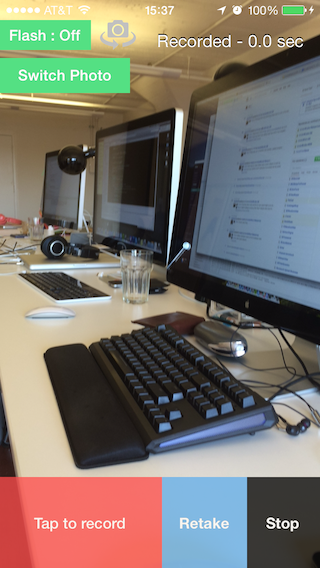
提供了iOS的示例。
想要在这个项目中创建过滤器更容易吗?请查看https://github.com/rFlex/CoreImageShop
需要的框架
- CoreVideo
- AudioToolbox
- GLKit
Podfile
如果您使用cocoapods,您可以按照以下Podfile使用此项目
platform :ios, '7.0'
pod 'SCRecorder'
手动安装
将SCRecorder.xcodeproject拖放到您的项目中。在您项目中,在“链接二进制与库”部分添加libSCRecorder.a依赖项到编译阶段(如示例所示)。
Swift
要在Swift中使用该项目,请遵循Podfile或手动安装说明(两者都适用于Swift)。然后,要使SCRecorder从Swift可访问,只需在桥接头中添加以下行
#import <SCRecorder/SCRecorder.h>简单快速
配置录制器
// Create the recorder
SCRecorder *recorder = [SCRecorder recorder]; // You can also use +[SCRecorder sharedRecorder]

// Start running the flow of buffers
if (![recorder startRunning]) {
    NSLog(@"Something wrong there: %@", recorder.error);
}

// Create a new session and set it to the recorder
recorder.session = [SCRecordSession recordSession];

// Begin appending video/audio buffers to the session
[recorder record];

// Stop appending video/audio buffers to the session
[recorder pause];SCRecorder是这个连接输入输出并处理音频和视频缓冲区,将它们追加到SCRecordSession中的主要类。
您可以在SCRecorder上直接配置输入设备设置(视频帧率,是否启用闪光灯等…)。
// Set the AVCaptureSessionPreset for the underlying AVCaptureSession.
recorder.captureSessionPreset = AVCaptureSessionPresetHigh;

// Set the video device to use
recorder.device = AVCaptureDevicePositionFront;

// Set the maximum record duration
recorder.maxRecordDuration = CMTimeMake(10, 1);

// Listen to the messages SCRecorder can send
recorder.delegate = self;您可以在各自的配置实例中配置视频、音频和图片的输出设置(SCVideoConfiguration、SCAudioConfiguration、SCPhotoConfiguration),并且可以像这样访问它们。
// Get the video configuration object
SCVideoConfiguration *video = recorder.videoConfiguration;

// Whether the video should be enabled or not
video.enabled = YES;
// The bitrate of the video video
video.bitrate = 2000000; // 2Mbit/s
// Size of the video output
video.size = CGSizeMake(1280, 720);
// Scaling if the output aspect ratio is different than the output one
video.scalingMode = AVVideoScalingModeResizeAspectFill;
// The timescale ratio to use. Higher than 1 makes a slow motion, between 0 and 1 makes a timelapse effect
video.timeScale = 1;
// Whether the output video size should be infered so it creates a square video
video.sizeAsSquare = NO;
// The filter to apply to each output video buffer (this do not affect the presentation layer)
video.filter = [SCFilter filterWithCIFilterName:@"CIPhotoEffectInstant"];

// Get the audio configuration object
SCAudioConfiguration *audio = recorder.audioConfiguration;

// Whether the audio should be enabled or not
audio.enabled = YES;
// the bitrate of the audio output
audio.bitrate = 128000; // 128kbit/s
// Number of audio output channels
audio.channelsCount = 1; // Mono output
// The sample rate of the audio output
audio.sampleRate = 0; // Use same input
// The format of the audio output
audio.format = kAudioFormatMPEG4AAC; // AAC

// Get the photo configuration object
SCPhotoConfiguration *photo = recorder.photoConfiguration;
photo.enabled = NO;
播放您的录音
SCRecorder提供了两个方便的类来播放视频/音频资产:SCPlayer和SCVideoPlayerView。
SCPlayer是AVPlayer的子类,增加了一些方法以便更易于使用。此外,它还添加了使用滤波器渲染器的能力,以及在视频上应用实时滤镜。
SCRecordSession *recordSession = ... // Some instance of a record session

// Create an instance of SCPlayer
SCPlayer *player = [SCPlayer player];

// Set the current playerItem using an asset representing the segments
// of an SCRecordSession
[player setItemByAsset:recordSession.assetRepresentingSegments];

UIView *view = ... // Some view that will get the video

// Create and add an AVPlayerLayer
AVPlayerLayer *playerLayer = [AVPlayerLayer playerLayerWithPlayer:player];
playerLayer.frame = view.bounds;
[view.layer.addSublayer:playerLayer];

// Start playing the asset and render it into the view
[player play];

// Render the video directly through a filter
SCFilterImageView *filterView = [[SCFilterImageView alloc] initWithFrame:view.bounds];
filterVieww.filter = [SCFilter filterWithCIFilterName:@"CIPhotoEffectInstant"];

player.SCImageView = filterView;

[view addSubview:filterView];
SCVideoPlayerView是UIView的子类,包含一个SCPlayer。视频缓冲区将直接在此视图中渲染。它消除了处理AVPlayerLayer创建的需要,使得在您的应用程序中播放视频变得非常容易。
SCRecordSession *recordSession = ... // Some instance of a record session

SCVideoPlayerView *playerView = // Your instance somewhere

// Set the current playerItem using an asset representing the segments
// of an SCRecordSession
[playerView.player setItemByAsset:recordSession.assetRepresentingSegments];

// Start playing the asset and render it into the view
[playerView.player play];
编辑您的录音
SCRecordSession从SCRecorder获取视频和音频缓冲区,并将它们附加到SCRecordSessionSegment上。SCRecordSessionSegment实际上就是一个连续的文件。当调用[SCRecorder pause]时,SCRecorder会请求SCRecordSession异步完成其当前的记录段。完成之后,该段将被添加到[SCRecordSession segments]数组中。SCRecorder还有带有完成处理器的[SCRecorder pause:]方法。在这个方法中,当SCRecordSession完成并添加了记录段到数组中时,将调用完成处理器。
您可以在SCRecordSession中轻松地添加/删除段。您也可以将所有段合并成单个文件。
SCRecordSession *recordSession = ... // An SCRecordSession instance

// Remove the last segment
[recordSession removeLastSegment];

// Add a segment at the end
[recordSession addSegment:[SCRecordSessionSegment segmentWithURL:anURL info:nil]];

// Get duration of the whole record session
CMTime duration = recordSession.duration;

// Get a playable asset representing all the record segments
AVAsset *asset = recordSession.assetRepresentingSegments;

// Get some information about a particular segment
SCRecordSessionSegment *segment = [recordSession.segments firstObject];

// Get thumbnail of this segment
UIImage *thumbnail = segment.thumbnail;

// Get duration of this segment
CMTime duration = segment.duration;
导出您的录音
基本上有两种方法可以导出SCRecordSession。
首先,您可以使用[SCRecordSession mergeSegmentsUsingPreset:completionHandler:]方法。此方法接收一个AVAssetExportPreset作为参数,并在幕后使用AVAssetExportSession。虽然这是合并记录段最快、最简单的方法,但它也无需配置输出设置。
// Merge all the segments into one file using an AVAssetExportSession
[recordSession mergeSegmentsUsingPreset:AVAssetExportPresetHighestQuality completionHandler:^(NSURL *url, NSError *error) {
    if (error == nil) {
        // Easily save to camera roll
        [url saveToCameraRollWithCompletion:^(NSString *path, NSError *saveError) {

        }];
    } else {
        NSLog(@"Bad things happened: %@", error);
    }
}];您还可以使用SCAssetExportSession,它是AVAssetExportSession在SCRecorder中的对应项。它提供了很多选项,比如配置比特率、输出视频大小、添加滤镜、添加水印等。这以稍微更多的配置和更长的处理时间为代价。像SCRecorder一样,SCAssetExportSession也包含一个SCVideoConfiguration和一个SCAudioConfiguration的实例(这不是很令人惊讶吗?)。
AVAsset *asset = session.assetRepresentingSegments;
SCAssetExportSession assetExportSession = [[SCAssetExportSession alloc] initWithAsset:asset];
assetExportSession.outputUrl = recordSession.outputUrl;
assetExportSession.outputFileType = AVFileTypeMPEG4;
assetExportSession.videoConfiguration.filter = [SCFilter filterWithCIFilterName:@"CIPhotoEffectInstant"];
assetExportSession.videoConfiguration.preset = SCPresetHighestQuality;
assetExportSession.audioConfiguration.preset = SCPresetMediumQuality;
[assetExportSession exportAsynchronouslyWithCompletionHandler: ^{
    if (assetExportSession.error == nil) {
        // We have our video and/or audio file
    } else {
        // Something bad happened
    }
}];
创建/操作滤镜
SCRecorder提供了一个基于Core Image的滤镜API。SCFilter是封装CIFilter的类。每个滤镜也可以有一个子滤镜链。当通过滤镜处理图片时,首先处理其所有子滤镜,然后是滤镜本身。SCFilter可以直接保存到文件,并从这个文件恢复。
SCFilter *blackAndWhite = [SCFilter filterWithCIFilterName:@"CIColorControls"];
[blackAndWhite setParameterValue:@0 forKey:@"inputSaturation"];

SCFilter *exposure = [SCFilter filterWithCIFilterName:@"CIExposureAdjust"];
[exposure setParameterValue:@0.7 forKey:@"inputEV"];

// Manually creating a filter chain
SCFilter *filter = [SCFilter emptyFilter];
[filter addSubFilter:blackAndWhite];
[filter addSubFilter:exposure];

SCVideoConfiguration *videoConfiguration = ... // A video configuration

videoConfiguration.filter = blackAndWhite; // Will render a black and white video
videoConfiguration.filter = exposure; // Will render a video with less exposure
videoConfiguration.filter = filter; // Will render a video with both black and white and less exposure

// Saving to a file
NSError *error = nil;
[filter writeToFile:[NSURL fileUrlWithPath:@"some-url.cisf"] error:&error];
if (error == nil) {

}

// Restoring the filter group
SCFilter *restoredFilter = [SCFilter filterWithContentsOfUrl:[NSURL fileUrlWithPath:@"some-url.cisf"]];

// Processing a UIImage through the filter
UIImage *myImage = ... // Some image
UIImage *processedImage = [restoredFilter UIImageByProcessingUIImage:myImage];

// Save it to the photo library
[processedImage saveToCameraRollWithCompletion: ^(NSError *error) {

}];如果您想轻松地创建自己的滤镜,还可以查看CoreImageShop,这是一个Mac应用程序,可以直接生成可用于该项目的滤镜类中的序列化SCFilter。
使用滤镜
SCFilter 可以用于视图以实时渲染过滤后的图像,或者用于处理对象将滤镜渲染到文件。您可以使用 SCFilter 之一以下类
- SCVideoConfiguration(处理)
- SCImageView(实时渲染)
- SCSwipeableFilterView(实时渲染)
滤镜动画
可以动画化 SCFilter 的参数。例如,您可以逐步模糊视频。为此,您需要在 SCFilter 中添加动画。动画由 SCFilterAnimation 表示,这是一个表示从起始值到结束值斜率的模型对象,在给定时间开始应用,并在指定时间内完成。
一些示例
// Fade from completely blurred to sharp at the beginning of the video
SCFilter *blurFadeFilter = [SCFilter filterWithCIFilterName:@"CIFilterGaussianBlur"];
[blurFadeFilter addAnimationForPameterKey:kCIInputRadiusKey startValue:@100 endValue:@0 startTime:0 duration:0.5];

// Make the video instantly become black and white at 2 seconds for 1 second
SCFilter *blackAndWhite = [SCFilter filterWithCIFilterName:@"CIColorControls"];
[blackAndWhite addAnimationForParameterKey:kCIInputSaturationKey startValue:@1 endValue:@1 startTime:0 duration:2];
[blackAndWhite addAnimationForParameterKey:kCIInputSaturationKey startValue:@0 endValue:@0 startTime:2 duration:1];
[blackAndWhite addAnimationForParameterKey:kCIInputSaturationKey startValue:@1 endValue:@1 startTime:3 duration:1];
关于其他提供类的详细信息
SCRecorderToolsView
可配置的视图,可以有一个 SCRecorder 实例,并处理触摸对焦、捏合缩放。
SCImageView
一个类,可以通过 EAGL、Metal 或 CoreGraphics 渲染 CIImage。这个类旨在用于 CIImage 的实时渲染。如果您想通过子类继承更改渲染,可以重写 renderedCIImageInRect:。
SCFilterImageView
SCImageView 的一个子类,可以拥有一个滤镜。它使用 SCFilter 渲染输入 CIImage(如果有的话)。
SCSwipeableFilterView
SCImageView 的一个子类,它有一个滚动视图和 SCFilter 的列表。它允许用户在滤镜之间滚动,以便选择一个。可以通过 -[SCSwipeableFilterView selectedFilter] 获取选定的滤镜。这基本上与 Snapchat 组合页的工作方式相同。
SCPlayer
基于 Apple AVPlayer 的播放器。它添加了一些便利方法,并提供了一种使用 CIImageRenderer 来渲染视频图像缓冲区的方法。您可以将此类与 CIImageRenderer 结合使用,以在视频上渲染实时滤镜。
SCVideoPlayerView
一种可以轻松渲染 SCPlayer 的视图。它支持触摸播放/暂停。默认情况下,它自己持有 SCPlayer 实例并共享此 SCPlayer 的生命周期。您可以通过调用 +[SCVideoPlayerView setAutoCreatePlayerWhenNeeded:NO] 禁用此功能。