Porcupine


由位于加拿大温哥华的 Picovoice 制造


Porcupine 是一个高精度且轻量级的唤醒词引擎。它能够构建始终聆听的语音应用程序。它
- 使用在真实环境中训练的深度神经网络。
- 紧凑且计算效率高。非常适合物联网。
- 跨平台
- Arm Cortex-M、STM32、Arduino 和 i.MX RT
- Raspberry Pi、NVIDIA Jetson Nano 和 BeagleBone
- Android 和 iOS
- Chrome、Safari、Firefox 和 Edge
- Linux (x86_64)、macOS (x86_64、arm64) 和 Windows (x86_64)
- 可扩展。它可以检测多个始终聆听的语音命令,而无需增加运行时占用。
- 自助服务。开发者可以使用 Picovoice 控制台 训练自定义唤醒词模型。
目录
使用场景
如果您需要检测一个或少数静态(始终监听)语音命令,Porcupine是合适的产品。
- 如果您想创建类似于Alexa或Google的语音体验,请参阅Picovoice平台。
- 如果您需要在特定领域理解复杂和自然表达的语言命令,请参阅Rhino语音到意图引擎。
试用
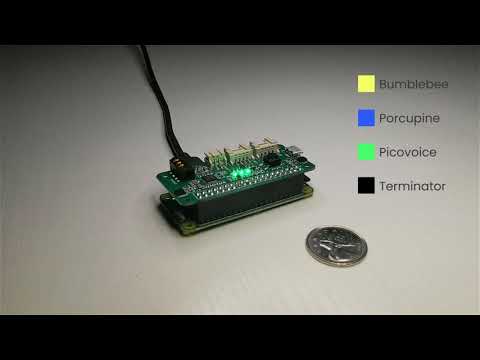
-
Porcupine在Raspberry Pi Zero上
语言支持
- 阿拉伯语、荷兰语、英语、波斯语、法语、德语、印地语、意大利语、日语、韩语、普通话、波兰语、葡萄牙语、俄语、西班牙语、瑞典语和越南语
- 可以针对商业客户逐案提供对其他语言的支持。
性能
在这里提供了Porcupine与其他两个常用库(PocketSphinx和Snowboy)在准确性和运行时间指标上的比较。与这两者的最佳性能引擎相比,Porcupine在Raspberry Pi 3上具有11.0倍的准确性和6.5倍的速度。
演示
如果使用SSH,使用以下命令克隆仓库:
git clone --recurse-submodules [email protected]:Picovoice/porcupine.git如果使用HTTPS,使用以下命令克隆仓库:
git clone --recurse-submodules https://github.com/Picovoice/porcupine.gitPython演示
安装演示包
sudo pip3 install pvporcupinedemo确保你的设备已连接一个工作状态下的麦克风,然后在终端运行以下命令
porcupine_demo_mic --access_key ${ACCESS_KEY} --keywords porcupine引擎开始实时处理麦克风的音频输入,并在检测到“Porcupine”发音时将输出输出到终端。
有关Python演示的更多信息,请访问demo/python。
.NET演示
从demo/dotnet/PorcupineDemo运行以下命令构建演示
dotnet build -c MicDemo.Release确保你的设备已连接一个工作状态下的麦克风。从demo/dotnet/PorcupineDemo运行以下命令
dotnet run -c MicDemo.Release -- \
--access_key ${ACCESS_KEY} \
--keywords porcupine
引擎开始实时处理麦克风的音频输入,并在检测到“Porcupine”发音时将输出输出到终端。
有关.NET演示的更多信息,请访问demo/dotnet。
Java演示
确保你的设备已连接一个工作状态下的麦克风。然后在终端调用以下命令
cd demo/java
./gradlew build
cd build/libs
java -jar porcupine-mic-demo.jar -a ${ACCESS_KEY} -k porcupine
引擎开始实时处理麦克风的音频输入,并在检测到“Porcupine”发音时将输出输出到终端。
有关Java演示的更多信息,请访问demo/java。
Go 示例
示例需要 cgo,在 Windows 上可能意味着您需要安装 gcc 编译器,例如 Mingw,以正确构建它。
从 demo/go 在终端中运行以下命令以构建和运行语音识别示例
go run micdemo/porcupine_mic_demo.go \
-access_key "${ACCESS_KEY}" \
-keywords porcupine
当检测到单词 Porcupine 的语音时,该引擎将在实时中实时处理麦克风输入并在终端输出
有关 Go 示例的更多信息,请访问 demo/go。
Unity 示例
要运行 Porcupine Unity 示例,请将 Porcupine Unity 包 导入到您的项目中,打开 PorcupineDemo 场景并播放。要在其他平台或播放器上运行,请转到 文件 > 构建设置,选择您的平台,然后单击 构建和运行 按钮。
要浏览示例源,请访问 demo/unity。
Flutter 示例
要使用 Flutter 在 Android 或 iOS 上运行 Porcupine 示例,必须在您系统中安装 Flutter SDK。安装后,您可以通过运行 flutter doctor 确定您平台的相关其他缺失要求。环境设置好后,开启模拟器或连接 Android/iOS 设备。
使用语言代码运行 demo/flutter 中的 prepare_demo 脚本来设置您选择的示例语言(例如,de -> 德语,ko -> 韩语)。要查看可用语言列表,请不带语言代码运行 prepare_demo。
dart scripts/prepare_demo.dart ${LANGUAGE}请在 lib/main.dart 文件中更换您的 AccessKey
final String accessKey = "{YOUR_ACCESS_KEY_HERE}"; // AccessKey obtained from Picovoice Console (https://console.picovoice.ai/)从 demo/flutter 运行以下命令以在设备上构建和部署示例
flutter runReact Native 示例
要运行 React Native Porcupine 示例应用程序,您首先需要设置 React Native 环境。有关详细信息,请参阅React Native 文档。
在 App.tsx 文件中替换您的 AccessKey
_accessKey: string ="${YOUR_ACCESS_KEY_HERE}" // AccessKey obtained from Picovoice Console (https://console.picovoice.ai/)导航到 demo/react-native 运行以下命令
对于 Android
yarn android-install          # sets up environment
yarn android-run ${LANGUAGE}  # builds and deploys to Android
对于 iOS
yarn ios-install              # sets up environment
yarn ios-run ${LANGUAGE}      # builds and deploys to iOS
将 ${LANGUAGE} 替换为您选择的语言代码(例如,de -> 德国,ko -> 韩语)。要查看可用语言的列表,请在没有语言代码的情况下运行 android-run 或 ios-run 命令。
Android 示例
使用 Android Studio 打开 demo/android/Activity 作为 Android 项目,将您的 AccessKey 复制到 MainActivity.java,选择所需的构建变体(构建 > 选择构建变体...),然后运行应用程序。
要了解如何在长时间运行的服务中使用 Porcupine,请访问 demo/android/Service。
要了解如何使用 Android 语音识别功能与 Porcupine 结合使用,请参阅 demo/android/STT。
iOS 示例
后台服务示例运行后台音频录制,即使在应用程序 不在焦点 时,也能检测到唤醒词,并保持在后台运行。前台应用程序示例只在应用程序 聚焦 时运行唤醒词检测。
BackgroundService 示例
要运行示例,请访问 demo/ios/BackgroundService 并运行
pod install将文件 ViewController.swift 中的 let accessKey = "${YOUR_ACCESS_KEY_HERE}" 替换为您的 accessKey。
然后,使用 Xcode 打开生成的 PorcupineBackgroundServiceDemo.xcworkspace 并运行应用程序。
ForegroundApp 示例
要运行前台应用程序示例
- 转到 ForegroundApp 目录。然后运行
pod install-
在 XCode 中打开
PorcupineForegroundAppDemo.xcworkspace -
将文件 ViewController.swift 中的
let accessKey = "${YOUR_ACCESS_KEY_HERE}"替换为您的AccessKey。 -
转到
产品 > 方案并选择您想要演示的语言方案(例如arDemo-> 阿拉伯演示,deDemo-> 德语演示) -
使用模拟器或连接的 iOS 设备运行演示
该演示允许您选择预构建的关键词进行检测。按“开始”并说出所选的关键词。
Web 示例
原生 JavaScript 和 HTML
从 demo/web 在终端运行以下命令
yarn
yarn start ${LANGUAGE}
(或)
npm install
npm run start ${LANGUAGE}
在您的浏览器中打开 https://:5000 以尝试演示。
Angular 演示
从 demo/angular 在终端中运行以下命令
yarn
yarn start ${LANGUAGE}
(或)
npm install
npm run start ${LANGUAGE}
在浏览器中打开 https://:4200 以尝试演示。
React 演示
从 demo/react 在终端中运行以下命令
yarn
yarn start ${LANGUAGE}
(或)
npm install
npm run start ${LANGUAGE}
在浏览器中打开 https://:3000 以尝试演示。
Vue 演示
从 demo/vue 在终端中运行以下命令
yarn
yarn start ${LANGUAGE}
(或)
npm install
npm run start ${LANGUAGE}
在浏览器中打开 https://:8080 以尝试演示。
NodeJS 演示
安装演示包
yarn global add @picovoice/porcupine-node-demo确保你的设备已连接一个工作状态下的麦克风,然后在终端运行以下命令
ppn-mic-demo --access_key ${ACCESS_KEY} --keywords porcupine引擎开始实时处理麦克风的音频输入,并在检测到“Porcupine”发音时将输出输出到终端。
有关 NodeJS 演示的更多信息,请访问 demo/nodejs。
Rust 示例
此示例打开来自麦克风的音频流,并检测给定的唤醒词“Picovoice”的发音。从demo/rust/micdemo中打开默认麦克风并检测“Picovoice”的出现。
cargo run --release -- --access_key ${ACCESS_KEY} --keywords picovoice了解更多关于 Rust 示例的信息,请访问 demo/rust。
C 示例
C 示例需要版本 3.4 或更高版本的 CMake。
Windows 需要 MinGW 来构建演示。
麦克风示例
在存储库的根目录下,构建命令为:
cmake -S demo/c/. -B demo/c/build && cmake --build demo/c/build --target porcupine_demo_micLinux (x86_64), macOS (x86_64), Raspberry Pi, BeagleBone, and Jetson
使用以下命令列出输入音频设备:
./demo/c/build/porcupine_demo_mic --show_audio_devices使用以下命令运行演示:
./demo/c/build/porcupine_demo_mic -l ${LIBRARY_PATH} -m lib/common/porcupine_params.pv \
-k resources/keyword_files/${PLATFORM}/porcupine_${PLATFORM}.ppn -t 0.5 \
-d ${AUDIO_DEVICE_INDEX} -a ${ACCESS_KEY}
将 ${LIBRARY_PATH} 替换为在 lib 下的适当库的路径,将 ${PLATFORM} 替换为您正在运行的平台名称(linux、raspberry-pi、mac、beaglebone 或 jetson),将 ${AUDIO_DEVICE_INDEX} 替换为您的音频设备的索引,将 ${ACCESS_KEY} 替换为您的访问密钥。
Windows
使用以下命令列出输入音频设备:
.\\demo\\c\\build\\porcupine_demo_mic.exe --show_audio_devices使用以下命令运行演示:
.\\demo\\c\\build\\porcupine_demo_mic.exe ^
-l lib/windows/amd64/libpv_porcupine.dll ^
-m lib/common/porcupine_params.pv ^
-k resources/keyword_files/windows/porcupine_windows.ppn ^
-t 0.5 ^
-d ${AUDIO_DEVICE_INDEX} ^
-a ${ACCESS_KEY}
将 ${AUDIO_DEVICE_INDEX} 替换为您的音频设备的索引,将 ${ACCESS_KEY} 替换为您的 AccessKey。
演示程序打开音频流并检测 Porcupine 的语音。
文件演示
在存储库的根目录下,构建命令为:
cmake -S demo/c/. -B demo/c/build && cmake --build demo/c/build --target porcupine_demo_fileLinux (x86_64), macOS (x86_64), Raspberry Pi, BeagleBone, 和 Jetson
使用以下命令运行演示:
./demo/c/build/porcupine_demo_file -l ${LIBRARY_PATH} -m lib/common/porcupine_params.pv \
-k resources/keyword_files/${PLATFORM}/porcupine_${PLATFORM}.ppn -t 0.5 \
-w resources/audio_samples/multiple_keywords.wav -a ${ACCESS_KEY}
将 ${LIBRARY_PATH} 替换为 lib 下的合适库的路径,将 ${PLATFORM} 替换为您正在运行的平台名称(《linux》、“《raspberry-pi》”、“《mac》”、“《beaglebone》” 或 “《jetson》”),并将 ${ACCESS_KEY} 替换为您的 AccessKey。
Windows
使用以下命令运行演示:
.\\demo\\c\\build\\porcupine_demo_file.exe ^
-l lib/windows/amd64/libpv_porcupine.dll ^
-m lib/common/porcupine_params.pv ^
-k resources/keyword_files/windows/porcupine_windows.ppn ^
-t 0.5 ^
-w resources/audio_samples/multiple_keywords.wav ^
-a ${ACCESS_KEY}
将 ${ACCESS_KEY} 替换为您的 AccessKey。
演示程序打开文件并检测 Porcupine 的语音。
有关 C 演示的更多信息,请访问 demo/c。
微控制器演示
mcu 演示文件夹内部包含针对各种开发板的多个项目。
SDKs
Python
安装 Python SDK
pip3 install pvporcupineSDK 提供了一个工厂方法来创建引擎实例
import pvporcupine

# AccessKey obtained from Picovoice Console (https://console.picovoice.ai/)
access_key = "${ACCESS_KEY}"

handle = pvporcupine.create(access_key=access_key, keywords=['picovoice', 'bumblebee'])
keywords 参数用于访问随库提供的默认关键字文件。可用的默认关键字文件可以通过以下方式获取:
import pvporcupine

print(pvporcupine.KEYWORDS)
如果您想使用非默认的关键字文件,您需要识别其路径
import pvporcupine

# AccessKey obtained from Picovoice Console (https://console.picovoice.ai/)
access_key = "${ACCESS_KEY}"

handle = pvporcupine.create(
    access_key=access_key,
    keyword_paths=['path/to/non/default/keyword/file'])
初始化时,可以使用 handle.sample_rate 获取有效采样率。所需的帧长度(输入数组中的音频样本数)是 handle.frame_length。该对象可用于以下方式监控传入的音频
import pvporcupine

# AccessKey obtained from Picovoice Console (https://console.picovoice.ai/)
access_key = "${ACCESS_KEY}"

handle = pvporcupine.create(access_key=access_key, keywords=['porcupine'])

def get_next_audio_frame():
    pass

while True:
    keyword_index = handle.process(get_next_audio_frame())
    if keyword_index >= 0:
        # Insert detection event callback here
        pass
最后,完成时务必显式使用 handle.delete() 释放资源。
.NET
使用 NuGet 或 dotnet CLI 安装 .NET SDK
dotnet add package PorcupineSDK 提供了一个工厂方法来创建引擎实例
using Pv;

const string accessKey = "${ACCESS_KEY}";
var keyword = new List<BuiltInKeyword> { BuiltInKeyword.PICOVOICE };

Porcupine handle = Porcupine.FromBuiltInKeywords(accessKey, keyword);
使用 FromBuiltInKeywords 构造函数可以将 Porcupine 引擎初始化为检测库中提供的任何免费内置关键字。这些内置关键字通过 BuiltInKeyword 枚举表示。
如果您要使用自定义关键字文件(例如,由 Picovoice 控制台生成的带 .ppn 扩展名的关键字文件),您需要指定其路径
const string accessKey = "${ACCESS_KEY}";
var keywordPaths = new List<string> {
    "/absolute/path/to/keyword/one",
    "/absolute/path/to/keyword/two",
    ... }

Porcupine handle = Porcupine.FromKeywordPaths(accessKey, keywordPaths);
初始化后,可以使用 handle.SampleRate 获取所需的采样率。期望的帧长(输入数组中的音频样本数)是 handle.FrameLength。该对象可以用来监控传入的音频如下所示
short[] getNextAudioFrame()
{
    // .. get a frame of audio
    return audioFrame;
}

while(true)
{
    var keywordIndex = handle.Process(getNextAudioFrame())
    if(keywordIndex >= 0)
    {
        // .. Insert detection event callback here
    }
}
Porcupine 将由垃圾回收器释放资源,但为了在使用后立即释放资源,请将其包裹在 using 语句中
using(Porcupine handle = Porcupine.FromBuiltInKeywords(
    accessKey,
    new List<BuiltInKeyword> { BuiltInKeyword.PICOVOICE }))
{
    // .. Porcupine usage here
}
Java
Porcupine Java 绑定可以从 Maven Central 仓库中的 ai.picovoice:porcupine-java:${version} 获取。
import ai.picovoice.porcupine.*;

// AccessKey obtained from Picovoice Console (https://console.picovoice.ai/)
final String accessKey = "${ACCESS_KEY}";
try {
    Porcupine handle = new Porcupine.Builder()
                        .setAccessKey(accessKey)
                        .setBuiltInKeyword(BuiltInKeyword.PORCUPINE)
                        .build();
} catch (PorcupineException e) { }
setBuiltInKeyword() 构造函数参数是访问随包一起提供的内置关键字模型文件的简写。
内置关键字列表可在 BuiltInKeyword 枚举中找到,可以通过以下方式获取
import ai.picovoice.porcupine.*;

for(BuiltInKeyword keyword : BuiltInKeyword.values()) {
    System.out.println(keyword.name());
}
如果您要使用自定义关键字文件(例如,由 Picovoice 控制台生成的带 .ppn 扩展名的关键字文件),您需要像以下示例所示指定文件路径
import ai.picovoice.porcupine.*;

// AccessKey obtained from Picovoice Console (https://console.picovoice.ai/)
final String accessKey = "${ACCESS_KEY}";
try {
    Porcupine handle = new Porcupine.Builder()
                        .setAccessKey(accessKey)
                        .setKeywordPath("path/to/custom/keyword/file")
                        .build();
} catch (PorcupineException e) { }
初始化后,可以使用 handle.getSampleRate() 获取有效的采样率。期望的帧长(输入数组中的音频样本数)是 handle.getFrameLength()。该对象可以用来监控传入的音频如下所示
short[] getNextAudioFrame() {
    // .. get audioFrame
    return audioFrame;
}

while(true) {
    int keywordIndex = handle.Process(getNextAudioFrame());
    if(keywordIndex >= 0) {
        // .. detection event logic/callback
    }
}
一旦您使用完 Porcupine,请确保显式释放其资源
handle.delete();Go
要将 Porcupine Go 模块安装到项目中,请使用以下命令
go get github.com/Picovoice/porcupine/binding/go要创建一个引擎实例,首先使用唤醒词引擎的配置参数创建一个 Porcupine 结构体,然后调用 .Init()。
import . "github.com/Picovoice/porcupine/binding/go/v2"

porcupine := Porcupine{
  AccessKey: "${ACCESS_KEY}", // from Picovoice Console (https://console.picovoice.ai/)
  BuiltInKeywords: []BuiltInKeyword{PICOVOICE}}
err := porcupine.Init()
if err != nil {
    // handle init fail
}
在上面的示例中,我们将引擎初始化为检测内置唤醒词 "Picovoice"。内置关键字是具有 BuiltInKeyword 类型的包中的常量。
要检测非默认关键字,请使用 KeywordPaths 参数代替
porcupine := Porcupine{
  AccessKey: "${ACCESS_KEY}", // from Picovoice Console (https://console.picovoice.ai/)
  KeywordPaths: []string{"/path/to/keyword.ppn"}}
err := porcupine.Init()
初始化后,有效的采样率由 SampleRate 给出。期望的帧长(输入数组中的音频样本数)由 FrameLength 给出。该引擎接受 16 位线性编码的 PCM,并处理单声道音频。
要将音频输入 Porcupine,请使用捕获循环中的 Process 函数。必须在调用 Process 之前调用 Init。
func getNextFrameAudio() []int16 {
    // get audio frame
}

for {
    keywordIndex, err := porcupine.Process(getNextFrameAudio())
    if keywordIndex >= 0 {
        // wake word detected!
    }
}
完成后,必须显式释放资源。
porcupine.Delete()Unity
将 Porcupine Unity Package 导入您的 Unity 项目中。
SDK 提供了两个 API
高级 API
PorcupineManager 提供了一个高级 API,用于处理音频录制。这是开始使用的最快方式。
静态构造函数 PorcupineManager.FromBuiltInKeywords 将通过使用一个或多个内置关键字来创建 PorcupineManager 的实例。
using Pv.Unity;

// AccessKey obtained from Picovoice Console (https://console.picovoice.ai/)
string accessKey = "${ACCESS_KEY}";

try {
    List<Porcupine.BuiltInKeyword> keywords = new List<Porcupine.BuiltInKeyword>(){
        Porcupine.BuiltInKeyword.PICOVOICE,
        Porcupine.BuiltInKeyword.PORCUPINE
    };
    PorcupineManager _porcupineManager = PorcupineManager.FromBuiltInKeywords(
                                            accessKey,
                                            keywords,
                                            OnWakeWordDetected);
}
catch (Exception ex)
{
    // handle porcupine init error
}
要创建一个用于检测自定义关键字的 PorcupineManager 实例,可以使用 PorcupineManager.FromKeywordPaths 静态构造函数并指定 .ppn 文件的路径。
// AccessKey obtained from Picovoice Console (https://console.picovoice.ai/)
string accessKey = "${ACCESS_KEY}";

List<string> keywordPaths = new List<string>(){ "/path/to/keyword.ppn" };
PorcupineManager _porcupineManager = PorcupineManager.FromKeywordPaths(
                                        accessKey,
                                        keywordPaths,
                                        OnWakeWordDetected);
一旦实例化了一个 PorcupineManager,可以通过调用以下方法开始/停止音频捕获和唤醒词检测:
_porcupineManager.Start();
// .. use porcupine
_porcupineManager.Stop();
当应用完成使用 PorcupineManager 后,您可以显式释放 Porcupine 分配的资源
_porcupineManager.Delete();无需处理音频捕获即可使用 PorcupineManager 启用唤醒词检测。这是因为它使用我们的 unity-voice-processor Unity 包来捕获音频帧并将其自动传递给唤醒词引擎。
低级 API
Porcupine 为那些希望将唤醒词检测集成到现有的音频处理流程中的人提供了对唤醒词引擎的低级访问权限。要创建 Porcupine 的实例,请使用 .FromBuiltInKeywords 静态构造函数。
using Pv.Unity;

// AccessKey obtained from Picovoice Console (https://console.picovoice.ai/)
string accessKey = "${ACCESS_KEY}";

try
{
    List<Porcupine.BuiltInKeyword> keywords = new List<Porcupine.BuiltInKeyword>(){
        Porcupine.BuiltInKeyword.PORCUPINE,
        Porcupine.BuiltInKeyword.PICOVOICE
    };
    Porcupine _porcupine = Porcupine.FromBuiltInKeywords(
        accessKey: accessKey,
        keywords: keywords);
}
catch (Exception ex)
{
    // handle porcupine init error
}
要在音频中搜索关键字,您必须使用 Process 函数将音频帧传递给 Porcupine。返回的 keywordIndex 将是未检测到检测时为 -1 的整数,或者表示已检测到哪个关键字的整数。
short[] frame = getAudioFrame();

try
{
    int keywordIndex = _porcupine.Process(frame);
    if (keywordIndex >= 0)
    {
        // detection made!
    }
}
catch (Exception ex)
{
    Debug.LogError(ex.ToString());
}
为确保 Process 正确工作,提供的音频必须为单声道和 16 位线性编码。
最后,一旦不再需要唤醒词引擎,您可以通过显式释放 Porcupine 分配的资源来删除它
_porcupine.Dispose();Flutter
将Porcupine Flutter插件添加到您的pub.yaml文件中。
dependencies:
  flutter_porcupine: ^<version>
SDK 提供了两个 API
高级API
PorcupineManager提供了一套高级API,它可以处理音频录制。此类是快速入门的最佳途径。
静态构造函数PorcupineManager.fromBuiltInKeywords将根据内置关键字创建一个PorcupineManager实例。
import 'package:porcupine_flutter/porcupine_manager.dart';
import 'package:porcupine_flutter/porcupine_error.dart';

// AccessKey obtained from Picovoice Console (https://console.picovoice.ai/)
final String accessKey = "{ACCESS_KEY}";

void createPorcupineManager() async {
    try {
        _porcupineManager = await PorcupineManager.fromBuiltInKeywords(
            accessKey,
            [BuiltInKeyword.PICOVOICE, BuiltInKeyword.PORCUPINE],
            _wakeWordCallback);
    } on PorcupineException catch (err) {
        // handle porcupine init error
    }
}要创建一个用于检测自定义关键字的PorcupineManager实例,您可以使用静态构造函数PorcupineManager.fromKeywordPaths,并提供.ppn文件的路径。
 // AccessKey obtained from Picovoice Console (https://console.picovoice.ai/)
final String accessKey = "{ACCESS_KEY}";

_porcupineManager = await PorcupineManager.fromKeywordPaths(
    accessKey,
    ["/path/to/keyword.ppn"],
    _wakeWordCallback);
一旦实例化了一个 PorcupineManager,可以通过调用以下方法开始/停止音频捕获和唤醒词检测:
try {
    await _porcupineManager.start();
} on PorcupineException catch (ex) {
    // deal with either audio exception
}
// .. use porcupine
await _porcupineManager.stop();
当应用完成对PorcupineManager的使用后,请确保您显式释放分配给Porcupine的资源。
await _porcupineManager.delete();使用PorcupineManager启用唤醒词检测时,无需处理音频捕获。这是因为它使用flutter_voice_processor插件捕获音频帧并自动将其传递给唤醒词引擎。
低级API
Porcupine为希望将唤醒词检测集成到现有音频处理管道中的人提供了对唤醒词引擎的低级访问。Porcupine具有fromBuiltInKeywords和fromKeywordPaths静态构造函数。
import 'package:porcupine_flutter/porcupine_manager.dart';
import 'package:porcupine_flutter/porcupine_error.dart';

// AccessKey obtained from Picovoice Console (https://console.picovoice.ai/)
final String accessKey = "{ACCESS_KEY}";

void createPorcupine() async {
    try {
        _porcupine = await Porcupine.fromBuiltInKeywords(
          accessKey,
          [BuiltInKeyword.PICOVOICE]);
    } on PorcupineException catch (err) {
        // handle porcupine init error
    }
}要搜索音频中的关键字,必须使用process函数将音频帧传递给Porcupine。返回的keywordIndex将是一个整数,指定检测到的关键字,如果没有检测到则为-1。
List<int> buffer = getAudioFrame();

try {
    int keywordIndex = _porcupine.process(buffer);
    if (keywordIndex >= 0) {
        // detection made!
    }
} on PorcupineException catch (error) {
    // handle error
}为了使process正确工作,提供的音频必须为单频道且16位线性编码。
最后,一旦不再需要唤醒词引擎,请确保显式释放分配给Porcupine的资源。
_porcupine.delete();React Native
安装 @picovoice/react-native-voice-processor 和 @picovoice/porcupine-react-native。该SDK提供了两个API
高级API
PorcupineManager 提供了一个高级API,用于处理音频录制。此类是快速开始的方式。
使用构造函数 PorcupineManager.fromBuiltInKeywords 将创建一个使用一个或多个内置关键字 PorcupineManager 的实例。
 // AccessKey obtained from Picovoice Console (https://console.picovoice.ai/)
const accessKey = "${ACCESS_KEY}";

async createPorcupineManager(){
    try {
        this._porcupineManager = await PorcupineManager.fromBuiltInKeywords(
            accessKey,
            [BuiltInKeywords.Picovoice, BuiltInKeywords.Porcupine],
            detectionCallback,
            processErrorCallback);
    } catch (err) {
        // handle error
    }
}要创建一个用于检测自定义关键字的PorcupineManager实例,您可以使用静态构造函数PorcupineManager.fromKeywordPaths,并提供.ppn文件的路径。
// AccessKey obtained from Picovoice Console (https://console.picovoice.ai/)
const accessKey = "${ACCESS_KEY}";

this._porcupineManager = await PorcupineManager.fromKeywordPaths(
  accessKey,
  ["/path/to/keyword.ppn"],
  detectionCallback,
  processErrorCallback
);
一旦实例化了 Porcupine 管理器,可以通过调用
let didStart = this._porcupineManager.start();
// .. use Porcupine
let didStop = this._porcupineManager.stop();
当应用完成对PorcupineManager的使用后,请确保您显式释放分配给Porcupine的资源。
this._porcupineManager.delete();不需要处理音频捕获即可使用 PorcupineManager 启用唤醒词检测。这是因为它使用 @picovoice/react-native-voice-processor 模块捕获音频帧并将其自动传递给唤醒词引擎。
低级API
Porcupine 为需要将唤醒词检测集成到现有的音频处理管道中的人提供了对唤醒词引擎的底层访问。 Porcupine 也有 fromBuiltInKeywords 和 fromKeywordPaths 静态构造函数。
// AccessKey obtained from Picovoice Console (https://console.picovoice.ai/)
const accessKey = "${ACCESS_KEY}";

async createPorcupine(){
    try {
        this._porcupine = await Porcupine.fromBuiltInKeywords(
            accessKey, [BuiltInKeywords.PICOVOICE]);
    } catch (err) {
        // handle error
    }
}要搜索音频中的关键字,必须使用process函数将音频帧传递给Porcupine。返回的keywordIndex将是一个整数,指定检测到的关键字,如果没有检测到则为-1。
let buffer = getAudioFrame();

try {
  let keywordIndex = await this._porcupine.process(buffer);
  if (keywordIndex >= 0) {
    // detection made!
  }
} catch (e) {
  // handle error
}为了使process正确工作,提供的音频必须为单频道且16位线性编码。
最后,一旦不再需要唤醒词引擎,请确保显式释放分配给Porcupine的资源。
this._porcupine.delete();Android
要将该包包含在您的Android项目中,请确保您的顶层build.gradle文件中已包含mavenCentral(),然后在您的app的build.gradle文件中添加以下内容:
dependencies {
    implementation 'ai.picovoice:porcupine-android:${LATEST_VERSION}'
}
将Porcupine集成到Android应用程序中有两种可能性。
高阶API
PorcupineManager为集成Porcupine到Android应用程序提供了一个高阶API。它管理所有与创建输入音频流、将其送入Porcupine库以及调用用户提供的检测回调相关联的活动。
import ai.picovoice.porcupine.*;

final String accessKey = "${ACCESS_KEY}"; // AccessKey obtained from Picovoice Console (https://console.picovoice.ai/)
final String keywordPath = "/path/to/keyword.ppn"; // path relative to 'assets' folder

try {
    PorcupineManager porcupineManager = new PorcupineManager.Builder()
                        .setAccessKey(accessKey)
                        .setKeywordPath(keywordPath)
                        .setSensitivity(0.5f)
                        .build(context,
                        new PorcupineManagerCallback() {
                            @Override
                            public void invoke(int keywordIndex) {
                                // detection event logic/callback
                            }
                        });
} catch (PorcupineException e) { }关键词文件(.ppn)应放置在Android项目assets文件夹下(src/main/assets/)。
敏感性是允许开发者以牺牲误报率为代价降低漏报率的参数。它是一个位于[0, 1]区间内的浮点数。更高的敏感性会降低漏报率,但会增加误报率。
初始化时,可以使用manager.start()来监控输入音频。通过调用manager.stop()停止管理器。完成后的操作确保使用manager.delete()释放资源。
低阶API
Porcupine为Android提供了一个绑定。它可以通过以下方式初始化:
import ai.picovoice.porcupine.*;

final String accessKey = "${ACCESS_KEY}";
final String keywordPath = "/path/to/keyword.ppn";
try {
    Porcupine porcupine = new Porcupine.Builder()
                        .setAccessKey(accessKey)
                        .setKeywordPath(keywordPath)
                        .setSensitivity(0.5f)
                        .build(context);
} catch (PorcupineException e) { }初始化后,porcupine可以用来监控传入的音频。
private short[] getNextAudioFrame();

while (true) {
    final int keywordIndex = porcupine.process(getNextAudioFrame());
    if (keywordIndex != -1) {
        // detection event logic/callback
    }
}
最后,确保显式释放porcupine获取的资源,因为绑定类不依赖于垃圾回收器来释放本地资源。
porcupine.delete();iOS
将Porcupine集成到iOS应用程序有两种方法。
高级API
PorcupineManager负责管理音频录制,将其传递到Porcupine,并调用用户提供的检测回调。
let accessKey = "${ACCESS_KEY}" // Obtained from Picovoice Console (https://console.picovoice.ai)
let modelPath: String = ... // Available at lib/common/porcupine_params.pv
let keywordPaths: [String] = ["/path/to/keyword/file/a", "/path/to/keyword/file/b"]
let sensitivities: [Float32] = [0.35, 0.64]
let keywordCallback: ((Int32) -> Void) = { keywordIndex in
    // Insert detection event logic
}

let manager = try PorcupineManager(
    accessKey: accessKey,
    modelPath: modelPath,
    keywordPaths: keywordPaths,
    sensitivities: sensitivities
onDetection: keywordCallback)初始化时,可以使用manager.start()监视输入音频。完成时,务必使用manager.stop()停止管理器。
低级API
Porcupine.swift为想要将唤醒词检测集成到现有的音频处理管道的人提供了对唤醒词引擎的底层访问。
要构建Porcupine的一个实例,传入一个关键字。
import Porcupine

let accessKey = "${ACCESS_KEY}" // Obtained from Picovoice Console (https://console.picovoice.ai)

do {
    Porcupine porcupine = try Porcupine(
      accessKey: accessKey,
      keyword: Porcupine.BuiltInKeyword.picovoice)
} catch { }要搜索音频中的关键字,必须使用process函数将音频帧传递给Porcupine。返回的keywordIndex将是一个整数,指定检测到的关键字,如果没有检测到则为-1。
func getNextAudioFrame() -> [Int16] {
    // .. get audioFrame
    return audioFrame;
}

while true {
    do {
        let keywordIndex = try porcupine.process(getNextAudioFrame())
        if keywordIndex >= 0 {
            // .. detection made!
        }
    } catch { }
}
使用完Porcupine后,您可以通过强制它释放其本地资源,而不是等待垃圾回收器来释放其资源。
porcupine.delete();Web
Porcupine通过WebAssembly在现代浏览器(即非Internet Explorer)中可用。麦克风音频通过Web Audio API处理,并通过WebVoiceProcessor进行抽象,它还处理到正确格式的降采样。Porcupine作为预打包的Web Worker提供。
每种口语化的语言都以独立的npm软件包提供(例如,@picovoice/porcupine-web-en-worker)。这些软件包可与@picovoice/web-voice-processor一起使用。它们还可以与Angular、React和Vue绑定一起使用,这抽象并隐藏了Web工作器通信的详细信息。
原生JavaScript和HTML(CDN脚本标签)
<!DOCTYPE html>
<html lang="en">
<head>
  <script src="https://unpkg.com/@picovoice/porcupine-web/dist/iife/index.js"></script>
  <script src="https://unpkg.com/@picovoice/web-voice-processor/dist/iife/index.js"></script>
  <script type="application/javascript">

    const PORCUPINE_MODEL_BASE64 = /* Base64 representation of the `.pv` model file*/;

    function keywordDetectionCallback(detection) {
      console.log(`Porcupine detected ${detection.label}`);
    }

    function processErrorCallback(error) {
      console.error(error);
    }

    async function startPorcupine() {
      console.log("Porcupine is loading. Please wait...");
      const accessKey = "${ACCESS_KEY}" // Obtained from Picovoice Console (picovoice.ai/console/)
      let porcupine = await PorcupineWeb.PorcupineWorker.create(
              accessKey,
              [PorcupineWeb.BuiltInKeyword.Picovoice],
              porcupineKeywordCallback,
              { base64: PORCUPINE_MODEL_BASE64 },
      );

      console.log("Porcupine worker ready!");

      console.log("WebVoiceProcessor initializing. Microphone permissions requested ...");
      await window.WebVoiceProcessor.WebVoiceProcessor.subscribe(porcupine);
      console.log("WebVoiceProcessor ready and listening!");

      document.addEventListener("DOMContentLoaded", function () {
        startPorcupine();
      });
  </script>
</head>
<body></body>
</html>
原生JavaScript和HTML(ES模块)
使用yarn安装Web SDK
yarn add @picovoice/porcupine-web @picovoice/web-voice-processor(或)
npm install --save @picovoice/porcupine-web @picovoice/web-voice-processorimport { WebVoiceProcessor } from "@picovoice/web-voice-processor"
import { PorcupineWorker } from "@picovoice/porcupine-web";
const PORCUPINE_MODEL_BASE64 = /* Base64 representation of the `.pv` model file*/;
function keywordDetectionCallback(detection) {
console.log(`Porcupine detected ${detection.label}`);
}
const porcupine = await PorcupineWorker.create(
"${ACCESS_KEY}",
PorcupineWeb.BuiltInKeyword.Porcupine,
keywordDetectionCallback,
{ base64: PORCUPINE_MODEL_BASE64 },
);
console.log("WebVoiceProcessor initializing. Microphone permissions requested ...");
await WebVoiceProcessor.subscribe(porcupine);
console.log("WebVoiceProcessor ready and listening!");
...
// Finished with Porcupine? Release the WebVoiceProcessor and the worker.
if (done) {
await WebVoiceProcessor.unsubscribe(porcupine);
porcupine.release()
porcupine.terminate()
}Angular
yarn add @picovoice/porcupine-angular @picovoice/web-voice-processor(或)
npm install @picovoice/porcupine-angular @picovoice/web-voice-processorimport { Subscription } from "rxjs";
import { PorcupineService } from "@picovoice/porcupine-web-angular";
import {BuiltInKeyword} from '@picovoice/porcupine-web';
import porcupineParams from "${PATH_TO_PORCUPINE_PARAMS_BASE64}";
constructor(private porcupineService: PorcupineService) {
this.keywordSubscription = porcupineService.keyword$.subscribe(
porcupineDetection => {
console.log(`Porcupine Detected "${porcupineDetection.label}"`)
});
this.isLoadedSubscription = porcupineService.isLoaded$.subscribe(
isLoaded => {
console.log(isLoaded);
});
this.isListeningSubscription = porcupineService.isListening$.subscribe(
isListening => {
console.log(isListening);
});
this.errorSubscription = porcupineService.error$.subscribe(
error => {
console.error(error);
});
}
async ngOnInit() {
await this.porcupineService.init(
${ACCESS_KEY},
[BuiltInKeyword.Porcupine],
porcupineModel,
options
).then(() => {
this.porcupineService.start();
});
}
ngOnDestroy() {
this.keywordSubscription.unsubscribe();
this.isLoadedSubscription.unsubscribe();
this.isListeningSubscription.unsubscribe();
this.errorSubscription.unsubscribe();
this.porcupineService.release();
}React
yarn add @picovoice/porcupine-react @picovoice/web-voice-processor(或)
npm install @picovoice/porcupine-react @picovoice/web-voice-processorimport { BuiltInKeyword } from '@picovoice/porcupine-web';
import { usePorcupine } from '@picovoice/porcupine-react';
function App(props) {
const {
wakeWordDetection,
isLoaded,
isListening,
error,
init,
start,
stop,
release,
} = usePorcupine();
const initEngine = async () => {
await init(
${ACCESS_KEY},
[BuiltInKeyword.Porcupine],
porcupineModel
);
await start();
}
useEffect(() => {
if (wakeWordDetection !== null) {
console.log(wakeWordDetection.label);
}
}, [wakeWordDetection])
}Vue
yarn add @picovoice/porcupine-vue @picovoice/web-voice-processor(或)
npm install @picovoice/porcupine-vue @picovoice/web-voice-processor<script lang='ts'>
import { BuiltInKeyword } from '@picovoice/porcupine-web';
import { usePorcupine } from '@picovoice/porcupine-vue';
import porcupineParams from "${PATH_TO_PORCUPINE_PARAMS_BASE64}"
// Use Vue.extend for JavaScript
export default {
data() {
const {
state,
init,
start,
stop,
release
} = usePorcupine();
init(
${ACCESS_KEY},
[BuiltInKeyword.Porcupine],
{ base64: porcupineParams }, // porcupine model
);
return {
state,
start,
stop,
release
}
},
watch: {
"state.keywordDetection": function (keyword) {
if (keyword !== null) {
console.log(keyword.label);
}
},
"state.isLoaded": function (isLoaded) {
console.log(isLoaded)
},
"state.isListening": function (isListening) {
console.log(isListening)
},
"state.error": function (error) {
console.error(error)
},
},
onBeforeDestroy() {
this.release();
},
};
</script>NodeJS
安装 NodeJS SDK
yarn add @picovoice/porcupine-node通过指定识别的关键词来创建 Porcupine 类的实例
const {
  Porcupine,
  BuiltinKeyword,
}= require("@picovoice/porcupine-node");

 // Obtained from the Picovoice Console (https://console.picovoice.ai/)
const accessKey = "${ACCESS_KEY}";

let handle = new Porcupine(
    accessKey,
    [BuiltinKeyword.GRASSHOPPER, BuiltinKeyword.BUMBLEBEE],
    [0.5, 0.65]);
GRASSHOPPER 和 BUMBLEBEE 是内置关键词。如果你希望使用自定义关键词文件,则需要识别其路径
const Porcupine = require("@picovoice/porcupine-node");

 // Obtained from the Picovoice Console (https://console.picovoice.ai/)
const accessKey = "${ACCESS_KEY}";

let handle = new Porcupine(
    accessKey,
    ["/path/to/custom/keyword/file"],
[0.5]);当实例化后,handle 可以通过其 .process 方法处理音频。
let getNextAudioFrame = function() {
    ...
};

while (true) {
  let keywordIndex = handle.process(getNextAudioFrame());
  if (keywordIndex !== -1) {
    // detection event callback
  }
}
完成时,一定要使用 release() 释放 WebAssembly 获得资源
handle.release();Rust
首先需要在您的系统上安装 Rust 和 Cargo。
要将 porcupine 库添加到您的应用中,将 pv_porcupine 添加到您的应用 Cargo.toml 清单中。
[dependencies]
pv_porcupine = "*"
要创建引擎实例,首先创建一个具有唤醒词引擎配置参数的 PorcupineBuilder 实例,然后调用 .init()
use porcupine::{BuiltinKeywords, PorcupineBuilder};

// AccessKey obtained from Picovoice Console (https://console.picovoice.ai/)
let access_key = "${ACCESS_KEY}";

let porcupine: Porcupine = PorcupineBuilder::new_with_keywords(
        access_key,
        &[BuiltinKeywords::Porcupine]
    )
    .init()
    .expect("Unable to create Porcupine");
在上面的例子中,我们已将引擎初始化为检测内置唤醒词 "Porcupine"。内置关键词包含在具有 BuiltinKeywords 枚举类型的 内置关键词 包中。
要检测自定义关键词,使用 PorcupineBuilder 的 new_with_keyword_paths 方法传入 *.ppn 文件路径
let porcupine: Porcupine = PorcupineBuilder::new_with_keyword_paths(
        &["/absolute/path/to/keyword/one.ppn",
        "/absolute/path/to/keyword/two.ppn"]
    )
    .init()
    .expect("Unable to create Porcupine");
初始化后,有效采样率由 sample_rate() 给出。预期帧长度(输入数组中的音频样本数)由 frame_length() 给出。该引擎接受 16 位线性编码 PCM 并操作单声道音频。
要向 Porcupine 提供音频,请在捕获循环中使用 process 函数
fn next_audio_frame() -> Vec<i16> {
    // get audio frame
}

loop {
    if let Ok(keyword_index) = porcupine.process(&next_audio_frame()) {
        if keyword_index >= 0 {
            // wake word detected!
        }
    }
}
C
Porcupine 使用 ANSI C 实现,因此可以直接链接到 C 应用程序。包含相关信息的头文件为 include/pv_porcupine.h。Porcupine 对象实例可以构建如下:
// Available at lib/common/porcupine_params.pv
const char *model_path = ...
// AccessKey obtained from Picovoice Console (https://console.picovoice.ai/)
const char *access_key = ...
const char *keyword_path = ...
const float sensitivity = 0.5f;

pv_porcupine_t *handle = NULL;
const pv_status_t status = pv_porcupine_init(
    access_key,
    model_path,
    1,
    &keyword_path,
    &sensitivity,
    &handle);
if (status != PV_STATUS_SUCCESS) {
    // Insert error handling logic
}
灵敏度是允许开发者用误报率换取虚警率的参数。它是一个位于[0, 1]之间的浮点数。更高的灵敏度会降低误报率(真拒绝率),但代价是(可能)增加了虚警率。
现在可以使用handle来监控传入的音频流。Porcupine接受单声道、16位线性编码的PCM音频。可以通过pv_sample_rate()检索采样率。最后,Porcupine接受连续的音频输入块(也称为帧),可以通过pv_porcupine_frame_length()检索每帧的长度。
extern const int16_t *get_next_audio_frame(void);

while (true) {
    const int16_t *pcm = get_next_audio_frame();
    int32_t keyword_index = -1;
    const pv_status_t status = pv_porcupine_process(handle, pcm, &keyword_index);
    if (status != PV_STATUS_SUCCESS) {
        // error handling logic
    }
    if (keyword_index != -1) {
        // Insert detection event callback
    }
}
最后,完成时,请务必释放所获取的资源。
pv_porcupine_delete(handle);微控制器
Porcupine使用ANSI C实现,因此可以直接链接到嵌入式的C项目。其公共头文件包含相关信息的实例:
#define MEMORY_BUFFER_SIZE ...
uint8_t memory_buffer[MEMORY_BUFFER_SIZE] __attribute__((aligned(16)));

// AccessKey string obtained from Picovoice Console (https://console.picovoice.ai/)
static const char* ACCESS_KEY = ...

const uint8_t keyword_array[] = {...};

const int32_t keyword_model_sizes = sizeof(keyword_array);
const void *keyword_models = keyword_array;
const float sensitivity = 0.5f;

pv_porcupine_t *handle = NULL;

const pv_status_t status = pv_porcupine_init(
        ACCESS_KEY,
        MEMORY_BUFFER_SIZE,
        memory_buffer,
        1,
        &keyword_model_sizes,
        &keyword_models,
        &sensitivity,
        &handle);

if (status != PV_STATUS_SUCCESS) {
    // error handling logic
}
灵敏度是允许开发者用误报率换取虚警率的参数。它是一个位于[0, 1]之间的浮点数。更高的灵敏度会降低误报率(真拒绝率),但代价是(可能)增加了虚警率。
现在可以使用handle来监控传入的音频流。Porcupine接受单声道、16位PCM音频。可以通过pv_sample_rate()检索采样率。最后,Porcupine接受连续的音频输入块(也称为帧),可以通过pv_porcupine_frame_length()检索每帧的长度。
extern const int16_t *get_next_audio_frame(void);

while (true) {
    const int16_t *pcm = get_next_audio_frame();
    int32_t keyword_index;
    const pv_status_t status = pv_porcupine_process(handle, pcm, &keyword_index);
    if (status != PV_STATUS_SUCCESS) {
        // error handling logic
    }
    if (keyword_index != -1) {
        // detection event logic/callback
    }
}
最后,完成时,请务必释放所获取的资源。
pv_porcupine_delete(handle);发布
v2.2.0 - 2023年4月12日
- 增加了对阿拉伯语、荷兰语、印地语、普通话、波兰语、俄语、瑞典语和越南语的支持
- 增加了对.NET 7.0的支持,并修复了对.NET Standard 2.0的支持
- iOS最低支持版本移至11.0
- 提高了稳定性和性能
v2.1.0 - 2022年1月20日
- 为Java和Unity SDK添加了对macOS arm64(Apple Silicon)的支持
- 各种错误修复和改进
v2.0.0 - 2021年11月25日
- 改进了准确性。
- 添加了Rust SDK。
- 添加了对macOS arm64的支持。
- 为Windows、NVIDIA Jetson Nano和BeagleBone添加了NodeJS支持。
- 为NVIDIA Jetson Nano和BeagleBone添加了.NET支持。
- 运行时优化。
v1.9.0 - 2020年12月2日
- 添加了React Native SDK。
- 添加了Java SDK。
- 添加了.NET SDK。
- 添加了NodeJS SDK。
- 改进了准确性。
- 运行时优化。
v1.8.0 - 2020年5月27日
- 改进了准确性。
- 运行时优化。
v1.7.0 - 2020年2月13日
- 改进了准确性。
- 运行时优化。
- 添加了对Raspberry Pi 4的支持。
- 增加基于服务的Android演示应用程序。
- 增加C的演示应用程序。
- 更新文档。
v1.6.0 - 2019年4月25日
- 改进了准确性。
- 运行时优化。
- 添加对BeagleBone的支持。
- iOS构建现在可以在模拟器上运行。
v1.5.0 - 2018年11月13日
- 改进了准确性。
- 运行时优化。
- 增加了在Web浏览器中运行(WebAssembly)的支持。
v1.4.0 - 2018年7月20日
- 改进了准确性。
- 运行时优化。
- 更新文档。
v1.3.0 - 2018年6月19日
- 改进了准确性。
- 运行时优化
v1.2.0 - 2018年4月21日
- 运行时优化。
v1.1.0 - 2018年4月11日
- 添加了多项命令检测功能。
v1.0.0 - 2018年3月13日
- 首次发布。
常见问题解答(FAQ)
可以在这里找到常见问题解答。