


PayTabs SDK
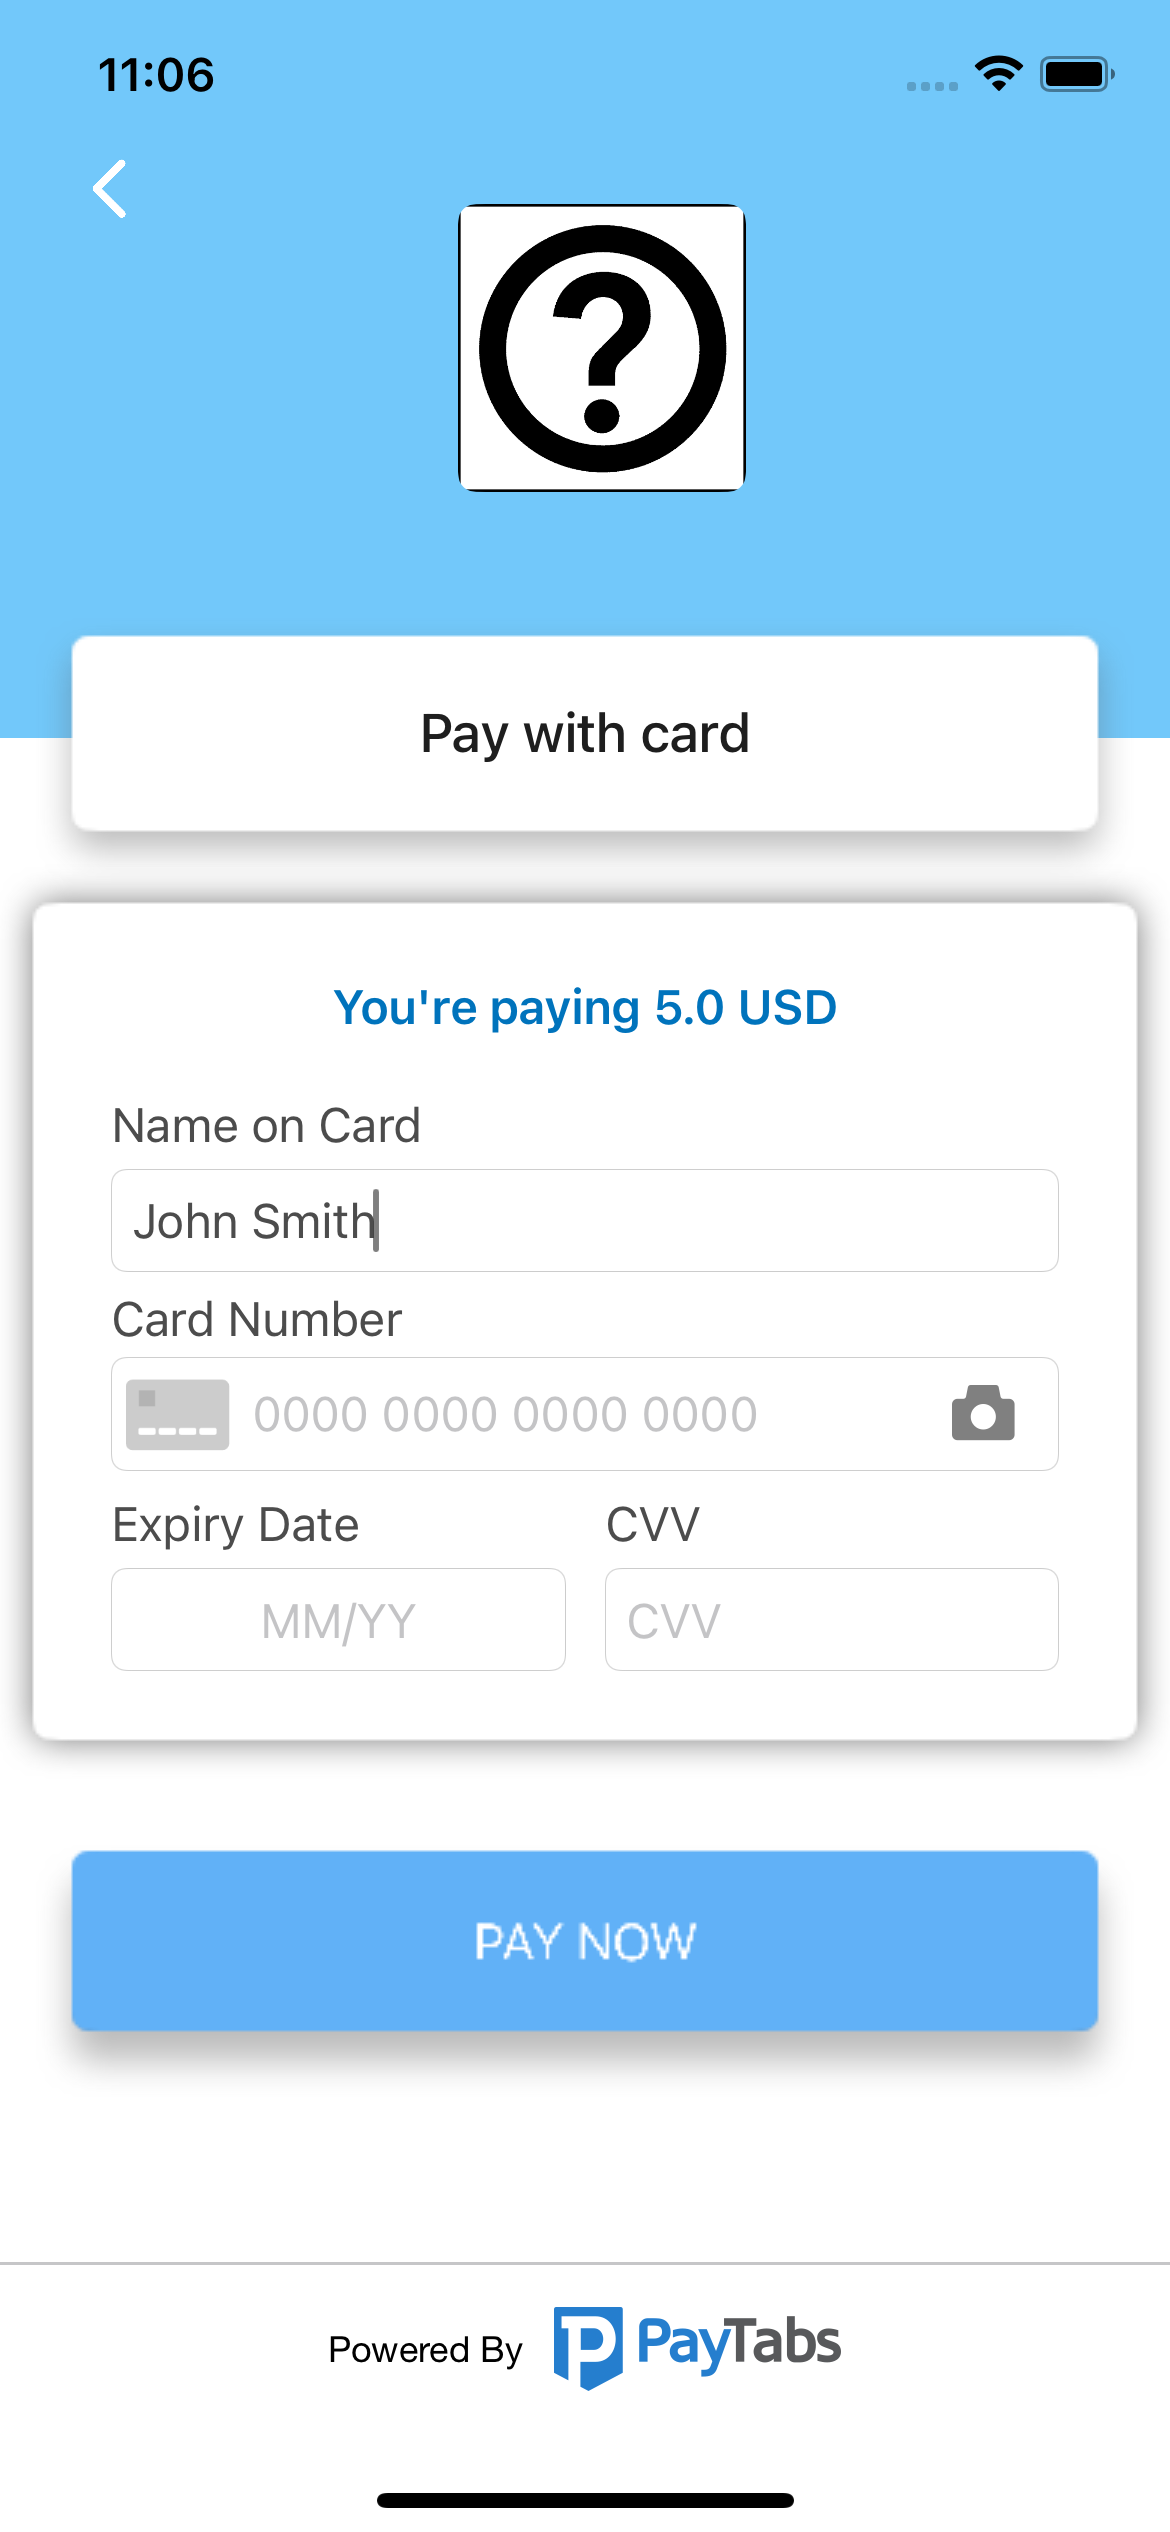
PayTabs SDk 通过提供现成的支付界面,使得与 PayTabs 支付网关的集成变得非常容易,该界面处理卡片输入和账单与收货信息,并完成所有缺失的详细信息。
特性
- 提供现成的卡片支付界面。
- 卡片扫描器,轻松快速地输入卡号信息(iOS 13.0+)。
- 处理所缺失的账单与收货信息。
- 易于自定义徽标、颜色和字体。
- 支持 Apple Pay。
- 由于我们去除了所有第三方依赖,SDK 大小变得非常轻量。
- 支持深色模式。
- 支持替代支付方式。
- 支持带有 3DS 的周期性支付。
- 支持保存和列出卡片。
要求
- iOS 10.0+, Swift 5.0+
- Xcode 10.0+
- 创建与您所在国家相关的 PayTabs 商户账户。
安装
CocoaPods
CocoaPods 是 Cocoa 项目的依赖管理器。有关用法和安装说明,请访问其网站。要通过 CocoaPods 在 Xcode 项目中集成 PayTabs SDK,在您的 Podfile 中指定它。
pod 'PayTabsSDK', '~> 6.4.12'Carthage
Carthage 是一个去中心化的依赖管理器,它构建您的依赖并提供二进制框架。要通过 Carthage 在 Xcode 项目中集成 PayTabs SDK,在您的 Cartfile 中指定它。
github "paytabscom/paytabs-ios-library-sample" ~> 6.4.12
Swift 包管理器
Swift 包管理器是一个用于自动分发 Swift 代码的工具,并集成到 Swift 编译器中。
设置好您的 Swift 包后,只需将其添加到 Package.swift 的依赖项值即可轻松添加 PayTabsSDK 依赖项。
dependencies: [
    .package(url: "https://github.com/paytabscom/paytabs-ios-library-sample.git", .upToNextMajor(from: "6.1.20"))
]
手册
按照以下步骤操作
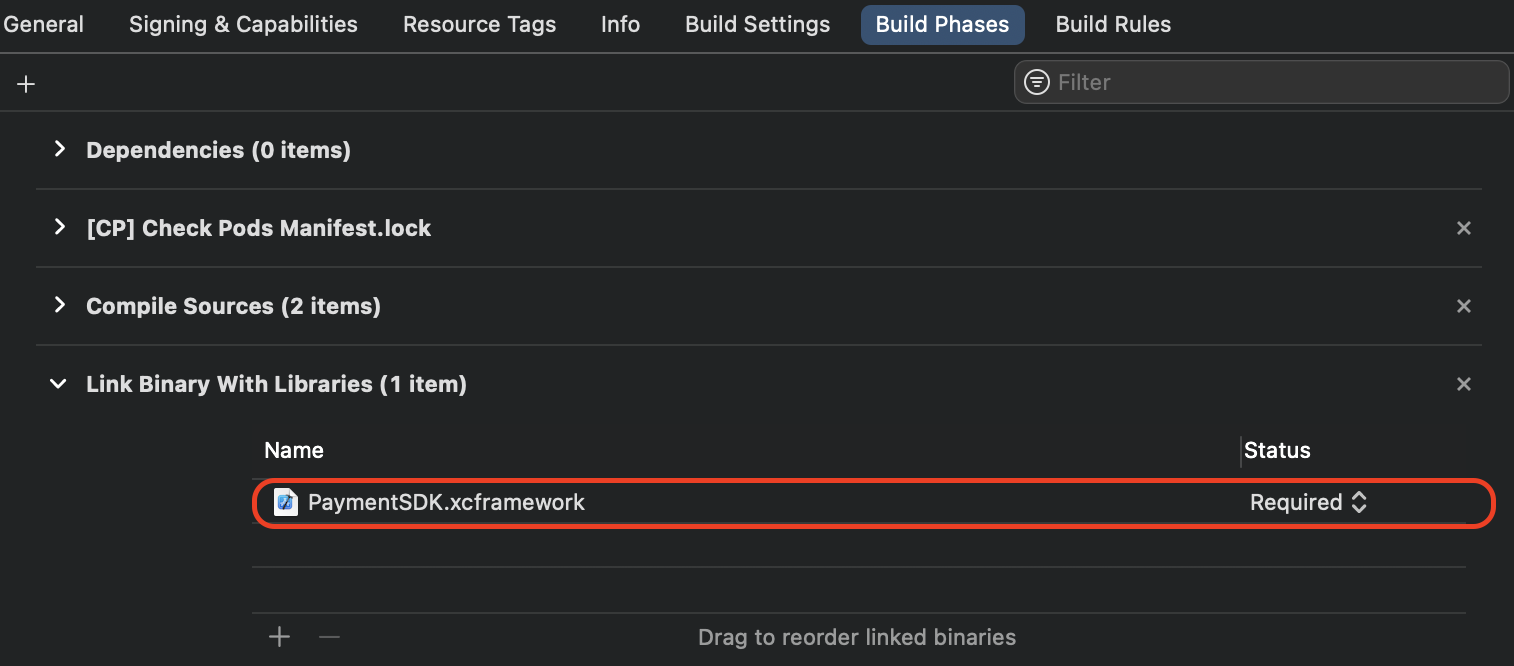
- 下载框架。
- 导航到您的
Target的通用部分。 - 将
PaymentSDK.xcframework文件拖放到框架、库和嵌入式内容部分。
先决条件
在开始使用PayTabs SDK进行集成之前,您应检查以下先决条件
- 为了授予
卡扫描器访问摄像头的权限,您应将以下键和值添加到您的应用info.plist文件中。
<key>NSCameraUsageDescription</key>
<string>Write here your message to the user</string>
用法
在您的代码中导入PaymentSDK。
import PaymentSDK
使用卡片支付
- 配置账单和配送信息,配送信息为可选。
let billingDetails = PaymentSDKBillingDetails(name: "John Smith",
                                            email: "[email protected]",
                                            phone: "+2011111111",
                                            addressLine: "address",
                                            city: "Dubai",
                                           state: "Dubai",
                                           countryCode: "ae", // ISO alpha 2
                                           zip: "12345")

let shippingDetails = PaymentSDKShippingDetails(name: "John Smith",
                                            email: "[email protected]",
                                            phone: "+2011111111",
                                            addressLine: "address",
                                            city: "Dubai",
                                           state: "Dubai",
                                           countryCode: "ae", // ISO alpha 2
                                           zip: "12345")
- 创建
PaymentSDKConfiguration对象并填写您的凭据和支付详情。
let configuration = PaymentSDKConfiguration(profileID: profileID,
                                       serverKey: serverKey,
                                       clientKey: clientKey,
                                       currency: "AED",
                                       amount: 5.0,
                                       merchantCountryCode: "AE")
            .cartDescription("Flowers")
            .cartID("1234")
            .screenTitle("Pay with Card")
            .billingDetails(billingDetails)
	    .isDigitalProduct(true)
-
您现在可以开始支付并处理
PaymentManagerDelegate了。- 用于正常卡片支付
PaymentManager.startCardPayment(on: self,
                         configuration: configuration,
                         delegate: self)
- 用于令牌化支付
PaymentManager.startTokenizedCardPayment(on: self,
                         configuration: configuration,
                         token: *token*,
                         transactionRef: *transactionReference*
                         delegate: self)
- 用于启用3DS功能(请求CVV)的令牌化支付
PaymentManager.start3DSecureTokenizedCardPayment(on: self,
                         configuration: configuration,
                         savedCardInfo: SavedCardInfo,
                         token: *token*
                         delegate: self)

- 用于允许SDK为您保存卡片并显示保存卡片列表以供用户选择的功能性支付
PaymentManager.startPaymentWithSavedCards(on: self,
                         configuration: configuration,
                         support3DS: true,
                         delegate: self)

使用Apple Pay支付
-
按照指南 Apple Pay配置步骤 了解如何在PayTabs中配置ApplePay。
-
尽管您可以忽略账单及配送详情,Apple Pay会处理这些信息,但您必须传递 商家名称 和 商家标识符 参数,请完成“用卡支付”步骤 1 和 2。
let configuration = PaymentSDKConfiguration(profileID: profileID,
                                       serverKey: serverKey,
                                       clientKey: clientKey,
                                       currency: "AED",
                                       amount: 5.0,
                                       merchantCountryCode: "AE")
            .cartDescription("Flowers")
            .cartID("1234")
            .screenTitle("Pay with Card")
            .merchantName("Flowers Store")
            .merchantAppleBundleID("merchant.com.bundleID")
            .simplifyApplePayValidation(true)
- 为了简化对所有用户的账单信息进行的ApplePay验证,请在配置中传递 simplifyApplePayValidation 参数并设置为 true。
configuration.simplifyApplePayValidation = true- 调用
startApplePayPayment开始支付
PaymentManager.startApplePayPayment(on: self,
                             configuration: configuration,
                             delegate: self)
使用其他支付方式支付
将其他支付方式(如STCPay、OmanNet、KNet、Valu、Fawry、UnionPay和Meeza)集成到您的地区,以便为更广泛的客户提供支付服务变得十分简单。
- 完成“用卡支付”步骤 1 和 2。
- 选择您想要支持的支付方式之一或多个
configuration.alternativePaymentMethods = [.stcPay]- 调用
startAlternativePaymentMethod开始支付
PaymentManager.startAlternativePaymentMethod(on: self,
                             configuration: configuration,
                             delegate: self)
查询交易
您可以检查交易的最新状态
1- 首先创建PaySDKQueryConfiguration
  let config = PaymentSDKQueryConfiguration(serverKey: "*ServerKey*",
                                              clientKey: "*ClientKey*",
                                              merchantCountryCode: "*CountryCode*",
                                              profileID: "*ProfileId*",
					      transactionReference: "*TransactionReference*")
2- 调用queryTransaction函数
          PaymentManager.queryTransaction(queryConfiguration: config) { transactionDetails, error in
            if let tranDet = transactionDetails {
                //handle transcation details
            } else if let err = error {
                //handle error
            }
        }
代理
在这里您将接收到交易详情和错误信息。
extension ViewController: PaymentManagerDelegate {
    func paymentManager(didFinishTransaction transactionDetails: PaymentSDKTransactionDetails?, error: Error?) {
        if let transactionDetails = transactionDetails {
            print("Response Code: " + (transactionDetails.paymentResult?.responseCode ?? ""))
            print("Result: " + (transactionDetails.paymentResult?.responseMessage ?? ""))
            print("Token: " + (transactionDetails.token ?? ""))
            print("Transaction Reference: " + (transactionDetails.transactionReference ?? ""))
            print("Transaction Time: " + (transactionDetails.paymentResult?.transactionTime ?? "" ))
       if transactionDetails.isSuccess() {
                print("Successful transaction")
          }
        } else if let error = error {
            // Handle errors
        }
    }
}
处理事务响应
您可以使用transactionDetails?.isSuccess()来确保事务成功...
如果事务不成功,您应检查相应的失败代码,代码将在transactionDetails?.paymentResult?.responseCode中返回 .. 所有代码均可在支付响应代码中找到
强制验证发货信息
默认情况下,对发货信息的验证是禁用的。
configuration.forceShippingInfo = true显示账单或发货信息部分
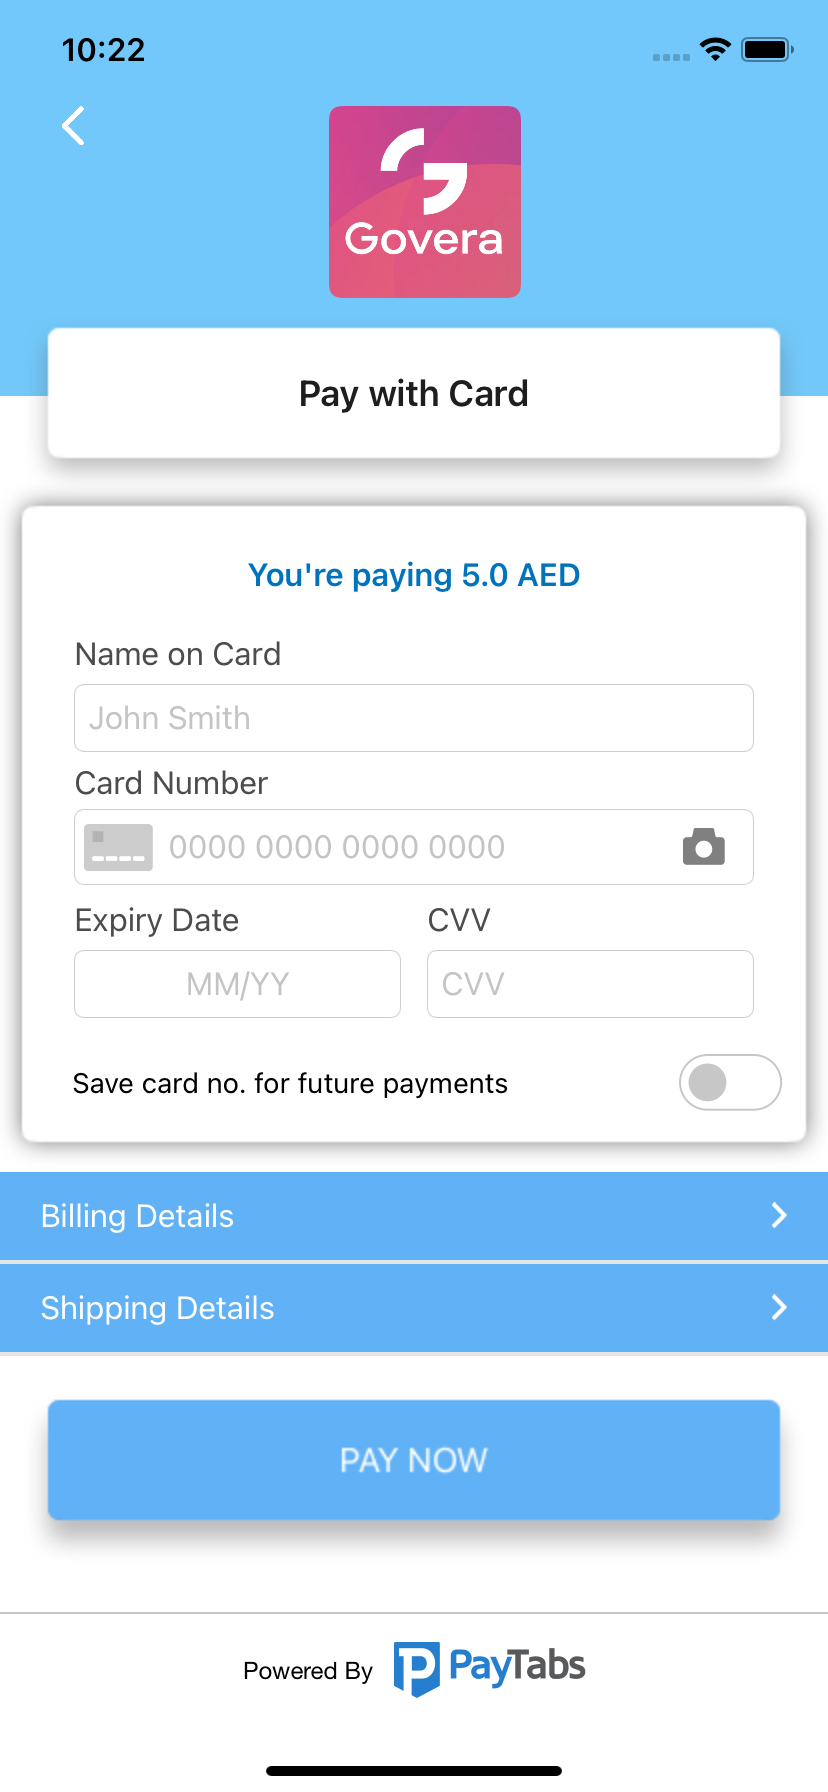
默认情况下,账单和发货信息部分是隐藏的,将其标志设置为true,让SDK内部处理缺失的账单和发货信息。
configuration.showBillingInfo = true
configuration.showShippingInfo = true
将账单名称与持卡人名称链接
默认情况下,账单名称与持卡人名称是链接的,如果您将其标志设置为false,则账单名称和持卡人名称将分开。
configuration.linkBillingNameWithCard = true
令牌化
要启用令牌化,请按照以下说明操作。
- 请求令牌
configuration.tokeniseType = .userOptinoal // read more about the tokeniseType in the enums section
configuration.tokenFormat = .hex32 // read more about the tokenFormat in the enums section
通过这些参数后,您将在受托代理中获得令牌和交易参考,请保存以备将来使用。
- 传递令牌 & 交易参考
configuration.token = token
configuration.transactionReference = transactionreference
主题
使用以下指南通过配置主题来自定义颜色、字体和标识,并将其传递到支付配置中。
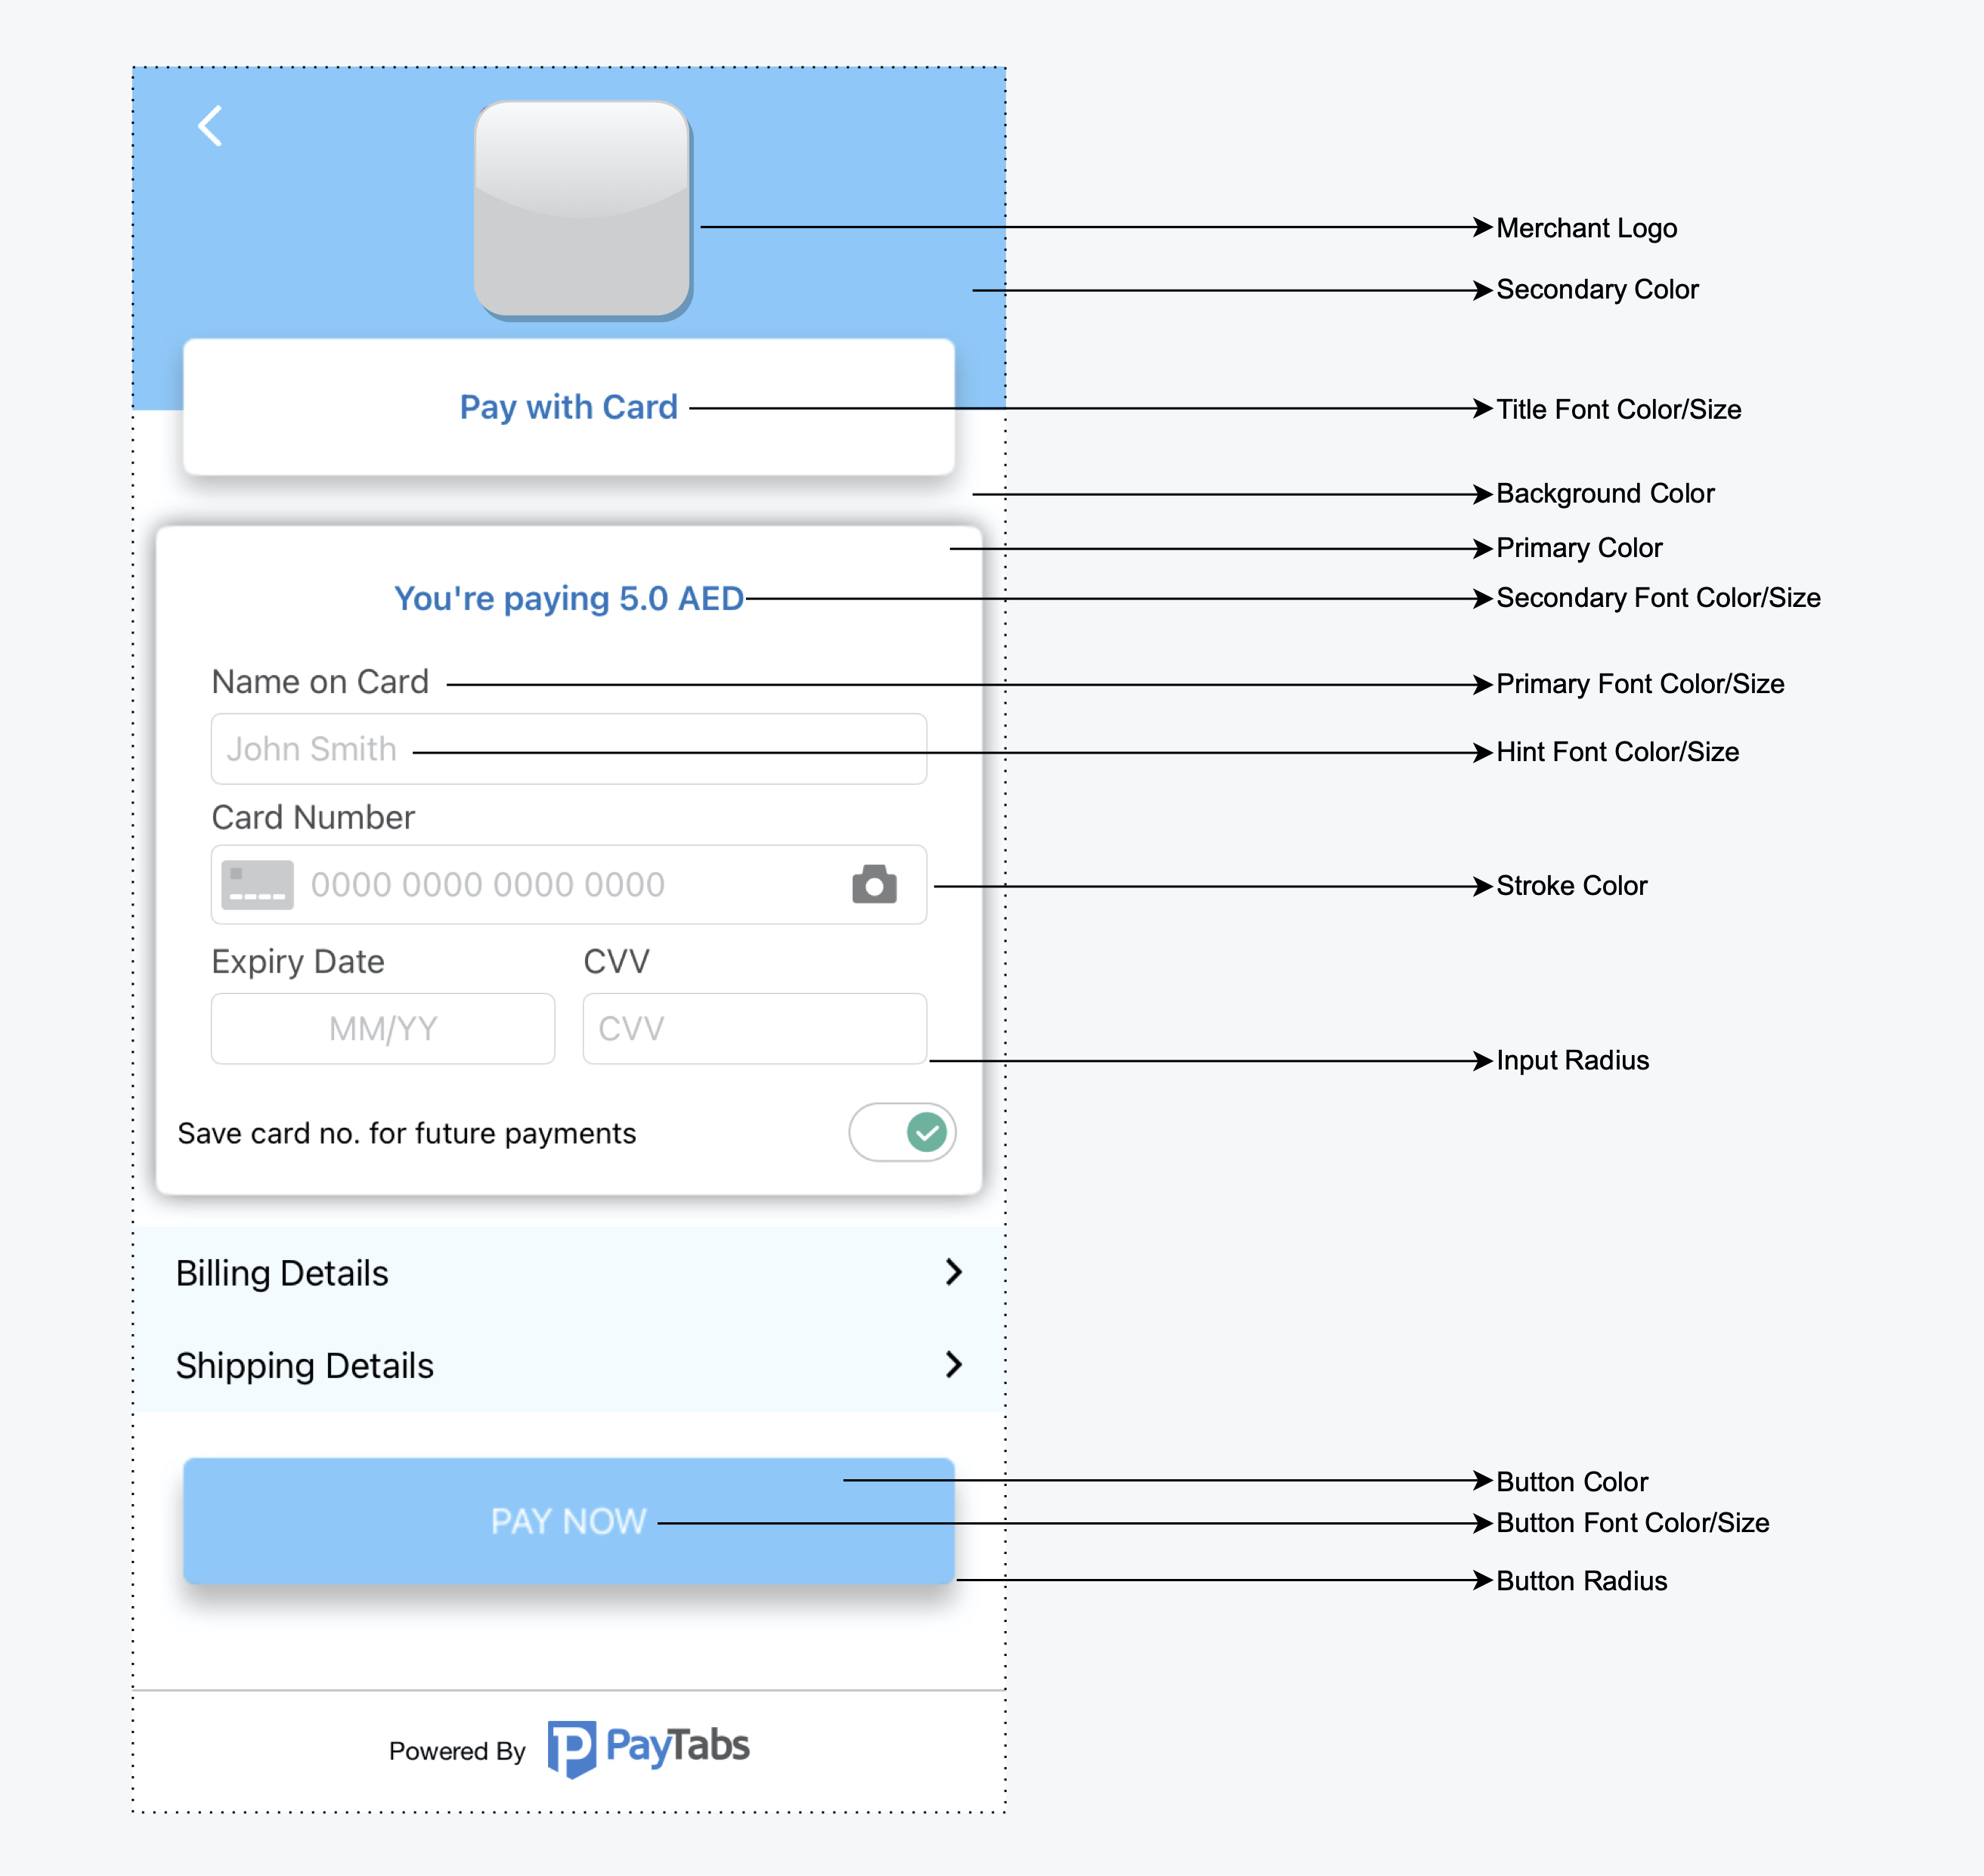
let theme = PaymentSDKTheme.default
theme.logoImage = UIImage(named: "Logo") //Change merchant logo.
theme.backgroundColor = .blue
theme.buttonFontColor = .red
configuration.theme = theme
本地化
您可以使用以下字符串文件复制密钥并将其添加到您的应用程序可本地化文件中,覆盖值为您自己的值。
枚举
这些枚举将帮助您自定义配置。
- 令牌化类型
默认类型为无
public enum TokeniseType: Int, Codable {
    case none // tokenise is off
    case merchantMandatory // tokenise is forced
    case userMandatory // tokenise is forced as per user approval
    case userOptinoal // tokenise if optional as per user approval
}- 令牌格式
默认格式为hex32
public enum TokenFormat: String {
    case none = "1"
    case hex32 = "2"
    case alphaNum20 = "3"
    case digit22 = "4"
    case digit16 = "5"
    case alphaNum32 = "6"
}- 交易类型
默认类型为销售
public enum TransactionType: String, CaseIterable {
    case sale
    case authorize = "auth"
}configuration.transactionType = .sale- 替代支付方式
public enum AlternativePaymentMethod: String {
    case unionPay = "unionpay"
    case stcPay = "stcpay"
    case valu
    case meezaQR = "meezaqr"
    case omannet
    case knetCredit  = "knetcredit"
    case knetDebit  = "knetdebit"
    case fawry
    case aman
    case URPay = "urpay"
}configuration.transactionType = .sale演示应用
查看我们的完整示例:示例。
许可协议
查看许可协议。