ORStackView
ORStackView 简化了设置一组堆叠视图的过程。使用 FLKAutoLayout 来简化API,你可能应该一直使用它。根据需求,这将可以替换。有关更多信息,您可以阅读 ORStackView.h
ORStackView
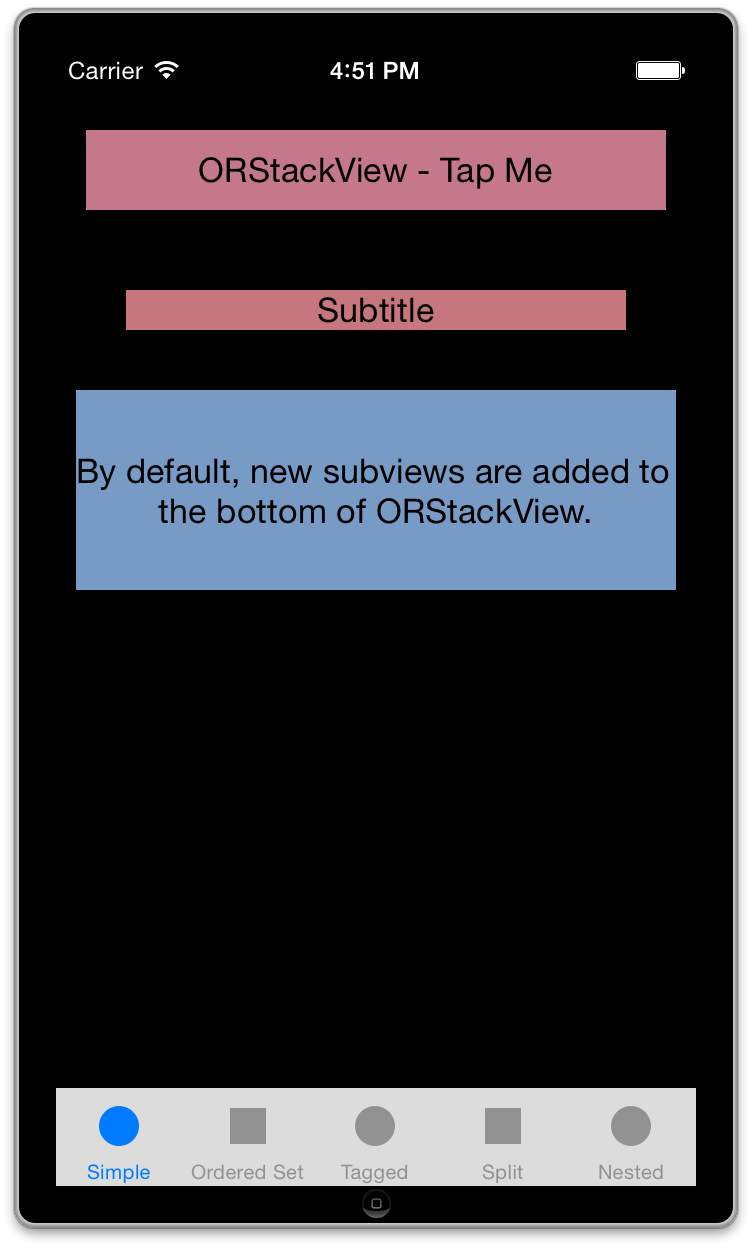
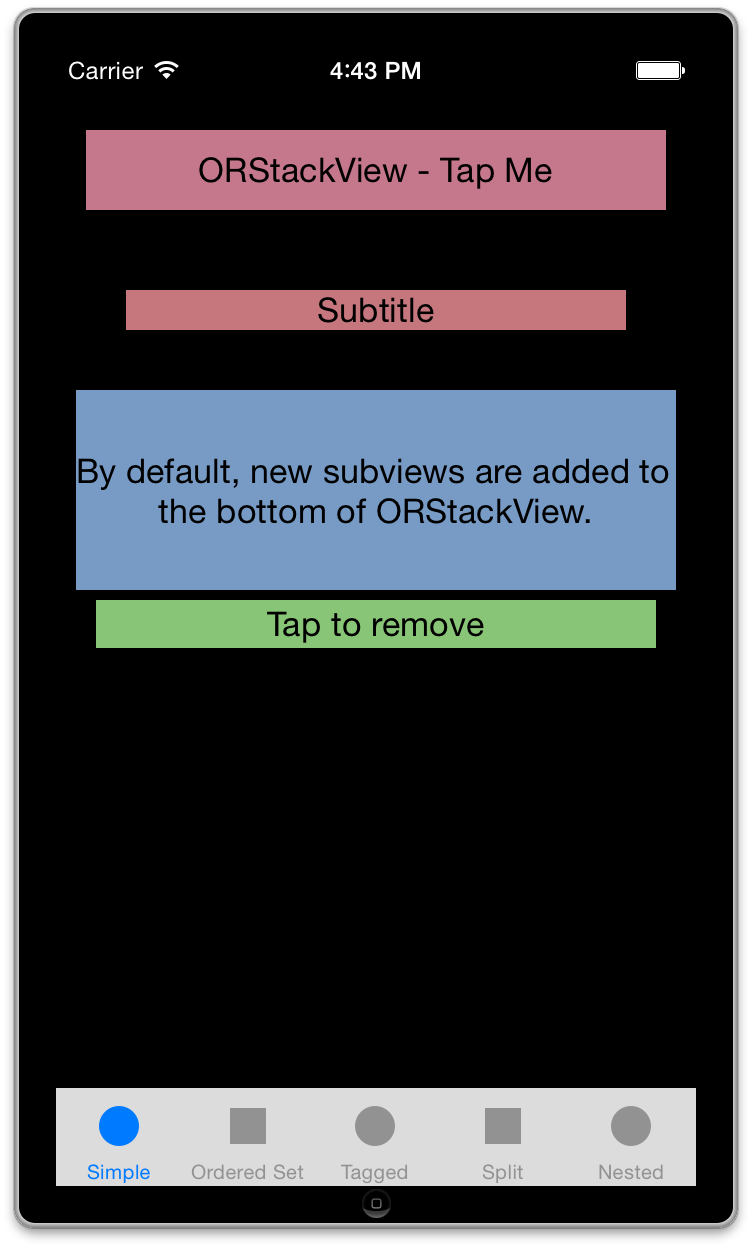
您可以使用 ORStackView 并按照您的意愿添加子视图。新的子视图将被添加到 ORStackView 的底部。在这个例子中,点击第一个子视图将在堆栈底部添加一个新的子视图。
- (void)loadView
{
    self.view = [[ORStackView alloc] init];
}

- (void)viewDidLoad
{
  ORColourView *view1 = [[ORColourView alloc] init];
  view1.text = @"ORStackView - Tap Me";
  view1.fakeContentSize = (CGSize){ UIViewNoIntrinsicMetric , 40};

  UITapGestureRecognizer *tapGesture = [[UITapGestureRecognizer alloc]
    initWithTarget:self action:@selector(addView)];
  [view1 addGestureRecognizer:tapGesture];

  ORColourView *view2 = [[ORColourView alloc] init];
  view2.text = @"Subtitle";
  view2.fakeContentSize = (CGSize){ UIViewNoIntrinsicMetric , 20 };

  ORColourView *view3 = [[ORColourView alloc] init];
  view3.text = @"By default, new subviews are added to the bottom of ORStackView.";
  view3.fakeContentSize = (CGSize){ UIViewNoIntrinsicMetric , 100 };

  [self.view addSubview:view1 withTopMargin:@"20" sideMargin:@"30"];
  [self.view addSubview:view2 withTopMargin:@"40" sideMargin:@"70"];
  [self.view addSubview:view3 withTopMargin:@"30" sideMargin:@"20"];
}

- (void)addView
{
  ORColourView *view = [[ORColourView alloc] init];
  view.text = @"Tap to remove";
  view.fakeContentSize = (CGSize){ UIViewNoIntrinsicMetric , 24 };
  [self.view addSubview:view withTopMargin:@"5" sideMargin:@"40"];
}
带有排序的ORStackView
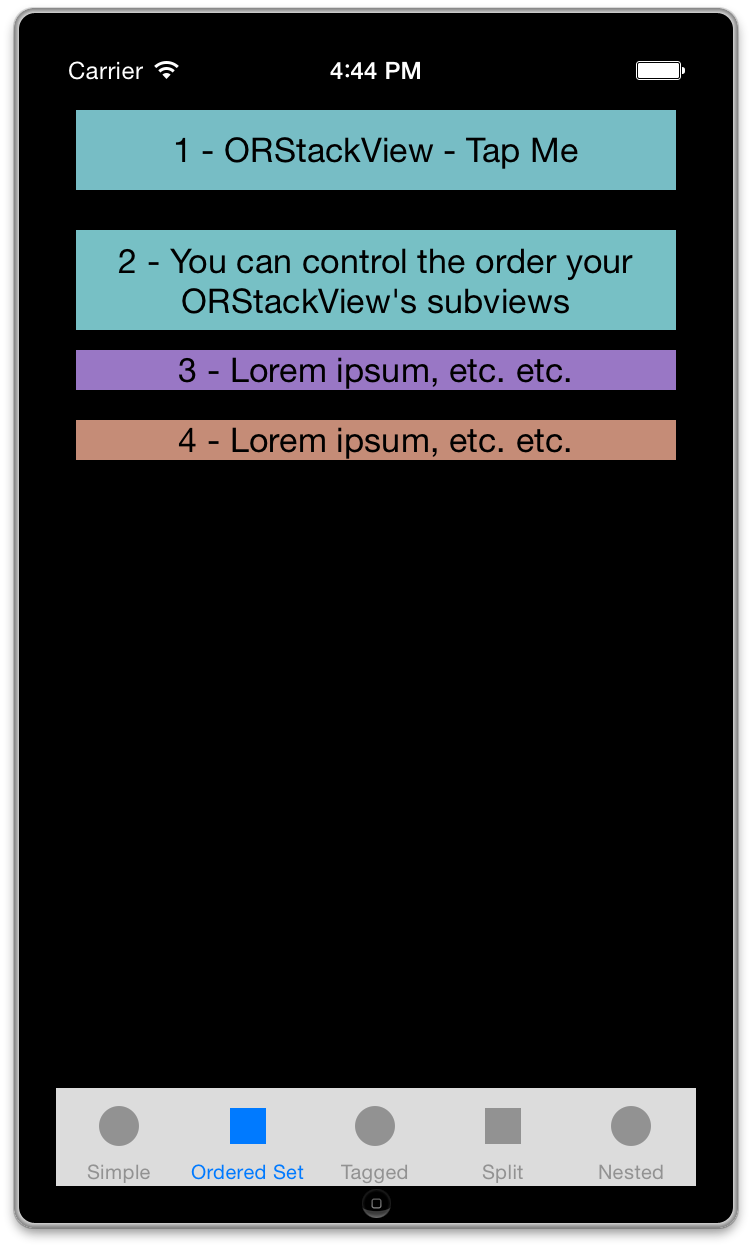
如果您有一些视图,这些视图只有在从外部源获取确认后才会显示,您可以使用以下方式添加子视图:insertSubview:atIndex:withTopMargin:、insertSubview:atIndex:withTopMargin:sideMargin:、insertSubview:belowSubview:withTopMargin: 或 insertSubview:aboveSubview:withTopMargin:
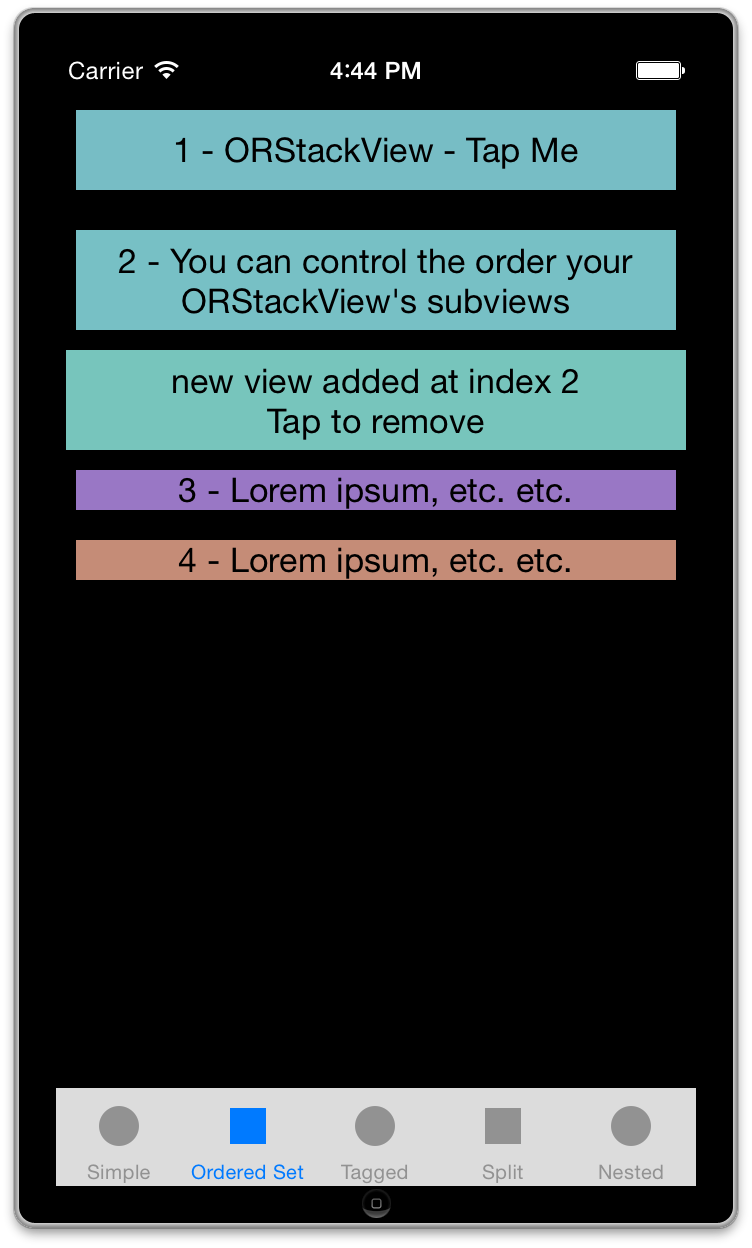
在这个例子中,子视图的显示顺序与其添加的时间顺序不同。点击第一个子视图将在堆栈中间添加一个新的子视图。
- (void)loadView
{
    self.view = [[ORStackView alloc] init];
}

- (void)viewDidLoad
{
  ORColourView *view1 = [[ORColourView alloc] init];
  view1.text = @"1 - ORStackView - Tap Me";
  view1.fakeContentSize = (CGSize){ UIViewNoIntrinsicMetric , 40};
  UITapGestureRecognizer *tapGesture = [[UITapGestureRecognizer alloc]
    initWithTarget:self action:@selector(addView)];
  [view1 addGestureRecognizer:tapGesture];

  ORColourView *view2 = [[ORColourView alloc] init];
  view2.text = @"2 - You can control the order your ORStackView's subviews";
  view2.fakeContentSize = (CGSize){ UIViewNoIntrinsicMetric , 50 };

  ORColourView *view3 = [[ORColourView alloc] init];
  view3.text = @"3 - Lorem ipsum, etc. etc.";
  view3.fakeContentSize = (CGSize){ UIViewNoIntrinsicMetric , 20 };

  ORColourView *view4 = [[ORColourView alloc] init];
  view4.text = @"4 - Lorem ipsum, etc. etc.";
  view4.fakeContentSize = (CGSize){ UIViewNoIntrinsicMetric , 20 };

  [self.view insertSubview:view2 atIndex:0 withTopMargin:@"20" sideMargin:@"20"];
  [self.view insertSubview:view4 atIndex:1 withTopMargin:@"15" sideMargin:@"20"];
  [self.view insertSubview:view1 atIndex:0 withTopMargin:@"10" sideMargin:@"20"];
  [self.view insertSubview:view3 atIndex:2 withTopMargin:@"10" sideMargin:@"20"];
}

- (void)addView
{
  ORColourView *view = [[ORColourView alloc] init];
  view.text = @"Tap to remove";
  view.fakeContentSize = (CGSize){ UIViewNoIntrinsicMetric , 24 };
  [self.view addSubview:view withTopMargin:@"5" sideMargin:@"40"];
}
ORTagBasedAutoStackView
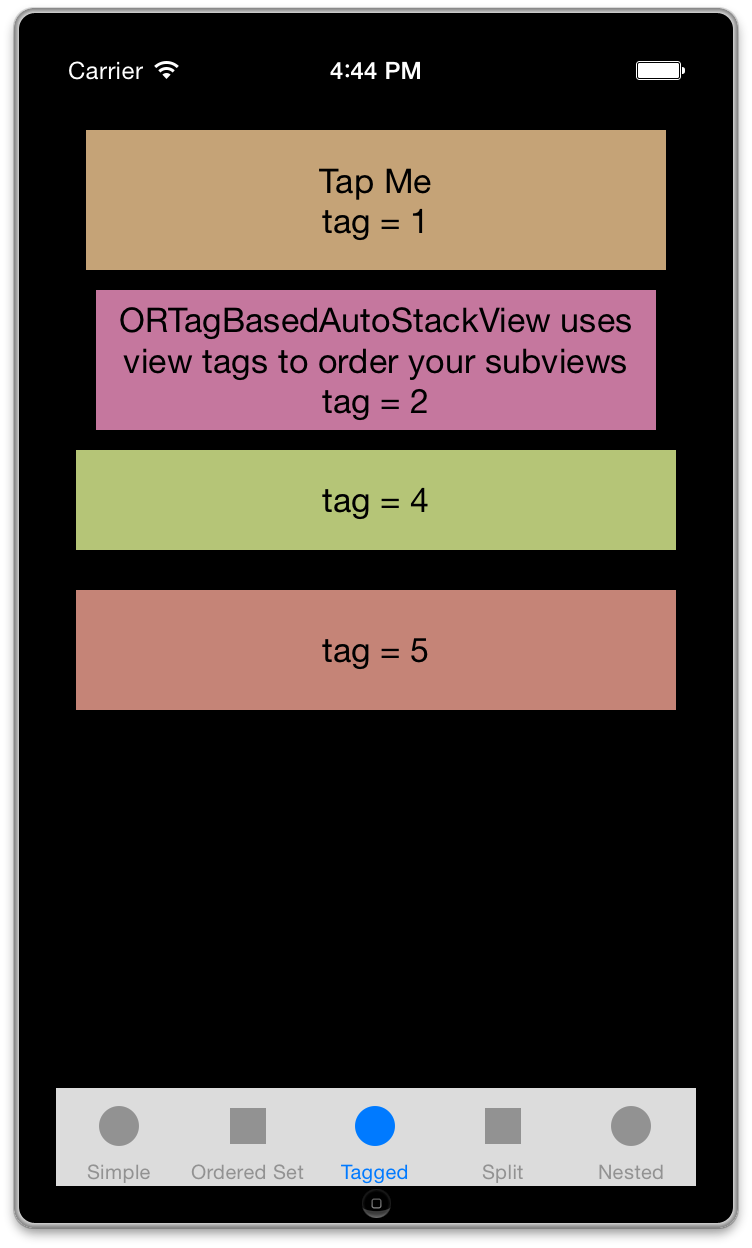
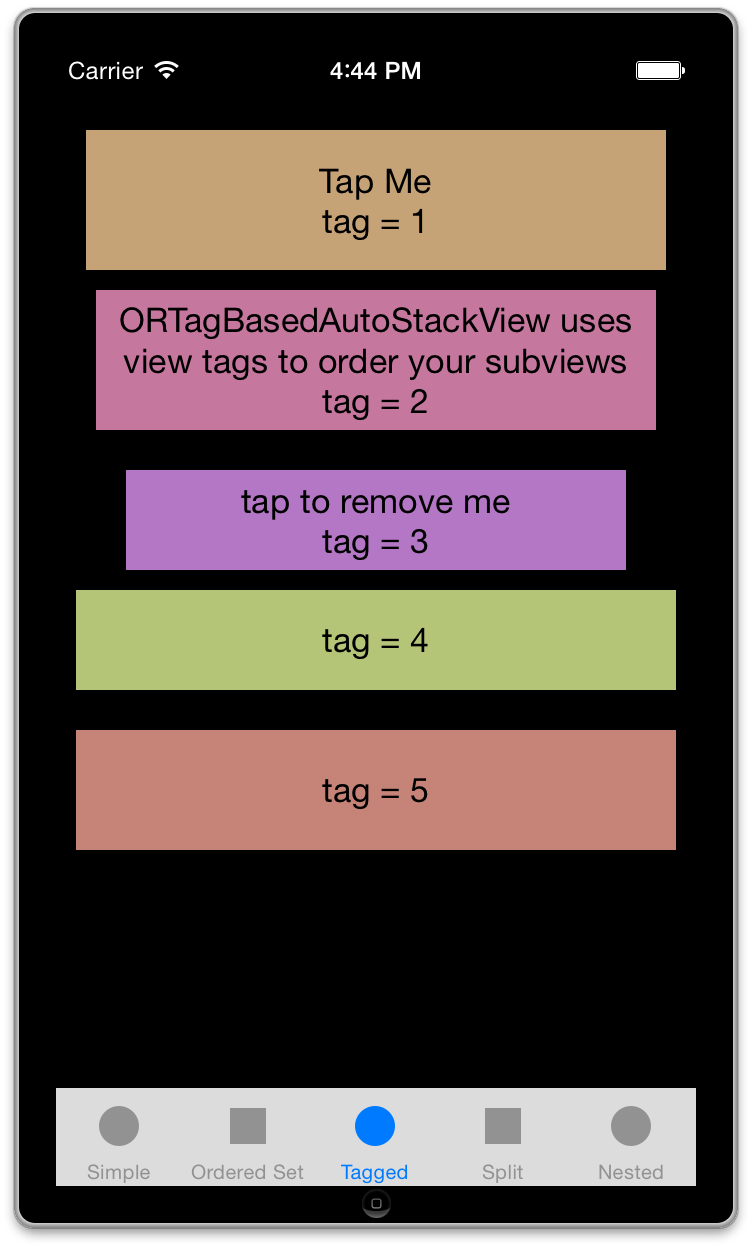
另一种选项是使用 ORTagBasedAutoStackView 来以不同的顺序视觉化管理子视图,而不是按添加时间顺序。ORTagBasedAutoStackView 使用视图标签来指定视图从顶部到底部显示的顺序。例如,这些视图将按正确的顺序排列,不管其添加时间的顺序。点击第一个视图将在栈中中间位置添加一个带有 tag 标记为 3 的新视图。
- (void)loadView
{
    self.view = [[ORTagBasedAutoStackView alloc] init];
}

- (void)viewDidLoad
{
  ORColourView *view1 = [[ORColourView alloc] init];
  view1.text = @"Tap Me\ntag = 1";
  view1.fakeContentSize = (CGSize){ UIViewNoIntrinsicMetric , 70};
  view1.tag = 1;

  UITapGestureRecognizer *tapGesture = [[UITapGestureRecognizer alloc]
    initWithTarget:self action:@selector(addView)];
  [view1 addGestureRecognizer:tapGesture];

  ORColourView *view2 = [[ORColourView alloc] init];
  view2.text = @"ORTagBasedAutoStackView uses view tags to order your subviews\ntag = 2";
  view2.fakeContentSize = (CGSize){ UIViewNoIntrinsicMetric , 70 };
  view2.tag = 2;

  ORColourView *view4 = [[ORColourView alloc] init];
  view4.text = @"tag = 4";
  view4.fakeContentSize = (CGSize){ UIViewNoIntrinsicMetric , 50 };
  view4.tag = 4;

  ORColourView *view5 = [[ORColourView alloc] init];
  view5.text = @"tag = 5";
  view5.fakeContentSize = (CGSize){ UIViewNoIntrinsicMetric , 60 };
  view5.tag = 5;

  [self.view addSubview:view2 withTopMargin:@"10" sideMargin:@"40"];
  [self.view addSubview:view5 withTopMargin:@"20" sideMargin:@"20"];
  [self.view addSubview:view4 withTopMargin:@"10" sideMargin:@"20"];
  [self.view addSubview:view1 withTopMargin:@"20" sideMargin:@"30"];
}

- (void)addView
{
  if ([[self.view.subviews filteredArrayUsingPredicate:[NSPredicate predicateWithFormat:@"tag = 3"]] count] > 0) return;

  ORColourView *view3 = [[ORColourView alloc] init];
  view3.text = @"tap to remove me\ntag = 3";
  view3.fakeContentSize = (CGSize){ UIViewNoIntrinsicMetric , 50 };
  view3.tag = 3;

  [self.view addSubview:view3 withTopMargin:@"20" sideMargin:@"70"];
}
ORSplitStackView
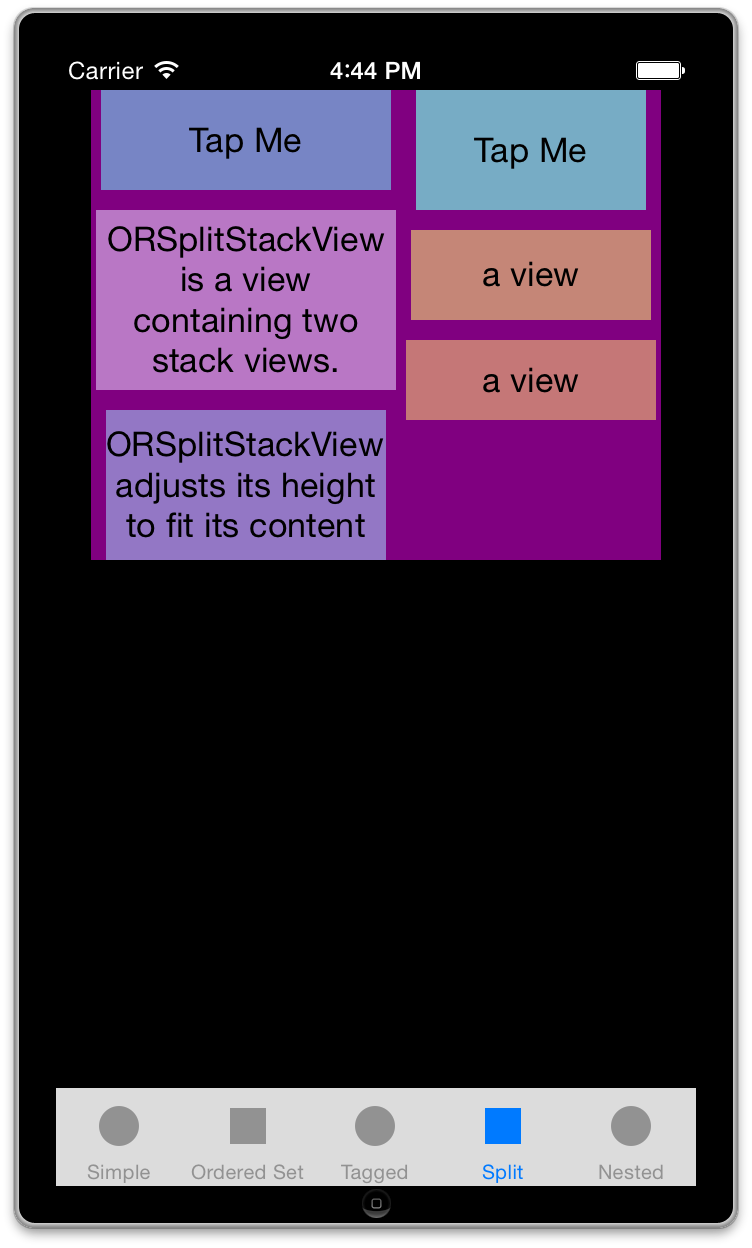
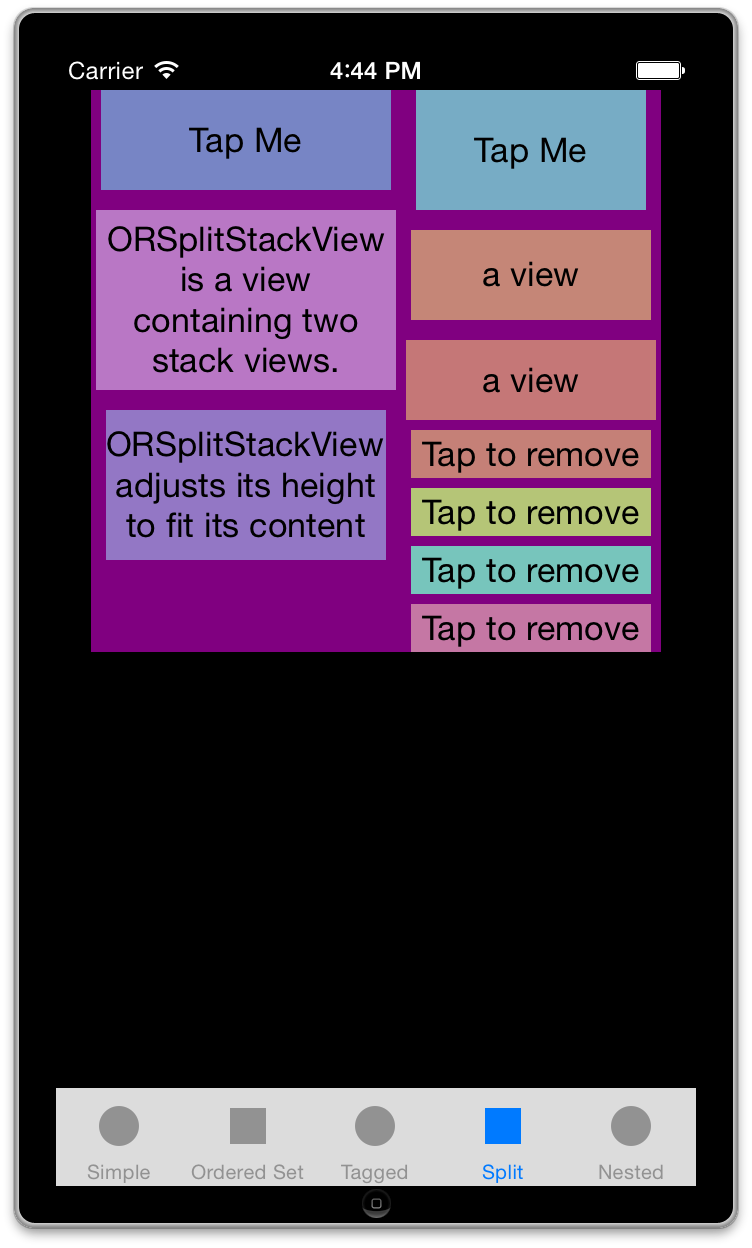
ORSplitStackView 是包含两个 ORStackView 列表的视图。将子视图添加到 leftStack 和 rightStack 视图中。ORSplitStackView 根据两个列表视图中最高的一个调整其高度。
- (void)loadView
{
  self.view = [[UIView alloc] init];
}

- (void)viewDidLoad
{
  ORSplitStackView *splitView = [[ORSplitStackView alloc] initWithLeftPredicate:@"155" rightPredicate:@"130"];
  [self.view addSubview:splitView];
  [self.view addConstraint:[NSLayoutConstraint constraintWithItem:splitView attribute:NSLayoutAttributeCenterX relatedBy:NSLayoutRelationEqual toItem:self.view attribute:NSLayoutAttributeCenterX multiplier:1.0 constant:0]];
  if ([self respondsToSelector:@selector(topLayoutGuide)]) {
    [self.view addConstraint:[NSLayoutConstraint constraintWithItem:splitView attribute:NSLayoutAttributeTop relatedBy:NSLayoutRelationEqual toItem:self.topLayoutGuide attribute:NSLayoutAttributeBottom multiplier:1.0 constant:0]];
  }

  splitView.backgroundColor = [UIColor purpleColor];
  ORColourView *left1 = [[ORColourView alloc] init];
  left1.text = @"Tap Me";
  left1.fakeContentSize = (CGSize){ UIViewNoIntrinsicMetric , 50};

  ORColourView *right1 = [[ORColourView alloc] init];
  right1.text = @"Tap Me";
  right1.fakeContentSize = (CGSize){ UIViewNoIntrinsicMetric , 60};

  UITapGestureRecognizer *leftGesture = [[UITapGestureRecognizer alloc]
    initWithTarget:self action:@selector(addView:)];
  [left1 addGestureRecognizer:leftGesture];
  UITapGestureRecognizer *rightGesture = [[UITapGestureRecognizer alloc]
    initWithTarget:self action:@selector(addView:)];
  [right1 addGestureRecognizer:rightGesture];

  ORColourView *left2 = [[ORColourView alloc] init];
  left2.text = @"ORSplitStackView is a view containing two stack views.";
  left2.fakeContentSize = (CGSize){ UIViewNoIntrinsicMetric , 90};

  ORColourView *left3 = [[ORColourView alloc] init];
  left3.text = @"ORSplitStackView adjusts its height to fit its content";
  left3.fakeContentSize = (CGSize){ UIViewNoIntrinsicMetric , 75};

  ORColourView *right2 = [[ORColourView alloc] init];
  right2.text = @"a view";
  right2.fakeContentSize = (CGSize){ UIViewNoIntrinsicMetric , 45};

  ORColourView *right3 = [[ORColourView alloc] init];
  right3.text = @"a view";
  right3.fakeContentSize = (CGSize){ UIViewNoIntrinsicMetric , 40};

  [splitView.leftStack addSubview:left1 withTopMargin:@"0" sideMargin:@"10"];
  [splitView.leftStack addSubview:left2 withTopMargin:@"10" sideMargin:@"5"];
  [splitView.leftStack addSubview:left3 withTopMargin:@"10" sideMargin:@"15"];
  [splitView.rightStack addSubview:right1 withTopMargin:@"0" sideMargin:@"15"];
  [splitView.rightStack addSubview:right2 withTopMargin:@"10" sideMargin:@"10"];
  [splitView.rightStack addSubview:right3 withTopMargin:@"10" sideMargin:@"5"];
}

- (void)addView:(UITapGestureRecognizer *)gesture
{
  ORColourView *view = [[ORColourView alloc] init];
  view.text = @"Tap to remove";
  view.fakeContentSize = (CGSize){ UIViewNoIntrinsicMetric , 24 };
  [(ORStackView *)gesture.view.superview addSubview:view withTopMargin:@"5" sideMargin:@"10"];
}
示例用法
pod try ORStackView 或运行示例项目;克隆仓库,然后在项目目录中运行 pod install。
安装
ORStackView 可以通过 CocoaPods 获得,只需将以下行添加到您的 Podfile 中即可安装:
pod "ORStackView"
作者
Orta Therox, [email protected]
许可协议
ORStackView 按照MIT许可协议提供。更多信息请参阅 LICENSE 文件。


