NotchToolkit 1.21
| 测试已测试 | ✗ |
| Lang语言 | SwiftSwift |
| 许可证 | MIT |
| 发布上次发布 | 2017 年 10 月 |
| SwiftSwift 版本 | echo "4.0" > .swift-version |
| SPM支持 SPM | ✗ |
由 Ahmed Bekhit 维护。

NotchToolkit 1.21
- 由
- Ahmed Bekhit
- iAFapps
NotchToolkit
NotchToolkit 是一款用于 iOS 的框架,允许开发者以创造性的方式使用 iPhone X 的刘海空间。
灵感来源
我在努力将应用程序设计与 #iPhoneX 的刘海结合在一起。
— Luboš Volkov📲 🤗 pic.twitter.com/lj2AhxWNeE⚡️ (@0therplanet) 2017 年 9 月 18 日
| 目录 | 描述 |
|---|---|
| 文档 | 描述了 NotchToolkit 所提供的配置选项 |
| 预览 | 显示 NotchToolkit 功能的预览图像 |
| 兼容性 | 描述了 NotchToolkit 的设备和 iOS 兼容性 |
| 示例项目 | 解释了如何运行此存储库中提供的示例项目 |
| 安装 | 描述了安装 NotchToolkit 的 CocoaPods、Carthage 和手动选项 |
| 实现 | 列出将 NotchToolkit 实现到项目中的步骤 |
| 更多选项 | 描述了 NotchToolkit 支持的额外功能 |
| 许可证 | 描述 NotchToolkit 许可证 |
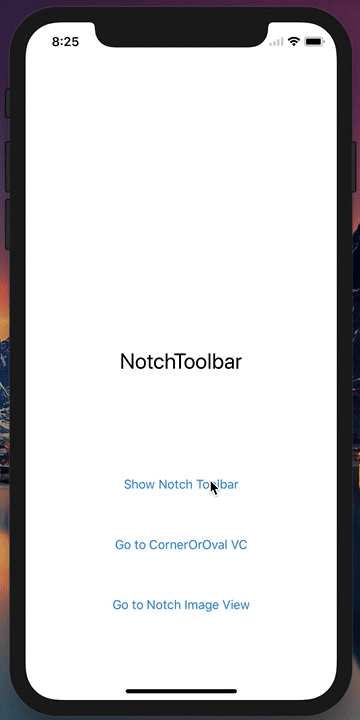
预览
NotchImageView


兼容性
尽管 NotchToolkit 是为 iPhone X 制作的,但它可以应用于较老的 iPhone 设备。此框架已在以下设备上进行了测试:
- iPhone X
- iPhone 8 Plus, 7 Plus, 6s Plus 和 6 Plus
- iPhone 8, 7, 6s 和 6
- iPhone SE 和 5s
NotchToolkit 需要
- iOS 11
- Swift 3.2 或更高版本
NotchToolkit 提供了自定义 Toolbar 和 UIView 的选项,
示例项目
要尝试示例项目,请简单下载此存储库,然后打开 Example 目录中的 NotchToolkit-Example.xcworkspace 项目文件。
安装
CocoaPods
- 使用
Terminal中的此命令下载 CocoaPods
$ sudo gem install cocoapods
- 在
Terminal中转到您的项目文件夹
$ cd YOUR_PROJECT_FILE_PATH
- 在
Terminal中初始化一个 pod
$ pod init
- 使用文本编辑器打开 Podfile 并添加此行
pod 'NotchToolkit'
- 回到
Terminal并安装 pod
$ pod install
Carthage
- 将此行添加到项目目录中的
Cartfile
github "AFathi/NotchToolkit"
- 更新您的 Carthage 目录
$ carthage update
手动
将文件 NotchToolkit.xcodeproj 拖到您的项目中,然后将 NotchToolkit 添加为您的目标的嵌入二进制文件。
在您的项目中实现
- 在
UIViewController类中导入NotchToolkit - 在代理部分添加
NotchToolbarDelegate
class ViewController: UIViewController, NotchToolbarDelegate
- 添加代理方法
//A protocol method that's triggered when the device rotates.
func deviceDidRotate() {
}

//A protocol method that's triggered when an icon is selected.
func didTapToolIcon(_ tools: UICollectionView, toolIndex: IndexPath, section: Int, row: Int) {
}
- 创建一个
NotchToolbar全局变量
let toolbar = NotchToolbar()
- 在
viewDidLoad中配置并初始化toolbar
toolbar.notch.isVisible = true
toolbar.notch.height = 250
toolbar.toolList = [
//[icon image, title]
[UIImage(named:"pikachusquare")!, "Pikachu"],
//only image icons
UIImage(named:"spongebob")!,
//only string icons (mainly for emojis 😉)
"🤔", "🤓",
"📱", "👩💻",
"👨💻", "✅", "🔥"]
toolbar.delegate = self
toolbar.initializeToolbar(self)
- 在
deviceDidRotate代理方法中调用autoResize()方法
func deviceDidRotate() {
toolbar.autoResize()
}
设置完成!
显示和隐藏 toolbar
showOrHide()
此方法允许您显示和隐藏 NotchToolbar。您可以在处理显示/隐藏工具栏的 IBAction 中调用此方法。
@IBAction func buttonClicked(_ sender: UIButton) {
toolbar.showOrHide()
}
处理图标选择
- 确保您将
NotchToolbar代理设置为self。 - 在
didTapToolIcon代理方法中处理图标选择
func didTapToolIcon(_ tools: UICollectionView, toolIndex: IndexPath, section: Int, row: Int) {
if row == 0 {
print("first icon")
}else if row == 1 {
print("second icon")
}
}
更多选项
此框架包含一个 UIView 扩展,允许您将缺口贝塞尔路径绘制到任何 UIView 类或其子类。
draw(_ notch:curveType, position:curvePosition, curve:CGFloat?, customBounds:CGRect? = nil)
这是一个扩展,允许您向任何 UIView 添加椭圆和圆角。
- 对于类型
oval,将curve缩放比设置为 1.0 - 10.0。 - 对于类型
corner,curve是半径大小。 - 更多信息请检查
curveType和curvePosition。
示例
//horizontalSides draws an oval-based bezier path vertically on the right & left sides of a view.
myView.draw(.oval, position: .horizontalSides, curve: 1.5)

//diagonalAC draws rounded rectangle corners diagonally from topLeft to bottomRight of a view.
myView.draw(.corner, position: .diagonalAC, curve: 35)
预览
LICENSE
NotchToolkit 在 MIT 许可下。请查看 LICENSE 文件以获取更多详细信息。