MYBlurIntroductionView 1.0.3
- 作者
- Matthew York
通知:截至 2014 年 2 月 4 日,苹果拒绝使用基于 UIToolbar 类的模糊效果的 apps。MYBlurIntroductionView 使用此类,因此需要重新配置以防止应用被拒绝。我们正在解决这个问题,并将重新编写以下文档以反映更改。
感谢。
专为您的需求构建的控制器
是时候结束所有的介绍/教程视图了!MYBlurIntroductionView 是一个强大的平台,用于为您的 iPhone 应用程序构建介绍。建立在 MYIntroductionView 核心上,MYBlurIntroductionView 通过提供构建 高度定制的介绍 的新功能,将首次用户体验提升到下一个级别。
包括功能
- 专为 iOS 7 构建的全新库存面板
- 可选的 iOS 7 模糊背景(向 ArcticMinds 表示喜爱)
- 直接从 .xib 文件中添加 自定义面板
- MYIntroductionPanel 的子类为 自定义面板 提供对新方法如的访问:
- panelDidAppear
- panelDidDisappear
- 启用/禁用
- 委托方法以处理面板更改和介绍完成事件
- iOS 6 和 7 兼容的 iPhone(iPad 即将推出)
- 本地化跳过按钮
- 从右到左语言支持
包含什么
手动安装
MYBlurIntroductionView 依赖于以下文件和框架
MYBlurIntroductionView.{h,m}MYIntroductionPanel.{h,m}AMBlurView.{h,m}- 使用 QuartzCore 框架
- 需要 ARC
过程
创建介绍视图基本上可以概括为以下步骤
- 创建面板
- 创建 MYIntroductionView
- 将 MYIntroductionPanels 添加到 MYIntroductionView
- 显示视图
创建面板
库存面板
MYBlurIntroductionView 的一个目标是实现创建样板(或“非自定义”)板块的简便性,如同使用 MYIntroductionView 一样。这就是为什么基本界面没有丝毫改变。所有内容都是可选的,并且可以为您重新排列。
主要板块类是 MYIntroductionPanel.{h,m}。它有许多不同的自定义初始化方法,用于快速创建样板板块。以下是一些示例,第一个包含标题,第二个不包含。
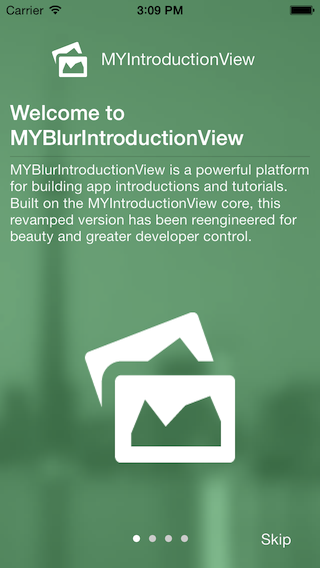
//Create stock panel with header
UIView *headerView = [[NSBundle mainBundle] loadNibNamed:@"TestHeader" owner:nil options:nil][0];
MYIntroductionPanel *panel1 = [[MYIntroductionPanel alloc] initWithFrame:CGRectMake(0, 0, self.view.frame.size.width, self.view.frame.size.height) title:@"Welcome to MYBlurIntroductionView" description:@"MYBlurIntroductionView is a powerful platform for building app introductions and tutorials. Built on the MYIntroductionView core, this revamped version has been reengineered for beauty and greater developer control." image:[UIImage imageNamed:@"HeaderImage.png"] header:headerView];
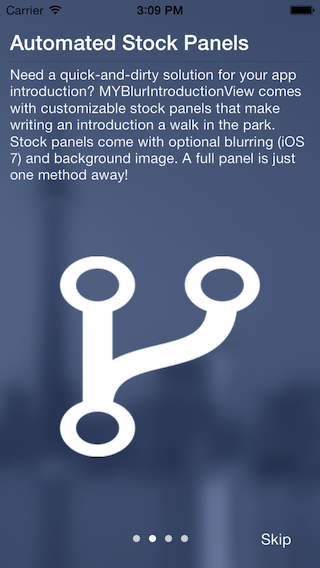
//Create stock panel with image
MYIntroductionPanel *panel2 = [[MYIntroductionPanel alloc] initWithFrame:CGRectMake(0, 0, self.view.frame.size.width, self.view.frame.size.height) title:@"Automated Stock Panels" description:@"Need a quick-and-dirty solution for your app introduction? MYBlurIntroductionView comes with customizable stock panels that make writing an introduction a walk in the park. Stock panels come with optional blurring (iOS 7) and background image. A full panel is just one method away!" image:[UIImage imageNamed:@"ForkImage.png"]];以下是最终结果
从 .xib 文件创建自定义板块
MYBlurIntroductionView 的一个优点是您可以直接从 xib 文件创建介绍板块。这对于不需要任何交互的静态布局非常理想(例如文本和图像)。
创建自定义板块与使用 MYIntroductionPanel 的 initWithFrame:nibNamed: 一样简单。
//Create Panel From Nib
MYIntroductionPanel *panel3 = [[MYIntroductionPanel alloc] initWithFrame:CGRectMake(0, 0, self.view.frame.size.width, self.view.frame.size.height) nibNamed:@"TestPanel3"];
这将把 xib 文件附加到 MYIntroductionPanel,以便在介绍视图中使用。如果您想使用样板标题/描述/标题/图像及其动画,只需在板块实例化后设置所需的附加属性,并运行 buildPanelWithFrame: 方法。以下是一个示例。
//Instantiate panel
MYIntroductionPanel *panel3 = [[MYIntroductionPanel alloc] initWithFrame:CGRectMake(0, 0, self.view.frame.size.width, self.view.frame.size.height) nibNamed:@"TestPanel3"];

//Add custom attributes
panel3.PanelTitle = @"Test Title";
panel3.PanelDescription = @"This is a test panel description to test out the new animations on a custom nib";

//Rebuild panel with new attributes
[panel3 buildPanelWithFrame:CGRectMake(0, 0, self.view.frame.size.width, self.view.frame.size.height)];
提示 确保您的自动调整大小属性设置为正确缩放(我使用所有选择效果最好)。如果不这样做,当您为 4 英寸屏幕设计但在 3.5 英寸屏幕上部署时,可能会导致一些问题。
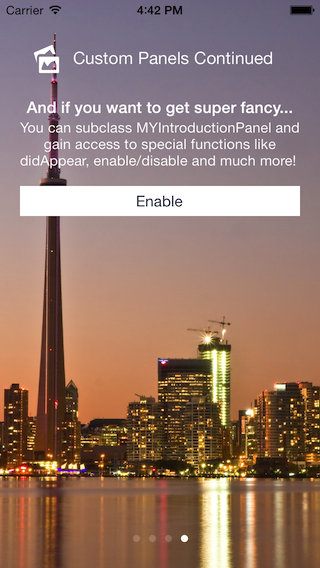
通过子类创建自定义板块
如果您真正想发挥 MYBlurIntroductionView 的全部功能,您将想要子类化一个 MYIntroductionPanel。如果这样做,您将能够访问许多创建事件驱动板块的新方法。
事件处理
也许您希望当介绍到达板块时触发某些动作。现在,通过重写 panelDidAppear 和 panelDidDisappear 方法,这是完全可能的。使用这些方法,您可以创建当板块消失时重置的动态板块。
停止
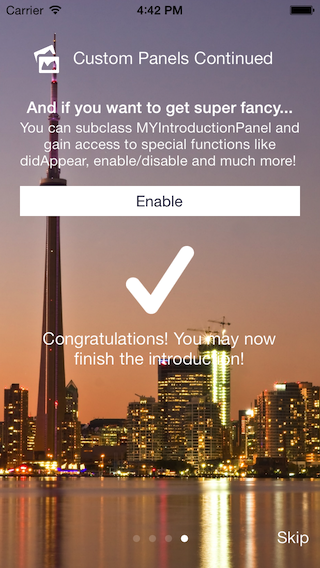
比如说,您想确保用户知道如何在您的应用中做某事。使用您的子类,您现在可以禁用介绍视图,直到他们完成他们喜欢的工作。一旦他们完成了这项任务,他们就可以进入下一个板块。示例代码可以在样本应用程序中的 MYCustomPanel 类中使用 [self.parentIntroductionView setEnabled:NO]; 命令找到。在这里,按钮点击启用移动到下一个板块。
创建 MYIntroductionView 并添加板块
假设您已经制作了一些板块,创建 MYIntroductionView 实例并添加板块只需几行代码。
//Create the introduction view and set its delegate
MYBlurIntroductionView *introductionView = [[MYBlurIntroductionView alloc] initWithFrame:CGRectMake(0, 0, self.view.frame.size.width, self.view.frame.size.height)];
    introductionView.delegate = self;
    introductionView.BackgroundImageView.image = [UIImage imageNamed:@"Toronto, ON.jpg"];
    //introductionView.LanguageDirection = MYLanguageDirectionRightToLeft;

//Feel free to customize your introduction view here

//Add panels to an array
NSArray *panels = @[panel1, panel2, panel3, panel4];

//Build the introduction with desired panels
[introductionView buildIntroductionWithPanels:panels];
buildIntroductionWithPanels 方法是所有神奇发生的地方。调用此方法后,介绍视图准备好显示。要最终显示它,只需将其添加为子视图。
//Add the introduction to your view
[self.view addSubview:introductionView];
要看到这一切是如何发生的,请转到样本项目!它创建了一个使用所有类型的板块的介绍视图,这样您就可以了解 MYBlurIntroductionView 提供的所有内容。
委托
MYBlurIntroductionView 附带两个用于与介绍视图交互的委托方法。
-
introduction:didChangeToPanel:withIndex
- 每次更改板块时,此方法都会调用。使用此方法可能更改背景图像或模糊颜色。
-
introduction:didFinishWithType
- 此方法在简介视图完成后触发。还提供完成的类型。
关于作者
马特·约克是一位iOS、Android和C#开发者,来自高级公共安全中心 (GitHub链接)。CAPS致力于为阿拉巴马州执法人员开发尖端移动技术。马特还是Intercede社交网络的创始人,该社交网络可在应用商店中找到。