LocalizableUI 0.3.8
- 作者
- Jan Weiss 和 Philipp Weiss
LocalizableUI


示例
要运行示例项目,请克隆仓库,并首先从 Example 目录运行 pod install。
支持的 UI 元素
- UIBarButtonItem
- UIButton
- UILabel
- UINavigationItem
- UISegmentedControl
- UITabBarItem
- UITableViewCell
- UITextField
- UITextView
- UIView
- UIViewController
- UIAlertController
- UIAlertAction
需求
- iOS 9.0+
- Xcode 9.0+
- Swift 4.0+
沟通
- 如果您发现缺少任何有用的元素,请提交问题。
- 如果您发现了一个错误,请提交问题。
- 如果您想要贡献,请提交拉取请求。
安装
CocoaPods
LocalizableUI 通过 CocoaPods 提供。要安装,只需在您的 Podfile 中添加以下行:
Carthage
pod 'LocalizableUI'将github "weiss19ja/LocalizableUI"添加到您的 Cartfile。
Swift Package Manager
用法
dependencies: [
    .package(url: "https://github.com/weiss19ja/LocalizableUI.git", from: "0.3.1")
]
Storyboard
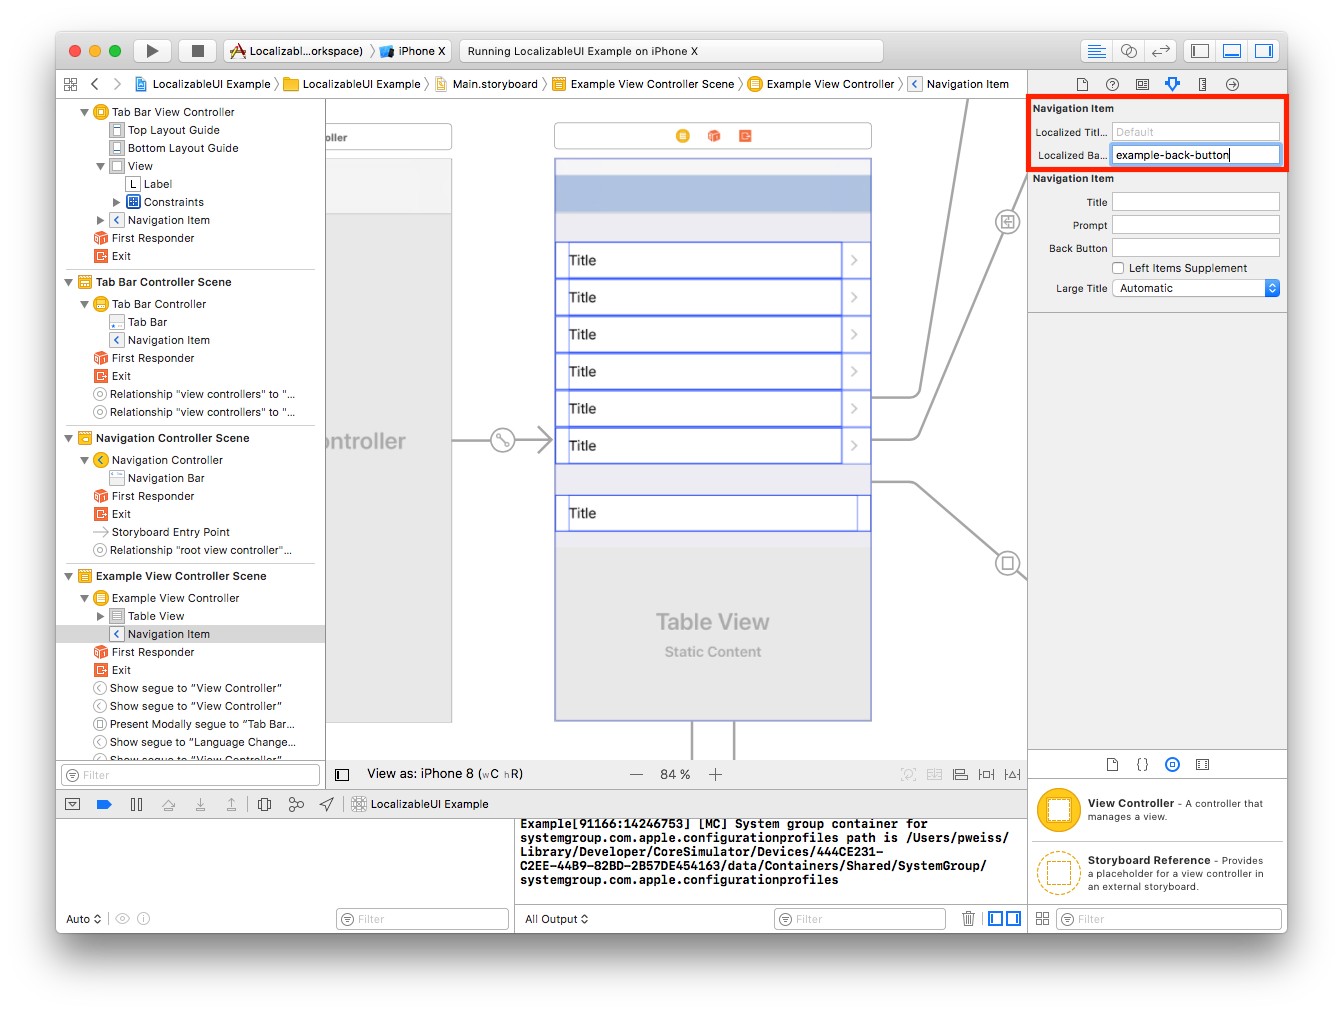
使用 LocalizableUI 最简单的方法是 Storyboard。在这里,您可以输入您的 Localizable.strings 密钥。
对于 SegmentedControl,您可以输入由逗号分隔的 Localizable.strings 密钥数组。

BackButton 可以在之前的 ViewController 中设置。在这里,您可以使用 Storyboard 中的 ViewController 字段。

如果您正在使用 NavigationItem,这将覆盖 ViewController 的标题和 BackButton。

代码
视图本地化
也可以在代码中设置 LocalizableKeys。这包括所有 Storyboard LocalizableKeys 的功能
AlertViewController
let newLabel = UILabel(frame: frame)
newLabel.localizedKey = "LocalizedKey"
AlertViews 必须在代码中进行配置。
本地化密钥到文本
let alertController = UIAlertController(localizedTitle: Constants.titleKey, localizedMessage: Constants.messagekey, preferredStyle: .alert)
let action = UIAlertAction(localzedTitleKey: Constants.buttonKey, style: .cancel, handler: nil)
alertController.addAction(action)
自定义视图
// #1
let localizedText = LocalizationManager.localizedStringFor("LocalizedKey")
// #2
let localizedText = LocalizationManager.localizedStringFor("LocalizedKey", bundle: bundle, value: "", comment: "")
// #3
let localizedText = "LocalizedKey".localized
要本地化任何类或结构,您只需实现 Localizable 协议
语言更改手册
extension CustomView: Localizable {
    func updateLocalizedStrings() {
    	/// do your localization stuff
        text = LocalizationManager.localizedStringFor("LocalizedKey")
    }
}
您可以在应用程序活跃时更改语言。您只需使用 LocalizationManager changeLanguage(...) 方法。所有视图都将更新,而无需进行任何其他调整。
作者
do {
	let tableName = "Localizable"
	let bundle = Bundle(for: type(of: self))
	let languageCode = "en"
	try LocalizationManager.sharedInstance.changeLanguage(to: tableName, from: bundle, languageCode: languageCode)
} catch {
	...
} 
Jan Weiß, Philipp Weiß
LocalizableUI 在 MIT 许可下可用。有关更多信息,请参阅 LICENSE 文件。
许可
CocoaPods 是以下团队的项目