HSTableView
一个更简单、更优雅的 UITableView。通过对象来管理行。事件通过块来处理。
您提供了一个完整的表,无需使用委托。
TableView 使用响应链方法来提供设置。任何设置都可以在行、节或表级别设置。
这允许在表级别进行简单的配置,并在行级别进行易于定制的自定义。
块用于处理点击事件、删除事件、样式等。
默认(彩色)附件支持
HSTableView 适用于已知行数有限的情况(尽管行数可以更改)。它不支持无限滚动表(您将必须使用 UITableView 和委托来实现这一点)!
安装
使用 cocoa pods
使用 CocoaPods
pod 'HSTableView'简单示例
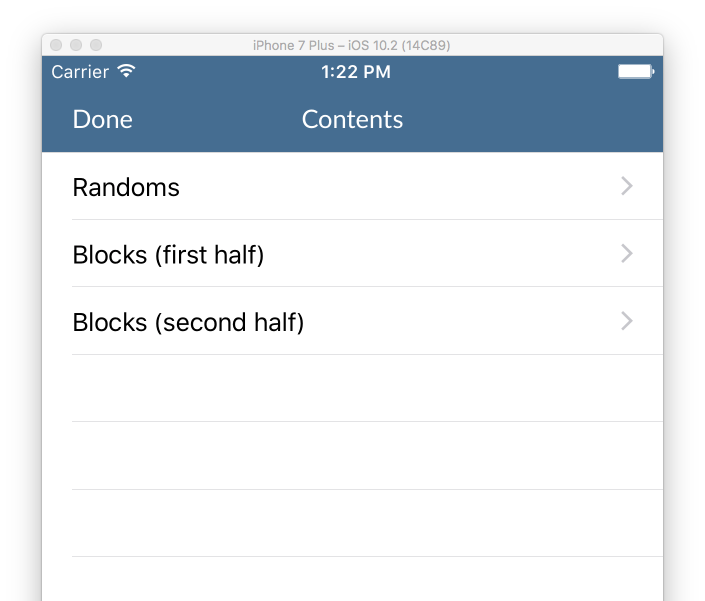
一个包含三行,并为每行提供点击处理器的简单表格
    func populateTable()
    {
        table.startDataUpdate()

        self.table.addSection()
        //All the rows have the same accessory type, so define it at the table level
        table.info.accessoryType = .disclosureIndicator

        table += HSTVRowInfo(title:"Randoms") {
            (rowInfo) in
            print("Clicked on row 1")
        }

        table += HSTVRowInfo(title:"Blocks (first half)") {
            (rowInfo) in
            print("Clicked on row 2")
        }

        table += HSTVRowInfo(title:"Blocks (second half)") {
            (rowInfo) in
            print("Clicked on row 3")
        }

        self.table.applyDataUpdate()
    }
通过继承进行自定义
每个单元格都是通过响应者链来处理的
HSTVRowInfo -> HSTVSectionInfo -> HSTVTableInfo
因此,例如,为了获取标题的颜色,对于一行,表格首先会检查HSTVRowInfo中是否有设置titleColor。如果是null,则检查HSTVSectionInfo;如果是null,则检查HSTVTable info
这意味着对于适用于您整个表格或部分的内容,您可以在顶级一次性设置,同时还可以在每行级别覆盖特定值。
自定义显示逻辑
您可以使用标准设置器(标题、副标题、样式等)来自定义显示
    var row = HSTVRowInfo(title:"MyTitle", subtitle:"My Subtitle")
    row.titleColor = .red
    row.leftImageName = "MyImageName"

    table += row
或者使用afterCreate或beforeDisplay处理器
   var row = HSTVRowInfo(title:"MyTitle", subtitle:"My Subtitle")
   row.styleAfterCreateHandler = {
       row,cell in

       cell.myCustomLabel.text = "TextForCustomLabel"
   }

   table += row
注意 - 如果您要对多个单元格执行相同的自定义操作,您可以在表或部分级别使用处理器,并通过customInfo属性访问所需的信息
   table.info.styleAfterCreateHandler = {
       row,cell in

       cell.myCustomLabel.text = row.customInfo!.customLabelText
   }
自定义单元格
-
您可以通过设置HSTVRowInfo.style来使用标准单元格格式
-
您可以使用HSTVRowInfo.nib指定自定义nib
-
您可以通过继承HSTVRowInfo并重写以下方法来创建自定义单元格:
func makeNewCell(_ identifier: String, inheritedStyle: UITableViewCellStyle) -> UITableViewCell
简单设置处理(用于设置表)
我经常在我的应用程序中使用表格来进行真假设置。有一个自定义处理器可以显示/隐藏勾选标记并在用户点击行时更新布尔型UserDefault
	row.handleCheckmark(userDefault:"TestDefault",
                            checkedSubtitle: "Checked (user default true)",
                            uncheckedSubtitle: "UnChecked (user default false)")
过滤
您可以使用过滤选项来动画化表格中单元格的显示和隐藏。当一行被隐藏时,它的宽度被设置为0,以便可以动画化消失。在设计单元格时,请考虑这一点——如果单元格有一个固定高度的视图,那么动画将运行得更快,因为在单元格动画下落时它不需要重绘多次。
例如,要根据搜索栏中的文本对表格进行筛选
   func searchBar(_ searchBar: UISearchBar, textDidChange searchText: String) {

       tableView.filter { (row) -> Bool in
           return row.title?.contains(string: searchText) ?? false
       }
   }
详细演示
此函数完全定义了示例表格
    func populateTable()
    {
        table.startDataUpdate()
        table.allowsSelectionDuringEditing=true

        // Provide defaults for all rows in the table
        // This will apply unless a value is set at a more specific level (section or row)
        table.info.subtitleColor = UIColor.lightGray
        table.info.subtitle="Table default subtitle"
        table.info.clickHandler = {row in
            //Default click handler prints the index path, updates the subtitle and redraws the row
            print("Table handler click: \(row.lastIndexPath)")
            row.subtitle="clicked at \(Date.init())"
            row.redrawCell(UITableViewRowAnimation.fade)
        };

        // Section
        // Add a section with a simple title
        //
        var section=self.table.addSection("Regular cells")
        // Provide some defaults for items in this section
        section.info.titleColor=UIColor.blue
        section.info.subtitleColor=UIColor.orange

        //First row has a simple click handler that reloads the table data
        //The number or rows is random - so you can see the effect of the reload
        var row=HSTVRowInfo(title:"Reload Table",subtitle: "Number of rows in first section is somewhat random")
        row.leftImageName="713-refresh-1"
        row.clickHandler = {
            [unowned self] (row) in
            self.populateTable()
        };
        table += row

        let numberOfRandoms=arc4random_uniform(6)
        //Random number of rows with the title 'Section One'
        //Odd rows get their subtitle from the table
        //Even rows have their own subtitle
        for i in 1...(2+numberOfRandoms) {
            row=HSTVRowInfo(title:"Section One: \(i)")
            if (i%2==0)
            {
                row.subtitle="subtitle \(Date.init())"
                row.clickHandler = {row in
                    print("Regular cell section click handler, \(i)")
                };
            }
            table += row
        }

        // Section
        // Simple swipe to delete row
        //
        self.table.addSection("Editable")
        row = HSTVRowInfo(title: "Swipe to delete")
        row.editingStyle=UITableViewCellEditingStyle.delete
        row.deleteHandler=row.simpleDeleteHandler
        table += row

        // Section
        // Row value is linked to the user default 'TestDefault'
        //
        self.table.addSection("Linked to default")
        row = HSTVRowInfo(title: "Linked to UserDefault 'TestDefault'")
        row.handleCheckmark(userDefault:"TestDefault",
                            checkedSubtitle: "Checked (user default true)",
                            uncheckedSubtitle: "UnChecked (user default false)")
        table += row

        //Row value is linked to the user default 'TestDefault', but checkmark shows when value is false
        row = HSTVRowInfo(title: "Linked to UserDefault 'TestOppositeDefault'")
        row.handleCheckmark(userDefault:"TestOppositeDefault",
                            checkedSubtitle: "Checked (user default false)",
                            uncheckedSubtitle: "UnChecked (user default true)",
                            checkmarkShowsForFalse: true)
        table += row

        // Section
        // Various accessory views
        // (including coloured disclosure indicators)
        section=self.table.addSection("Accessory views")
        section.info.subtitle=""

        row = HSTVRowInfo(title:"Chevron")
        row.accessoryType = .disclosureIndicator
        row.leftImageName="04-squiggle"
        row.tintColor=UIColor.orange
        row.tintChevronDisclosures = true
        table += row


        row = HSTVRowInfo(title:"Chevron")
        row.accessoryType = .disclosureIndicator
        row.tintColor=UIColor.orange
        table += row


        row = HSTVRowInfo(title:"Disclosure")
        row.accessoryType = .detailDisclosureButton
        row.leftImageName="04-squiggle"
        row.leftImageColor=UIColor.purple
        row.tintColor=UIColor.orange
        row.tintChevronDisclosures = true
        row.accessoryClickHandler = {
            row in
            print ("Disclosure accessory clicked")
        }
        table += row

        row = HSTVRowInfo(title:"Checkmark")
        row.accessoryType = .checkmark
        table += row

        row = HSTVRowInfo(title:"Info")
        row.accessoryType = .detailButton
        row.accessoryClickHandler = {
            row in
            print ("Info accessory clicked")
        }
        table += row

//         Section
//         Row loaded from prototype cell
        section = self.table.addSection("Cell Prototype")
        section.info.reuseIdentifier = "ProtoCell"


        for i in 1...2 {
            let row=HSTVRowInfo(title:"One: \(i)")
            if (i%2==0)
            {
                row.subtitle="subtitle"
            }
            table += row
        }


        // Section
        // Row loaded from custom xib
        //
        section = self.table.addSection("Custom Xib")
        section.info.subtitle="Section Override"
        let myNib = UINib(nibName: "MyTableViewCell", bundle: nil)
        section.info.nib=myNib
        section.info.estimatedRowHeight=150

        for i in 1...2 {
            let row=HSTVRowInfo(title:"One: \(i)")
            if (i%2==0)
            {
                row.subtitle="subtitle"
            }
            table += row
        }

        // Section
        // Nil title for section makes the header invisibile
        // styleAfterCreate handler used to set custom background and override label colours
        //
        section=self.table.addSection(nil)
        for i in 1...2 {
            let row=HSTVRowInfo(title:"Section with no header \(i)")
            table += row
        }

        //style after create handler in this section customises the row in code
        //setting a reuseTag makes sure that this cell is not re-used elsewhere
        section.info.styleAfterCreateHandler = {
            row,cell in

            //os caches imageNamed results
            var image=UIImage(named:"tableRowBackground.png")
            image=image?.stretchableImage(withLeftCapWidth: 30, topCapHeight: 2)

            cell.backgroundView=UIImageView.init(image: image)

            cell.textLabel?.textColor=UIColor.white
            cell.detailTextLabel?.textColor=UIColor.white
        }
        section.info.reuseTag="orange"

        self.table.applyDataUpdate()
    }