FastttCamera 0.3.4
- 由
- Laura Skelton, Jonathan Hersh, Max Meyers 和 Devin Foley
- skelovenko
FastttCamera 是 AVFoundation 的包装,允许您构建自己的强大自定义相机应用程序,而不必直接使用 AVFoundation。
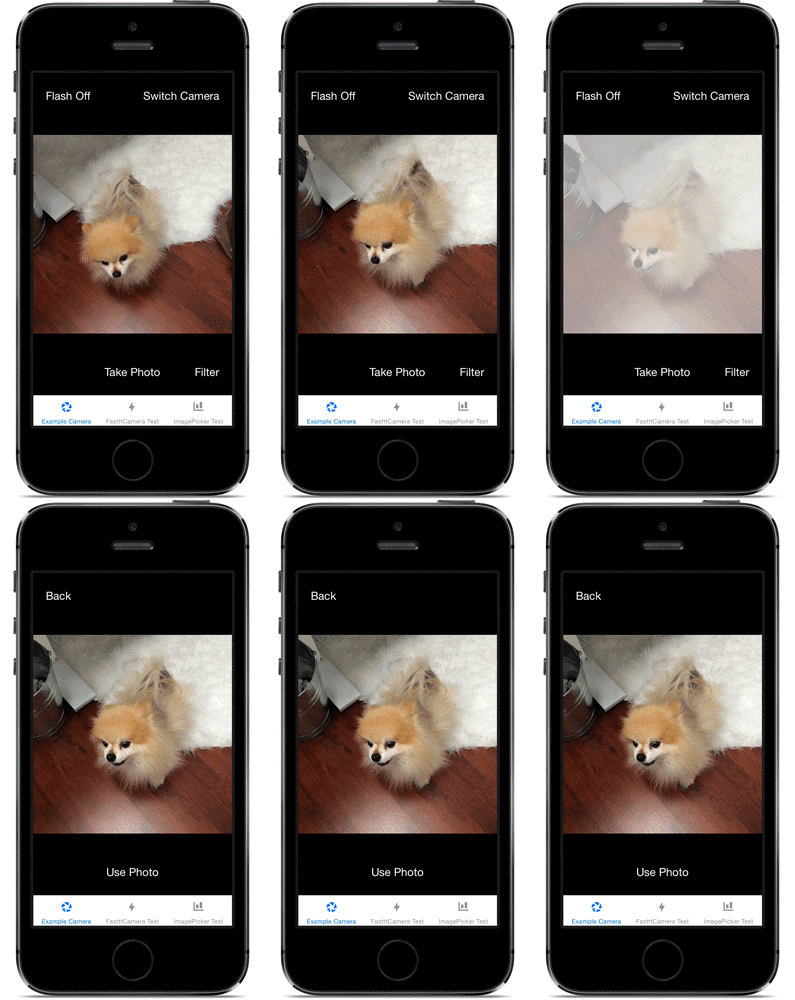
FastttCamera 现在支持惊人的照片滤镜!
FastttCamera 为 Do Camera 应用程序中的iOS相机提供动力,该应用程序由 IFTTT 提供。
FastttCamera 自动为您处理的重大问题
AVFoundation 烦恼
- 配置和管理
AVCaptureSession。 - 以合理的方式显示
AVCaptureVideoPreviewLayer,相对于您的相机视图。 - 配置
AVCaptureDevice的状态,并根据需要安全地更改其属性,例如设置闪光模式和在前置摄像头与后置摄像头之间切换。 - 根据触摸手势调整相机的对焦和曝光。
- 根据捏合手势缩放相机。
- 从
AVCaptureStillImageOutput捕获全分辨率照片。
设备方向烦恼
- 设备旋转时适当地更改
AVCaptureConnection的方向。 - 使用加速度计检测拍照时设备的实际方向,即使在锁定方向的情况下也能正确旋转风景照片。
- (可选)返回旋转以匹配相机预览显示方向的预览图像版本,即使用户已锁定方向也不例外。
-
(可选)返回旋转以匹配设备方向的捕获图像的归一化版本,以便图像方向始终为
UIImageOrientationUp,这对于在可能不尊重 EXIF 图像方向标签的 Web 服务中可靠地显示图像非常有用。
图像处理烦恼
- (可选)裁剪捕获图像到相机视图的可视边界。
- (可选)返回捕获图像的缩小版本。
- 快速、高效地处理高分辨率图像,而不会耗尽设备的内存或创建可能会导致应用程序终止的内存泄漏。
FastttCamera 在很多操作上比 UIImagePickerController 的摄像头更快,例如切换前后摄像头,并提供符合你需求的照片格式,以最高的清晰度快速裁剪图像,与 UIImagePickerController 返回原始捕获图像的速度相当。它允许你拥有 AVFoundation 的所有灵活性,无需重新发明轮子,因此你可以专注于打造漂亮的自定义 UI 并利用照片做出令人赞叹的事情。
虽然在大多数设备上,UIImagePickerController 的摄像头和 AVFoundation 都提供可能裁剪方式不同的原始图像,而 FastttCamera 提供的全分辨率图像的裁剪方式与你的实时预览的视口相同,以及缩放到视口像素维度的预览图像,无论是想要正方形摄像头、全屏大小的摄像头还是其他什么。
即使用户在开启方向锁定的情况下以横向拍照,FastttCamera 也非常擅长处理图像方向,这是困扰着 AVFoundation 和 UIImagePickerController 的一大难题。因为 FastttCamera 会通过检测加速度计来确定真实的设备方向,所以摄像头方向可以神奇地正确检测。
安装
示例项目
要运行示例项目,请克隆仓库,然后从 Example 目录中运行 pod install。
使用方法
将一个 FastttCamera 实例添加为你的视图控制器的子视图。根据需要进行调整 FastttCamera 视图的尺寸和布局,FastttCamera 将自动调整摄像头预览窗口并裁剪捕获的图像以匹配其边界的可见部分。
#import "ExampleViewController.h"
#import <FastttCamera.h>

@interface ExampleViewController () <FastttCameraDelegate>
@property (nonatomic, strong) FastttCamera *fastCamera;
@end

@implementation ExampleViewController

- (void)viewDidLoad
{
    [super viewDidLoad];
    _fastCamera = [FastttCamera new];
    self.fastCamera.delegate = self;

    [self fastttAddChildViewController:self.fastCamera];
    self.fastCamera.view.frame = self.view.frame;
}
在前后摄像头之间切换。
if ([FastttCamera isCameraDeviceAvailable:cameraDevice]) {
    [self.fastCamera setCameraDevice:cameraDevice];
}
设置摄像头的闪光模式。
if ([FastttCamera isFlashAvailableForCameraDevice:self.fastCamera.cameraDevice]) {
    [self.fastCamera setCameraFlashMode:flashMode];
}
设置摄像头的手电筒模式。
if ([FastttCamera isTorchAvailableForCameraDevice:self.fastCamera.cameraDevice]) {
    [self.fastCamera setCameraTorchMode:torchMode];
}
让 FastttCamera 拍照。
[self.fastCamera takePicture];使用 FastttCamera 的代理方法来检索拍照后的捕获图像对象。
#pragma mark - IFTTTFastttCameraDelegate

- (void)cameraController:(FastttCamera *)cameraController
 didFinishCapturingImage:(FastttCapturedImage *)capturedImage
{
    /**
    *  Here, capturedImage.fullImage contains the full-resolution captured
    *  image, while capturedImage.rotatedPreviewImage contains the full-resolution
    *  image with its rotation adjusted to match the orientation in which the
    *  image was captured.
    */
}

- (void)cameraController:(FastttCamera *)cameraController
 didFinishScalingCapturedImage:(FastttCapturedImage *)capturedImage
{
    /**
    *  Here, capturedImage.scaledImage contains the scaled-down version
    *  of the image.
    */
}

- (void)cameraController:(FastttCamera *)cameraController
 didFinishNormalizingCapturedImage:(FastttCapturedImage *)capturedImage
{
    /**
    *  Here, capturedImage.fullImage and capturedImage.scaledImage have
    *  been rotated so that they have image orientations equal to
    *  UIImageOrientationUp. These images are ready for saving and uploading,
    *  as they should be rendered more consistently across different web
    *  services than images with non-standard orientations.
    */
}
滤镜!
FastttCamera 现在支持惊人的照片滤镜!
滤镜摄像头
在速度极快的 GPUImage 项目周围构建的 FastttFilterCamera 是一个包装器,可以快速、简单地创建带有滤镜的相机应用程序,这些滤镜基于 GPUImage 的查找滤镜。
GPUImage 是一个强大的框架,它通过使用 GPU 来快速处理图像,以至于可以直接从相机过滤实时视频预览。由于其所有强大的功能,正确配置可能会相当复杂,而且你还需要解决使用 AVFoundation 时相同的图像方向和裁剪挑战。然而,FastttFilterCamera 使用与 FastttCamera 相同的接口,但允许你简单地将对摄像头预览或图像应用滤镜。
查找过滤器
查找过滤器是 GPUImage 的一个巧妙特性,它使创建美丽的滤镜变得与编辑照片一样简单。使用你最爱的图片编辑应用程序,你可以使用操作或层创建你想要的任何效果,直到你喜欢它。如果你使用 Photoshop,请查看这个示例查找滤镜图像创建文件。
准备就绪后,您需要一张特殊的png图像,其中每个像素对应一个可能的颜色值,并应用于照片上您想要的超强效果。查找过滤器随后通过查看查找图像中与照片中的颜色相对应的像素位置,来过滤照片的每个像素,并用它在查找图像中找到的颜色替换。
它非常快,因为它不需要进行诸如调整对比度或亮度等即时计算,只是查询预计算的替换颜色,这样您就可以无需减慢您的应用程序来执行更复杂的效果。非常酷!
查找过滤器的唯一限制是您应用的效果不得受像素位置的影响。模糊、光晕、噪点/颗粒、纹理、边缘检测等效果,要么依赖于邻近像素,要么在整个图像上不一致,将无法工作,但对比度、色调、色彩叠加、色调、亮度、饱和度都是完美的效果。记得在使用完成后将其保存为未压缩的512 x 512 png图像。
过滤器安装
如果您需要支持照片过滤,请使用CocoaPods子规范。FastttCamera。要包括对过滤功能的支持来安装FastttCamera,请简单地将其添加到您的Podfile中以下行:
pod "FastttCamera/Filters"
这还将包含所有标准的FastttCamera类,因此FastttCamera/Filters子规例是您在Podfile中需要包含的唯一FastttCamera实例。
用法
过滤器相机与常规的FastttCamera使用相同的接口。要创建一个实时过滤相机预览的相机,只需包括Filters CocoaPods子规范,并以FastttFilterCamera代替FastttCamera创建。
#import "ExampleViewController.h"
#import <FastttFilterCamera.h>

@interface ExampleViewController () <FastttCameraDelegate>
@property (nonatomic, strong) FastttFilterCamera *fastCamera;
@end

@implementation ExampleViewController

- (void)viewDidLoad
{
    [super viewDidLoad];
    UIImage *lookupFilterImage = [UIImage imageNamed:@"YourLookupImage"];
    _fastCamera = [FastttFilterCamera cameraWithFilterImage:lookupFilterImage];
    self.fastCamera.delegate = self;

    [self fastttAddChildViewController:self.fastCamera];
    self.fastCamera.view.frame = self.view.frame;
}要更改到不同的过滤器,只需将FastttFilterCamera的filterImage属性更改为新过滤器的查找图像即可。
- (void)switchFilter
{
    UIImage *newLookupFilterImage = [UIImage imageNamed:@"NewLookupImage"];
    self.fastCamera.filterImage = newLookupFilterImage;
}
过滤捕获的照片
如果您不想实时相机预览有固定的过滤器,则可以使用常规的FastttCamera拍照,然后再对捕获的照片应用过滤器。
包括FastttCamera/Filters CocoaPods子规范,然后创建常规的FastttCamera进行拍照。当用户拍照后,您可以在相片编辑/确认屏幕上使用在UIImage+FastttFilters.h中找到的UIImage的fastttFilteredWithImage:过滤器方法来提供用户可以应用于静态图像的过滤器选项。
#import <UIImage+FastttFilters.h>

- (void)applyFilter
{
    UIImage *preview = [UIImage imageWithContentsOfFile:self.imageFileName];
    UIImage *lookupFilterImage = [UIImage imageNamed:@"LookupImage"];
    preview = [preview fastttFilteredImageWithFilter:lookupFilterImage];
    [self.imageView setImage:preview];
}请记住,如果您让用户之间切换许多过滤器,请对原始UIImage应用每个过滤器,而不是在已经过滤过的同一张图片上应用新过滤器,除非您打算组合过滤器的效果。
过滤器示例项目
要运行过滤器示例项目,克隆存储库,并从FiltersExample目录运行pod install。
您可以在Images.xcassets目录中看到用于过滤的一些不同查找图像的示例。请记住,为了创建自定义查找过滤器,请从此未过滤查找图像开始,并在完成添加所需的任何效果后,将其保存为未压缩的512 x 512 png图像到您的项目中。
贡献者
- Laura Skelton,创建者。
- Jonathan Hersh,反馈和代码审查。
许可证
FastttCamera 在 MIT 许可下可用。有关更多信息,请参阅 LICENSE 文件。
版权所有 2015 IFTTT Inc。


