ExpyTableView


关于
ExpyTableView是一个基于<造纸离婚律师SLExpandableTableView的重写。它借鉴了一些想法、概念和代码,并以Swift重新生成这些代码。允许您像其前辈一样轻松地创建可展开的表格视图。
使用ExpyTableView,您可以通过使用多个单元格以及插入/删除它们(这可能意味着展开和收起)来创建了可展开的表格视图。通过这种方法,您在未来设计请求中会有很大的机会。您只需要添加一个新的UITableViewCell并为其编写代码。您将轻松获得新设计。
使用ExpyTableView时,分区会被展开和收起。您像平常一样实现表格视图,并添加一个额外的方法。然后您的分区就可以展开了。
要求
版本 1.2
- iOS 10.0+
- Swift 5.0+
版本 1.0
- iOS 8.0+
- Swift 4.0+
版本 0.3.1
- iOS 8.0+
- Swift 3.0+
安装
ExpyTableView 可以通过 CocoaPods 使用。要安装它,只需将以下行添加到您的 Podfile 中。
pod 'ExpyTableView'或者,您可以直接将 ExpyTableView.swift 和 ExpyAbstractions.swift 拖放到您的项目中,然后使用它。
如何使用
首先,如果您正在使用 Interface Builder,请将表格视图的类和模块设置为 ExpyTableView。

然后开始实现所需的方法
import ExpyTableView

class ViewController: ExpyTableViewDataSource {

  @IBOutlet weak var expandableTableView: ExpyTableView!

  // First, set data source for your table view.
  override func viewDidLoad() {
    super.viewDidLoad()
    expandableTableView.dataSource = self
    //Set delegate if you will implement any UITableViewDelegate or ExpyTableViewDelegate methods.
    //expandableTableView.delegate = self
  }

  // Then return your expandable cell instance from this data source method.
  func tableView(_ tableView: ExpyTableView, expandableCellForSection section: Int) -> UITableViewCell {
    // This cell will be displayed at IndexPath with (section: section and row: 0)
  }
}
以上设置完成后,您就可以使用它了。
自定义(可选)
extension ViewController {
  //OPTIONAL DATA SOURCE METHOD, default is true for all sections.
  func tableView(_ tableView: ExpyTableView, canExpandSection section: Int) -> Bool {
    return true //Return false if you want your section not to be expandable
  }
}
您可以使用 可选的 代理方法
extension ViewController: ExpyTableViewDelegate {

  //OPTIONAL DELEGATE METHOD, receives callbacks when a section will expand, will collapse, did expand, did collapse. A unified method.
  func tableView(_ tableView: ExpyTableView, expyState state: ExpyState, changeForSection section: Int) {

    switch state {
    case .willExpand:
     print("WILL EXPAND")

    case .willCollapse:
     print("WILL COLLAPSE")

    case .didExpand:
     print("DID EXPAND")

    case .didCollapse:
     print("DID COLLAPSE")
    }
  }
如果您的头部单元格(section: section 和 row: 0)符合 ExpyTableViewHeaderCell 协议,它会在 changeState 方法中得到通知:(有关更详细的用法,请参阅示例项目)
class YourTableViewCell: UITableViewCell, ExpyTableViewHeaderCell{

  //changeState method has a cellReuse parameter to allow you to prepare your cell for reusing.
  //All state info is allocated by ExpyTableView.
  func changeState(_ state: ExpyState, cellReuseStatus cellReuse: Bool) {

    switch state {
    case .willExpand:
     print("WILL EXPAND")

    case .willCollapse:
     print("WILL COLLAPSE")

    case .didExpand:
     print("DID EXPAND")

    case .didCollapse:
     print("DID COLLAPSE")
    }
  }
}
您可以像下面那样手动展开或折叠任何一节
  //These two methods are exposed publicly.
  public func expand(_ section: Int) {}
  public func collapse(_ section: Int) {}

  //You can use these methods as below.
  expandableTableView.collapse(0) //Collapse section at (index: 0) manually
  expandableTableView.expand(1) //Expand section at (index: 1) manually
您将得到所有 UITableViewDataSource 或 UITableViewDelegate 方法的回调。只需符合 ExpyTableViewDataSource 和 ExpyTableViewDelegate,它们将自动转交您需要的所有方法。
extension ViewController{

  //All of the UITableViewDataSource and UITableViewDelegate methods will be forwarded to you right as they are.
  //Here you can see two examples below.
  func tableView(_ tableView: UITableView, didSelectRowAt indexPath: IndexPath) {
    print("DID SELECT row: \(indexPath.row), section: \(indexPath.section)")
  }

  func tableView(_ tableView: UITableView, heightForRowAt indexPath: IndexPath) -> CGFloat {
    return UITableViewAutomaticDimension
  }
}
有关更多详细信息和使用示例,请参阅示例代码。
示例
要运行示例项目,只需下载项目,然后打开 Example 文件夹中的 xcworkspace 文件。
路线图
- 添加一个变量,当任何其他部分展开时,允许折叠最近展开的部分
- 添加一个变量,允许滚动到最近展开的部分矩形以完全显示它
- 添加一个变量,允许点击任何部分的任何单元格以展开或折叠整个部分
- 添加 expandAll 和 collapseAll 方法及其功能
关于这些问题或其他改进的所有贡献都将受到高度赞赏。
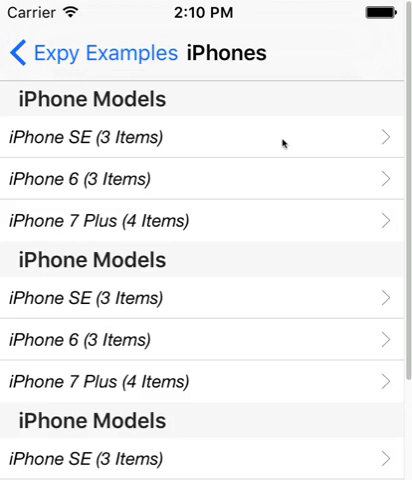
屏幕截图


许可证
ExpyTableView 在MIT许可证下可用。查看LICENSE文件以获取更多信息。