CBTableViewDataSource 1.1.0
- 作者
- Cocbin

一行代码即可创建用于 UITableView 的 DataSource 和 Delegate。中文文档 (带中文文档)
介绍
CBTableViewDataSource 是一个用于快速为 UITableView 创建 DataSource 和 Delegate 的轻量级框架。它提供了一个简单的 API,以创建逻辑性强且易于维护的代码。
创建类似这样的 DataSource 的最懒方式
[_tableView cb_makeSectionWithData:self.viewModel.data andCellClass:[CustomCell class]];当然,您必须遵循一些约定。同时,我也提供了一些其他灵活的方式来创建 DataSource。
详细请参阅以下文档。
为什么使用
在我们开发应用程序时,我们总是花费很多时间和精力来为 UITableView 创建 DataSource 和 Delegate。而这些代码往往是重复的且难以维护,因为它们位于每个委托方法的位置。我们必须从角落到角落找到它们,并在维护程序时修改它们。
然而,CBTableViewDataSource 改变了一切,并提供了一个简单的 API 来帮助我们创建逻辑性强且易于维护的代码。
为了让大家注意到这个框架的优势,让我们来做一番比较。
以下为原生方式
// Native vision

// define a enum to split section

typedef NS_ENUM(NSInteger, SectionNameDefine) {
    SECTION_ONE,
    SECTION_TWO,
    SECTION_THREE,
    SECTION_FOUR,
    //...
    COUNT_OF_STORE_SECTION
};

// define identifier for section

#define IDENTIFIER_ONE  @"IDENTIFIER_ONE"
#define IDENTIFIER_TWO  @"IDENTIFIER_TWO"
#define IDENTIFIER_THREE  @"IDENTIFIER_THREE"
#define IDENTIFIER_FOUR @"IDENTIFIER_FOUR"
//...


// register cell class for section

[self.tableView registerClass:[OneCell class] forCellWithReuseIdentifier:IDENTIFIER_ONE];
[self.tableView registerClass:[TwoCell class] forCellWithReuseIdentifier:IDENTIFIER_TWO];
[self.tableView registerClass:[ThreeCell class] forCellWithReuseIdentifier:IDENTIFIER_THREE];
[self.tableView registerClass:[FourCell class] forCellWithReuseIdentifier:IDENTIFIER_FOUR];


// implementation datasource protocol

- (NSInteger)numberOfSectionsInTableView:(UITableView *)tableView {
    return COUNT_OF_STORE_SECTION;
}

- (NSInteger)tableView:(UITableView *)tableView numberOfRowsInSection:(NSInteger)section {
    return ((NSArray*)self.data[section]).count;
}

- (UITableViewCell *)tableView:(UITableView *)tableView cellForRowAtIndexPath:(NSIndexPath *)indexPath {
    NSUInteger section = (NSUInteger) indexPath.section;
    NSUInteger index = (NSUInteger) indexPath.row;
    switch(section) {
        case SECTION_ONE:
        // to do something
            return cell;
        case SECTION_TWO:
        // to do something
            return cell;
        case SECTION_THREE:
        // to do something
            return cell;

            //...
    }

    return cell;
}
// ...
这种方式繁琐且难以维护。
而使用 CBTableViewDataSource
[_tableView cb_makeDataSource:^(CBTableViewDataSourceMaker * make) {
    // section one
    [make makeSection:^(CBTableViewSectionMaker *section) {
        section.cell([OneCell class])
            .data(self.viewModel.oneDate)
            .adapter(^(OneCell * cell,id data,NSUInteger index){
                [cell configure:data];
            })
            .autoHeight();
    }];
    // section two
    [make makeSection:^(CBTableViewSectionMaker *section) {
        section.cell([TwoCell class])
            .data(self.viewModel.twoData)
            .adapter(^(FeedCell * cell,id data,NSUInteger index){
                [cell configure:data];
            })
            .autoHeight();
    }];

    // ... so on
}];
它已经变得简洁而分层。最重要的是,它使代码更符合人类的思考方式。
用法
安装
使用 cocoapods:
pod 'CBTableViewDataSource'导入
#import <CBTableViewDataSource/CBTableViewDataSource.h>
创建 DataSource 和 Delegate
[_tableView cb_makeDataSource:^(CBTableViewDataSourceMaker * make) {
    // section one
    [make makeSection:^(CBTableViewSectionMaker *section) {
        section.cell([OneCell class])
            .data(self.viewModel.oneDate)
            .adapter(^(OneCell * cell,id data,NSUInteger index){
                [cell configure:data];
            })
            .autoHeight();
    }];
    // section two
    [make makeSection:^(CBTableViewSectionMaker *section) {
        section.cell([TwoCell class])
            .data(self.viewModel.twoData)
            .adapter(^(FeedCell * cell,id data,NSUInteger index){
                [cell configure:data];
            })
            .autoHeight();
    }];

    // ... so on
}];
示例
仅使用数据
UITableView tableView = [UITableView new];
[tableView cb_makeSectionWithData:data];
这种方式将使用默认的 UITalbeViewCell 作为 Cell 类。
数据必须遵循以下约定:
- 数据是一个 NSArray (NSArray < NSDictionary * >*)。
-
字典的键如下
-
text用于设置UITableViewCell的 textLabel 的文本 -
detail用于设置UITableViewCell的 detailTextLabel 的文本 -
value用于设置UITableViewCell的 detailTextLabel 的文本。 -
image用于设置UITableViewCell的 imageView 的图片。 -
accessoryType用于设置UITableViewCell的 accessory 类型。
value和detail都可用于设置UITableViewCell的 detailTextLabel 的文本。如果使用detail作为键,detailTextLabel将显示在textLabel的底部。如果使用value作为键,detailTextLabel将显示在textLabel的右侧。不要同时使用这两个键,数组中第一个出现的键具有优先级。 -
例如:
_data = @[
    @{@"text":@"Following",@"value":@"45"},
    @{@"text":@"Follower",@"value":@"10"},
    @{@"text":@"Star",@"value":@"234"},
    @{@"text":@"Setting",@"accessoryType":@(UITableViewCellAccessoryDisclosureIndicator)},
    @{@"text":@"Share",@"accessoryType":@(UITableViewCellAccessoryDisclosureIndicator)}];
UI如下
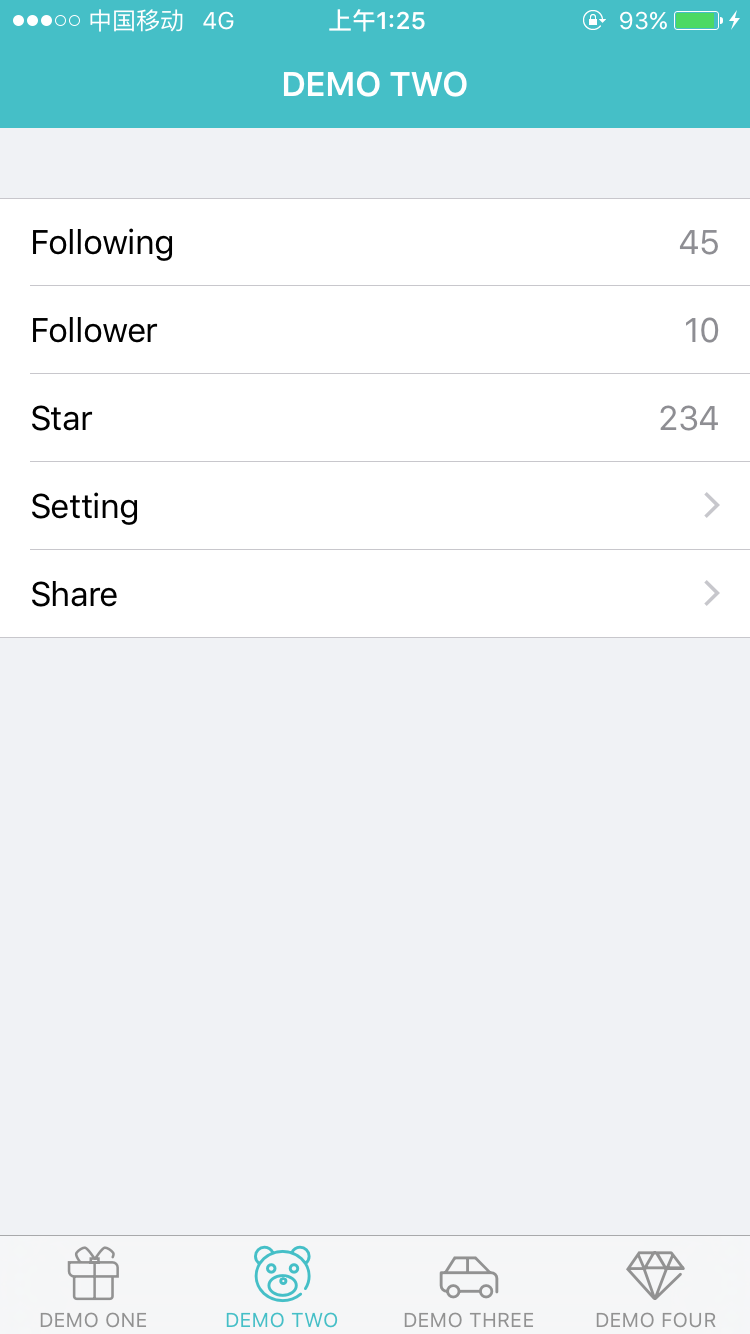
查看文件名分别为 DemoTwoViewController.h 和 DemoTwoViewController.m 的细节。
使用自定义单元格
[tableView cb_makeSectionWithData:data andCellClass:[CustomCell class]];CustomCell 必须提供一个 Configuer: 方法或 Configuer:index: 方法来适配数据。
例如
- (void)configure:(NSDictionary *)row index:(NSNumber * )index {
    if (row[@"avatar"]) {
        [self.avatarView setImage:[UIImage imageNamed:row[@"avatar"]]];
    } else {
        [self.avatarView setImage:nil];
    }
    [self.nameLabel setText:row[@"name"]];
    [self.titleLabel setText:row[@"title"]];
    [self.detailLabel setText:row[@"detail"]];
    self.circleView.hidden = row[@"unread"] == nil;

    if([index intValue] &1) {
        self.contentView.backgroundColor = [UIColor colorWithRed:0.95 green:0.96 blue:0.96 alpha:1.00];
    } else {
        self.contentView.backgroundColor = [UIColor whiteColor];
    }
}
查看文件名分别为 CustomCell.h 和 CustomCell.m 的细节。
UI如下
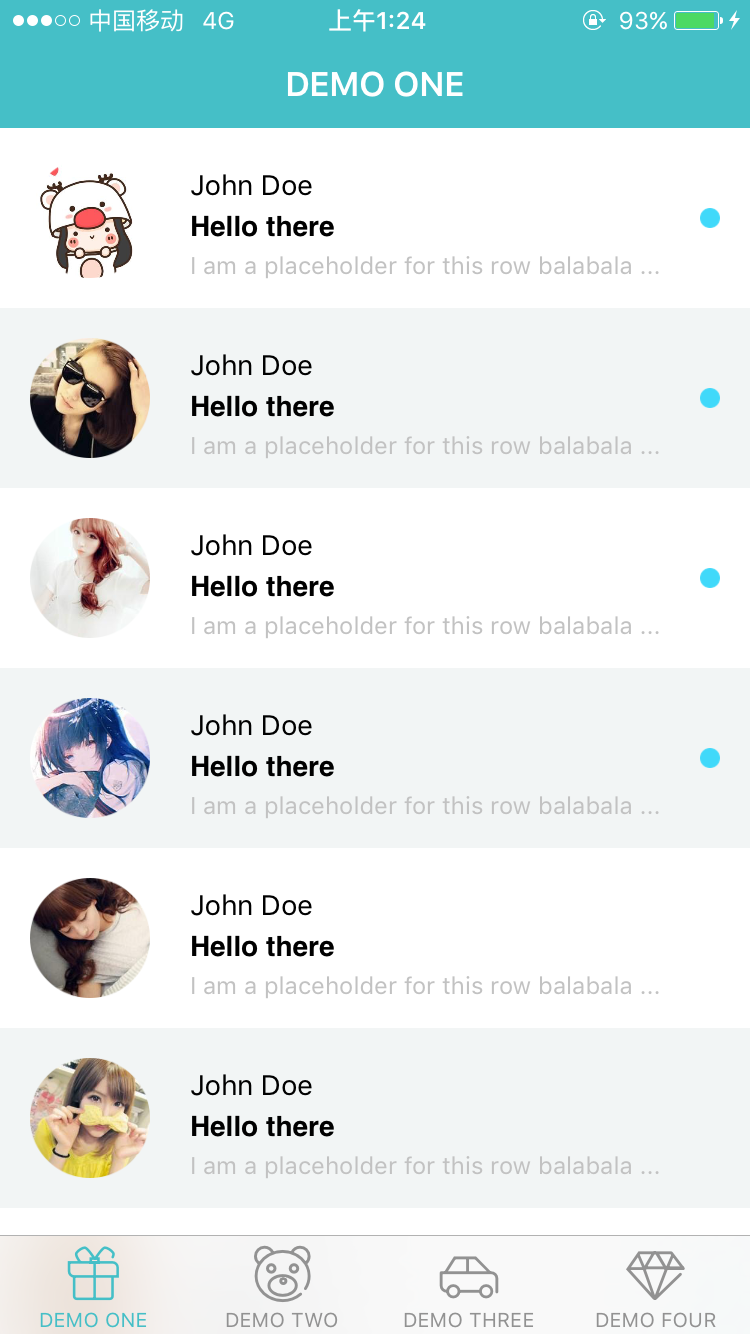
查看文件名分别为 DemoOneViewController.h 和 DemoOneViewController.m 的细节。
更灵活的设置
[tableView cb_makeSection:^(CBTableViewSectionMaker * section) {
    section.data(@[]);
    section.cell([CustomCell class]);
    section.adapter(^(CustomCell cell,id row,NSUInteger index) {
        cell.configure(row);
    });
    section.event(^() {
        // do something
    })
    // other setting
}];
这里展示单节的用例。
CBTableViewSectionMaker
CBTableViewSectionMaker 用于设置节的某些属性。可用的属性如下:
data
设置要显示在 UITableView 中的数据,参数需要一个 NSArray。
例如
section.data(@[@(goods1),@(goods2),...]);cell
设置显示数据的 Cell Class,单元格的标识符将自动注册。
例如
section.cell([CustomCell class]);adapter
用于适配单元格和数据。
例如
section.adapter(^(CustomCell * cell,id row,NSUInteger index) {
    [cell configure:row];
    // ...
});
event
用于设置单元格被触摸时的事件,例如
section.event(^(NSUInteger index,id row) {
    CustomViewController * controller = [CustomViewController new];
    controller.viewModel.data = row;
    [self.navigationController pushViewController:controller animated:YES];
});
height
用于设置 cell 的高度。需要一个静态值。此高度只适用于当前节。
section.height(100);autoHeight
用于设置单元格的动态计算高度。
section.autoHeight();如果设置了 autoHeight,则 height 将无效。
headerTitle
用于设置节的标题。例如
section.headerTitle("title");footerTitle
用于设置节的页脚标题。类似。
HeaderView
用于设置节的HeaderView。例如
section.headerView(^(){
    UIView * headerView = [UIView alloc]initWithFrame:CGRectMake(0,0,320,40);
    // ...
    return headerView;
})
如果设置了 HeaderView,则 headerTitle 将无效。
footerView
用于设置节的FooterView。类似。
多节
[tableView cb_makeDataSource:^(CBTableViewDataSourceMaker * make) {
    [make headerView:^{
        return [HeaderView new];
    }];
    [make makeSection: ^(CBTableViewSectionMaker * section) {
        section.data(@[]);
        section.cell();
        section.adapter();
        section.event();
        // ... so on
    }];
    [make makeSection: ^(CBTableViewSectionMaker * section) {
        section.data(@[]);
        section.cell();
        section.adapter();
        section.event();
        // ... so on
    }];
    [make makeSection: ^(CBTableViewSectionMaker * section) {
        section.data(@[]);
        section.cell();
        section.adapter();
        section.event();
        // ... so on
    }];
    // .. so on
    [make footView:^{
        return [FooterView new];
    }];
}]
UI如下
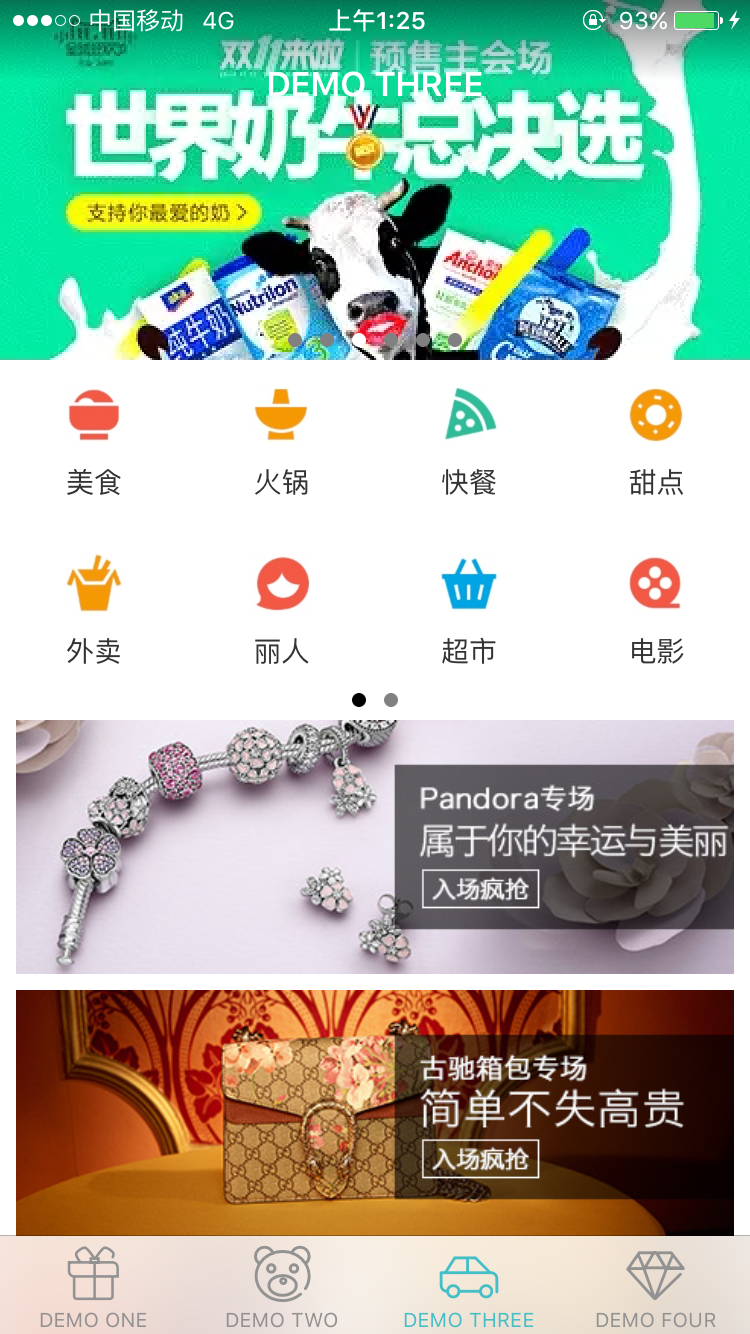
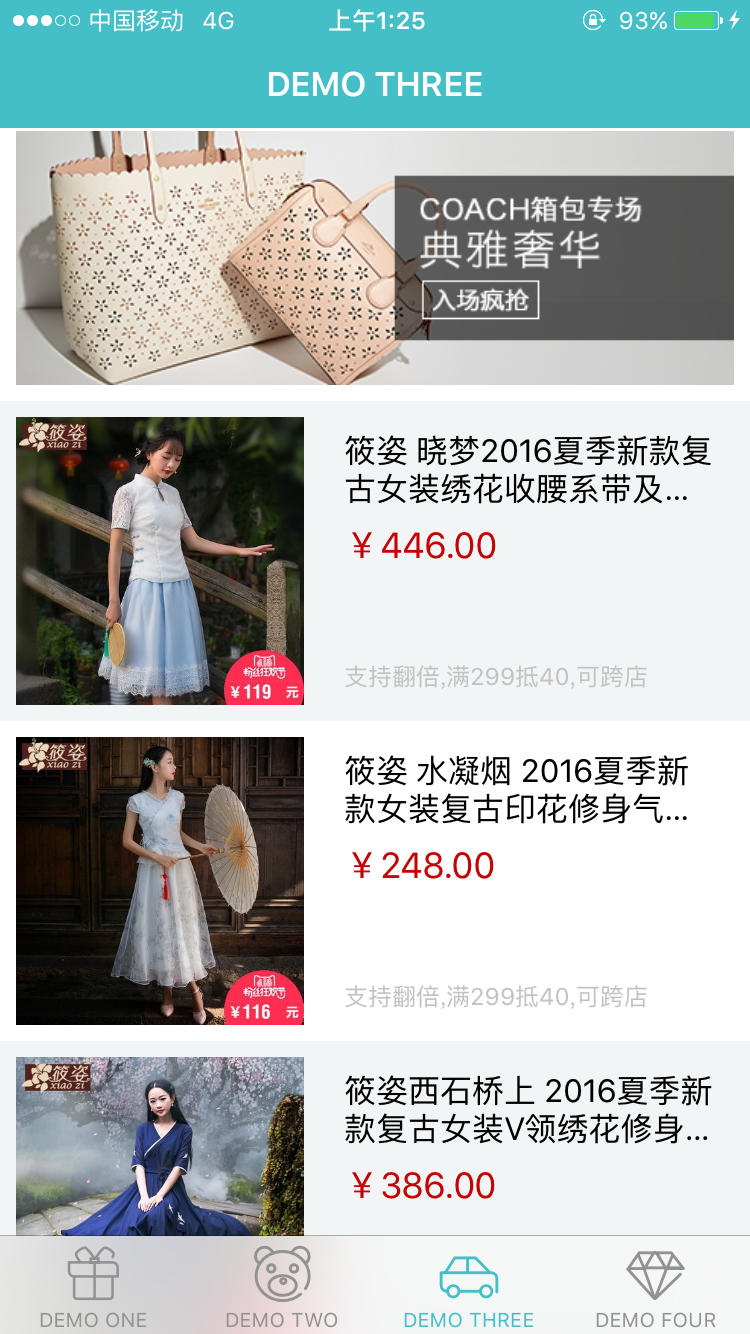
查看文件名分别为 DemoThreeViewController.h 和 DemoThreeViewController.m 的细节。
CBTableViewDataSourceMaker
CBTableViewDataSourceMaker 用于设置 UITableView 的一些属性。可用的属性如下
makeSection
用于为 UITableView 添加一个分区。例如
[tableView cb_makeDataSource:^(CBTableViewDataSourceMaker * make) {
    [make makeSection: ^(CBTableViewSectionMaker * section) {
       // ...
    }
}]
height
用于设置 UITableView 的默认高度
make.height(100);如果您为分区设置了 height 或 autoHeight,这里的高度将无效。默认值为 40。
headerView
用于设置 UITableView 的 tableHeaderView。请注意 tableHeaderView 与分区的 headerView 之间的区别。
例如
make.headerView(^(){
    UIView * headerView = [[UIView alloc]init];
    // ...
    return headerView;
});
footerView
用于设置 UITableView 的 tableFooterView。同上。
commitEditing
用于设置 UITableViewDelegate 的 commitEditing 方法。
 [make commitEditing:^(UITableView * tableView, UITableViewCellEditingStyle * editingStyle, NSIndexPath * indexPath) {
    // do somethings.
}];
scrollViewDidScroll
用于设置 UITableViewDelegate 的 scrollViewDidScroll 方法。
[make scrollViewDidScroll:^(UIScrollView * scrollView) {
    // do somethings
}];
致谢
感谢您使用和支持。欢迎提出问题和发送拉取请求。我会优先处理。
我在这个框架中参考了许多大师。例如,在设计 API 时,我参考了著名的 autolayout 框架 Masonry。动态计算单元格高度的实现方法参考了 @forkingdog 的 UITableView-FDTemplateLayoutCell。
感谢他们在给我的灵感。
通过电子邮件联系我:[email protected]