BlurImageProcessor 1.0.0
| 测试已测试 | ✓ |
| Lang语言 | Obj-CObjective C |
| 许可证 | MIT |
| 发布最新版本 | 2014年12月 |
由Daniel L. Alves,Gustavo Barbosa维护。

BlurImageProcessor 1.0.0
- 作者
- Daniel L. Alves
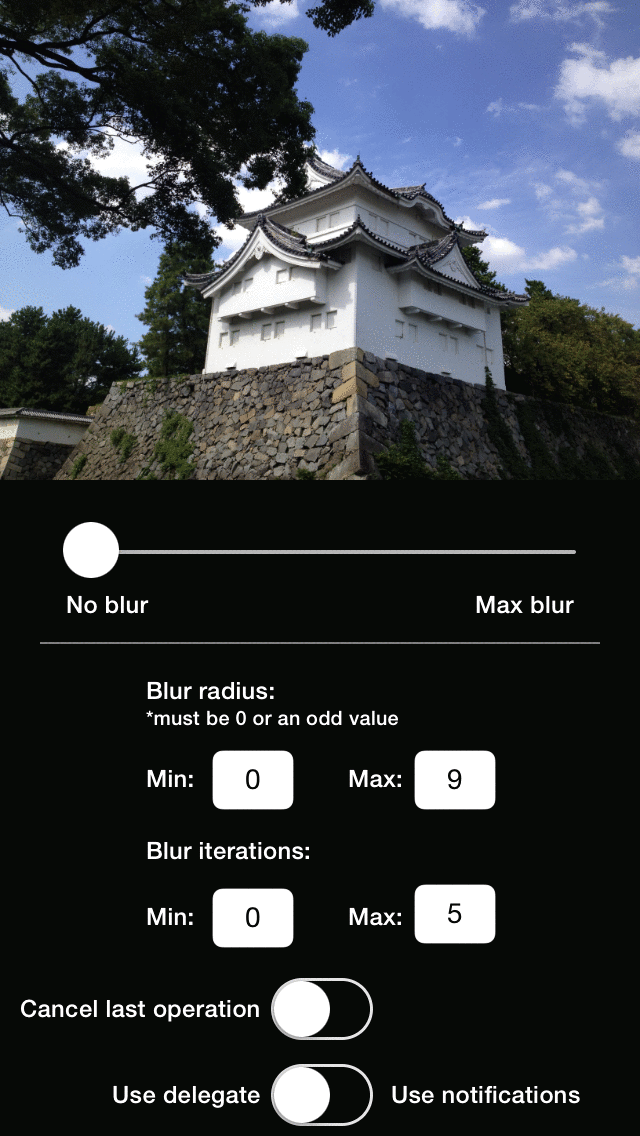
BlurImageProcessor提供了一个非常简单且实用的方法来实时生成模糊图像。指定图像后,每次新的模糊操作都会创建一个新分配的图像。通过调整半径和迭代的值,可以创建许多不同结果,甚至动画。
模糊操作可以是同步的或异步的。同步操作在其被调用的线程/操作队列上运行。每个ALDBlurImageProcessor对象都有自己的处理队列来运行异步操作,因此它们容易管理。此外,所有委托回调、通知和块都是在触发异步模糊处理操作的同一线程/操作队列上调用/触发的。因此,如果您从主线程/操作队列触发操作,则不需要担心将新模糊图像直接用于用户界面。
BlurImageProcessor试图在内存和性能之间取得良好的平衡。它监听UIApplicationDidReceiveMemoryWarningNotification通知,在内存不足的情况下清除临时内部缓冲区。此外,它还有一个智能缓存系统:只要模糊图像在外部应用程序中存在,就会将其缓存。因此,如果您在相同的原始图像上调用具有相同半径和迭代参数的另一个模糊操作,则不会发生处理。当外部应用程序停止引用模糊图像时,它将自动从缓存中删除,因此不会有内存浪费。
用法
首先,您需要使用一个指向它的强引用来实例化一个处理器,传入您想要模糊的目标图像
#import "ALDViewController.h"

@interface MyViewController ()
{
    ALDBlurImageProcessor *blurImageProcessor;
    UIImageView *blurTargetImageView;
}
@end

@implementation MyViewController
-( void )viewDidLoad
{
    ...
    blurImageProcessor = [[ALDBlurImageProcessor alloc] initWithImage: blurTargetImageView.image];
    ...
}
@end然后,您可以选择如何处理生成的图像:通过块、委托或通知
块
-( void )viewDidLoad
{
    ...
    [blurImageProcessor asyncBlurWithRadius: 5
                                 iterations: 7
                               successBlock: ^( UIImage * )blurredImage {
                                   blurTargetImageView.image = blurredImage;
                               }
                               errorBlock: ^( NSNumber *errorCode ) {
                                   NSLog( @"Error code: %d", [errorCode intValue] );
                               }];
    ...
}
这就是全部!
ALDBlurImageProcessorDelegate
声明您正在实现ALDBlurImageProcessorDelegate
@interface MyViewController()< ALDBlurImageProcessorDelegate >
{
    ALDBlurImageProcessor *blurImageProcessor;
    UIImageView *blurTargetImageView;
}
@end然后设置blurImageProcessor的委托
-( void )viewDidLoad
{
    ...
    blurImageProcessor.delegate = self;
    [blurImageProcessor asyncBlurWithRadius: 5 iterations: 7];
    ...
}
最后,实现其方法
-( void )onALDBlurImageProcessor:( ALDBlurImageProcessor * )blurImageProcessor newBlurrredImage:( UIImage * )image
{
    blurTargetImageView.image = image;
}

-( void )onALDBlurImageProcessor:( ALDBlurImageProcessor * )blurImageProcessor blurProcessingErrorCode:( NSNumber * )errorCode
{
    NSLog( @"Error code: %d", [errorCode intValue] );
}
NSNotificationCenter
使用通知,只需观察您想要的那些通知
-( void )viewDidLoad
{
    ...
    [[NSNotificationCenter defaultCenter] addObserver: self
                                             selector: @selector( onNewBlurredImage: )
                                                 name: ALDBlurImageProcessorImageReadyNotification
                                               object: nil];

    [[NSNotificationCenter defaultCenter] addObserver: self
                                             selector: @selector( onBlurImageProcessorError: )
                                                 name: ALDBlurImageProcessorImageProcessingErrorNotification
                                               object: nil];

    [blurImageProcessor asyncBlurWithRadius: 5 iterations: 7];
    ...
}
并实现处理模糊图像的方法
-( void )onNewBlurredImage:( NSNotification * )notification
{
    UIImage *image = notification.userInfo[ ALDBlurImageProcessorImageReadyNotificationBlurrredImageKey ];
    blurTargetImageView.image = image;
}

-( void )onBlurImageProcessorError:( NSNotification * )notification
{
    NSNumber *errorCode = notification.userInfo[ ALDBlurImageProcessorImageProcessingErrorNotificationErrorCodeKey ];
    NSLog( @"Error code: %d", [errorCode intValue] );
}
不要忘记取消您设置的所有观察者
-( void )dealloc
{
    [[NSNotificationCenter defaultCenter] removeObserver: self
                                                    name: ALDBlurImageProcessorImageReadyNotification
                                                  object: nil];

    [[NSNotificationCenter defaultCenter] removeObserver: self
                                                    name: ALDBlurImageProcessorImageProcessingErrorNotification
                                                  object: nil];
}
要求
iOS 6.0或更高版本
安装
BlurImageProcessor可以通过CocoaPods获取,要安装它,只需将以下行添加到您的Podfile中
pod "BlurImageProcessor"作者
合作者
许可证
BlurImageProcessor遵循MIT许可证。有关更多信息,请参阅LICENSE文件。