BTabViewController


安装
BTabViewController 通过 CocoaPods 提供,但首先请确保您正在工作的空间不是项目,否则您需要首先初始化空间。只需在终端中转到项目目录,然后运行 pod init,cocoa 将处理初始化和创建空间。然后,打开 Podfile 并将以下脚本添加到文件中,位于 Pods for <PROJECT_NAME> 行下方
pod 'BTabViewController'现在再次打开终端并运行以下命令
pod install我们已经准备好设计视图了!
需求
BTabViewController 不需要任何第三方依赖项,所以只需 XCode 10+ 版本就足够使用了。
用法
先看看我们经常会用到的模型
模型
/// To define child view controllers and their id
public struct BTabModel {
    // Attributes
    public var id: String
    public var target: UIViewController
}
该功能用于直接访问我们在创建容器时已附加到 var tabList: [BTabModel] 的视图类。例如,tabList[0].target 将返回 0 索引处容器视图的 ViewController 类。
/// Order should begin with zero
public struct BTabItemModel: Equatable {
    // Attributes
    public var order: Int
    public var title: String
    public var titleFont: UIFont = .systemFont(ofSize: 12)
    public var titleTextColor: UIColor = .init(red: 64/255.0, green: 64/255.0, blue: 64/255.0, alpha: 1.0)
    public var highlightFont: UIFont = .systemFont(ofSize: 12, weight: .bold)
    public var highlightTextColor: UIColor = .init(red: 64/255.0, green: 64/255.0, blue: 64/255.0, alpha: 1.0)
    public var backgroundColor: UIColor = .clear
    public var textAlignment: NSTextAlignment = .left
    // Private protection level attributes
    private var isActive: Bool = false
}
模型用于确定属于 var tabCollectionView 的顶部单元格。上述模型应在 setView(tabList: [BTabModel], tabItems: [BTabItemModel]) 函数中设置。非常重要,在调整完成后,要调用 super.setView(tabList: lists, tabItems: tabs)。
参数
// Sizing
open var tabsGap: CGFloat = 8
open var tabInset: CGFloat = 12
open var tabWidth: CGFloat = 80
open var tabsHeight: CGFloat = 50
open var tabAlignment: NSTextAlignment = .left
// Flags
open var fitTabs: Bool = false
open var indicatorIsRounded: Bool = true
open var isIndicatorVisible: Bool = true
open var isIndicatorSlide: Bool = false
open var isAnimated: Bool = true
// Indicator
open var indicatorView: UIView?
open var indicatorHeight: CGFloat = 4
open var indicatorWidth: CGFloat = 20
open var indicatorColor: UIColor = .init(red: 64/255.0, green: 64/255.0, blue: 64/255.0, alpha: 1.0)
以下是 BTabViewController 的参数及其默认值。您可以根据需要调整参数。
override func setView(tabList: [BTabModel], tabItems: [BTabItemModel]) {
    self.tabsGap = 0
    self.tabInset = 0
    self.tabsHeight = 30
    self.fitTabs = true
    self.isIndicatorVisible = false

    super.setView(tabList: tabList, tabItems: tabItems)
}
委托
您只需在将要用作基类控制器类的 ViewController 中继承 BTabViewController。
class FirstContainerViewController: BTabViewController {

}
现在重写委托函数,以便在与基本类通信时触发事件,例如滚动、选择标签。
public protocol BTabViewControllerProtocol: class {
    /// Trigger just tapping on the tab no matter the previous state
    /// - Parameters:
    ///   - target: Which container class did triggerred
    ///   - item: Selected tab item model
    ///   - index: Selected index order
    func listTab(_ target: UIViewController, didSelect item: BTabItemModel, index: Int)
    /// Called just changing operation did
    /// - Parameters:
    ///   - target: Container class just activated
    ///   - to: Newly changed tab model
    func listTab(_ target: UIViewController, tabSwitched toItem: BTabItemModel)
}
第一个函数将在标签上的每个点击动作触发。第二个函数将仅捕获视图更改动作。
集成UI
如果您克隆了存储库并使用 XCode 打开,您将看到示例项目和相关的模式。 我收集了主和标签的故事板,它们对应于
.xibs。
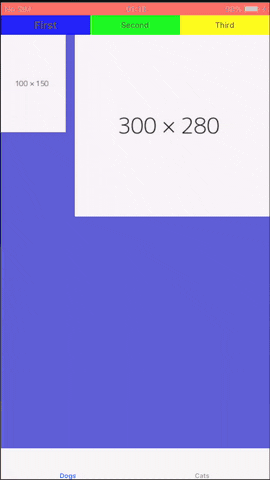
在故事板中创建一个 ViewController 并将其连接到其类。接下来,在内部添加容器视图。这显示了在故事板中基控制器的样子。

然后我们可以在类中实现协议函数并调整设计参数。
import UIKit
import BTabViewController

class FirstContainerViewController: BTabViewController {

    override func viewDidLoad() {
        super.viewDidLoad()

    }

    // MARK: - BTab Stuff
    override func setView(tabList: [BTabModel], tabItems: [BTabItemModel]) {
        // Model setting
        let firstTabVC = ExampleStoryboards.instantiateViewController(in: .tabs, classOf: FirstTabViewController.self)!
        let secondTabVC = ExampleStoryboards.instantiateViewController(in: .tabs, classOf: SecondTabViewController.self)!
        let thirdTabVC = ExampleStoryboards.instantiateViewController(in: .tabs, classOf: ThirdTabViewController.self)!
        let firstList = BTabModel(id: "1", target: firstTabVC)
        let secondList = BTabModel(id: "2", target: secondTabVC)
        let thirdList = BTabModel(id: "3", target: thirdTabVC)
        let lists = [firstList, secondList, thirdList]

        var firstTab = BTabItemModel(order: 0, title: "First")
        firstTab.highlightFont = .systemFont(ofSize: 16, weight: .bold)
        firstTab.textAlignment = .center
        var secondTab = BTabItemModel(order: 1, title: "Second")
        secondTab.highlightFont = .systemFont(ofSize: 16, weight: .bold)
        secondTab.textAlignment = .center
        var thirdTab = BTabItemModel(order: 2, title: "Third")
        thirdTab.highlightFont = .systemFont(ofSize: 16, weight: .bold)
        thirdTab.textAlignment = .center
        let tabs: [BTabItemModel] = [firstTab, secondTab, thirdTab]

        // Parameter adjusting
        self.tabsGap = 0
        self.tabInset = 0
        self.tabsHeight = 30
        self.fitTabs = true
        self.isIndicatorVisible = false

        // Dont forget to call super
        super.setView(tabList: lists, tabItems: tabs)
    }

    override func listTab(_ target: UIViewController, didSelect item: BTabItemModel, index: Int) {
        super.listTab(target, didSelect: item, index: index)
    }

    override func listTab(_ target: UIViewController, tabSwitched toItem: BTabItemModel) {
        super.listTab(target, tabSwitched: toItem)
    }
}
在任意设备上运行示例项目,以下是 gif 中的转换及其可视化。您可以简单地观察当视图大小改变时的流程。自定义也非常灵活。
作者
Berkay Vurkan, [email protected]
许可
BTabViewController可供MIT许可证下使用。有关更多信息,请参阅LICENSE文件。