BSText(YYText的Swift版本)


为iOS显示和编辑富文本的强大框架(前缀'BS'来自BlueSky,BlueSky Studio曾制作过名为"Ice Age"的电影,这里是一只可爱的小松鼠)。
特性
- UILabel和UITextView API兼容
- 高性能异步文本布局和渲染
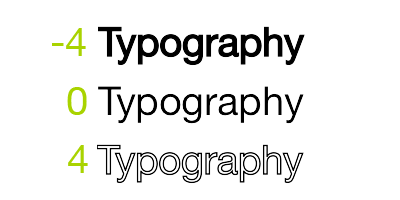
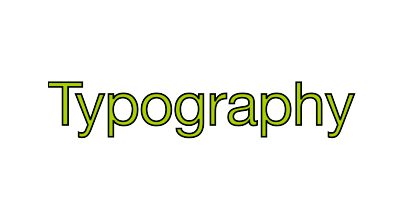
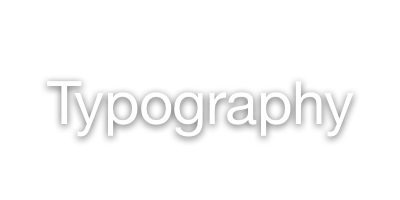
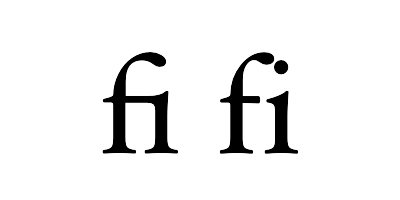
- 扩展CoreText属性,添加更多文本效果
- 带有UIImage、UIView和CALayer的文本附件
- 自定义高亮文本范围以允许用户交互
- 文本解析器支持(内置markdown/表情符号解析器)
- 文本容器路径和排除路径支持
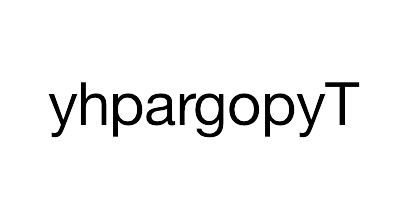
- 垂直表单布局支持(适用于CJK文本)
- 图像和属性化文本复制/粘贴支持
- 属性化文本占位符支持
- 自定义键盘视图支持
- 撤销和重做控制
- 属性化文本归档和解档支持
- 多语言和语音控制支持
- 完全文档化
架构
与YYText完全相同
文本属性
BSText支持属性
| 演示 | 属性名称 | 类 |
|---|---|---|
 |
TextAttachment | TextAttachment |
 |
TextHighlight | TextHighlight |
 |
TextBinding | TextBinding |
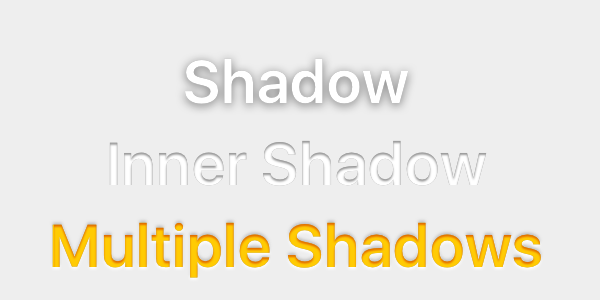 |
TextShadow TextInnerShadow |
TextShadow |
 |
TextBorder | TextBorder |
 |
TextBackgroundBorder | TextBorder |
 |
TextBlockBorder | TextBorder |
 |
TextGlyphTransform | NSValue(CGAffineTransform) |
 |
TextUnderline | TextDecoration |
 |
TextStrickthrough | TextDecoration |
 |
TextBackedString | TextBackedString |
CoreText支持的BSText属性
| 演示 | 属性名称 | 类 |
|---|---|---|
 |
字体 | UIFont(CTFontRef) |
 |
间距 | NSNumber |
 |
笔画宽度 | NSNumber |
 |
笔画颜色 | CGColorRef |
 |
阴影 | NSShadow |
 |
连字 | NSNumber |
 |
垂直字符形式 | NSNumber(BOOL) |
 |
书写方向 | NSArray(NSNumber) |
 |
Run委托 | CTRunDelegateRef |
 |
文本对齐 | NSParagraphStyle (NSTextAlignment) |
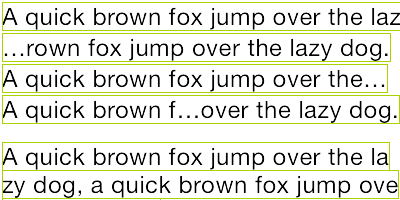 |
行中断模式 | NSParagraphStyle (NSLineBreakMode) |
 |
行间距 | NSParagraphStyle (CGFloat) |
 |
段落间距 段落间距之前 |
NSParagraphStyle (CGFloat) |
 |
首行首缩进 | NSParagraphStyle (CGFloat) |
 |
首缩进 | NSParagraphStyle (CGFloat) |
 |
尾缩进 | NSParagraphStyle (CGFloat) |
 |
最小行高 | NSParagraphStyle (CGFloat) |
 |
最大行高 | NSParagraphStyle (CGFloat) |
 |
行高倍数 | NSParagraphStyle (CGFloat) |
 |
基础书写方向 | NSParagraphStyle (NSWritingDirection) |
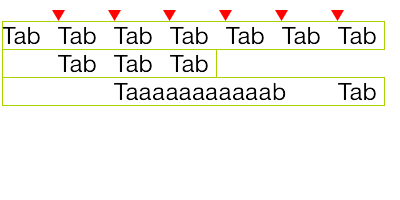 |
默认制表位间隔 制表位 |
NSParagraphStyle CGFloat/NSArray(NSTextTab) |
使用方法
基础
// BSLabel (similar to UILabel)
let label = BSLabel()
label.frame = ...
label.font = ...
label.textColor = ...
label.textAlignment = ...
label.lineBreakMode = ...
label.numberOfLines = ...
label.text = ...

// BSTextView (similar to UITextView)
let textView = BSTextView()
textView.frame = ...
textView.font = ...
textView.textColor = ...
textView.dataDetectorTypes = ...
textView.placeHolderText = ...
textView.placeHolderTextColor = ...
textView.delegate = ...
属性文本
// 1. Create an attributed string.
let text = NSMutableAttributedString(string: "Some Text, blabla...")

// 2. Set attributes to text, you can use almost all CoreText attributes.
text.bs_font = UIFont.boldSystemFont(ofSize:30)
text.bs_color = UIColor.blue
text.bs_set(color: UIColor.red, range: NSRange(location: 0, length: 4))
text.bs_lineSpacing = 10

// 3. Set to BSLabel or BSTextView.
let label = BSLabel()
label.frame = CGRect(x: 15, y: 100, width: 200, height: 80)
label.attributedText = text

let textView = BSTextView()
textView.frame = CGRect(x: 15, y: 200, width: 200, height: 80)
textView.attributedText = text
文本高亮
您可以使用一些便捷方法来设置文本高亮
text.bs_set(textHighlightRange: range,
            color: UIColor.blue,
            backgroundColor: UIColor.gray) { (view, text, range, rect) in
    print("tap text range:...")
}
或者使用自定义配置来设置文本高亮
// 1. Create a 'highlight' attribute for text.
let border = TextBorder.border(with: UIColor.gray, cornerRadius: 3)

let highlight = TextHighlight()
highlight.color = .white
highlight.backgroundBorder = highlightBorder
highlight.tapAction = { (containerView, text, range, rect) in
    print("tap text range:...")
    // you can also set the action handler to BSLabel or BSTextView.
}

// 2. Add 'highlight' attribute to a range of text.
let attributedText = NSMutableAttributedString(string: " ")
attributedText.bs_set(textHighlight: highlight, range: highlightRange)

// 3. Set text to label or text view.
let label = BSLabel()
label.attributedText = attributedText

let textView = BSTextView()
textView.delegate = self
textView.attributedText = ...

// 4. Receive user interactive action.
label.highlightTapAction = { (containerView, text, range, rect) in
    print("tap text range:...")
};
label.highlightLongPressAction = { (containerView, text, range, rect) in
    print("tap text range:...")
};

// MARK: - TextViewDelegate
func textView(_ textView: BSTextView, didTap highlight: TextHighlight, in characterRange: NSRange, rect: CGRect) {
    print("tap text range:...")
}
func textView(_ textView: BSTextView, didLongPress highlight: TextHighlight, in characterRange: NSRange, rect: CGRect) {
    print("tap text range:...")
}
文本附件
let text = NSMutableAttributedString()
let font = UIFont.systemFont(ofSize: 16)

// UIImage attachment
let image = UIImage.init(named: "dribbble64_imageio")
guard let attachment = NSMutableAttributedString.bs_attachmentString(with: image, contentMode: .center, attachmentSize: image?.size ?? .zero, alignTo: font, alignment: .center) else {
    return
}
text.append(attachment)

// UIView attachment
let switcher = UISwitch()
switcher.sizeToFit()
guard let attachment1 = NSMutableAttributedString.bs_attachmentString(with: switcher, contentMode: .center, attachmentSize: switcher.frame.size, alignTo: font, alignment: .center) else {
    return
}
text.append(attachment1)

// CALayer attachment
let layer = CAShapeLayer()
layer.path = ...
guard let attachment2 = NSMutableAttributedString.bs_attachmentString(with: layer, contentMode: .center, attachmentSize: layer.frame.size, alignTo: font, alignment: .center) else {
    return
}
text.append(attachment2)
文本布局计算
let text = NSAttributedString()
let size = CGSize(width: 100, height: CGFloat.greatestFiniteMagnitude)
let container = TextContainer()
container.size = size
guard let layout = TextLayout(container: container, text: text) else {
    return
}

// get text bounding
layout.textBoundingRect // get bounding rect
layout.textBoundingSize // get bounding size

// query text layout
layout.lineIndex(for: CGPoint(x: 10, y: 10))
layout.closestLineIndex(for: CGPoint(x: 10, y: 10))
layout.closestPosition(to: CGPoint(x: 10, y: 10))
layout.textRange(at: CGPoint(x: 10, y: 10))
layout.rect(for: TextRange(range: NSRange(location: 10, length: 2)))
layout.selectionRects(for: TextRange(range: NSRange(location: 10, length: 2)))

// text layout display
let label = BSLabel()
label.frame = CGRect(x: 0, y: 0, width: layout.textBoundingSize.width, height: layout.textBoundingSize.height)
label.textLayout = layout;
调整文本行位置
// Convenience methods:
// 1. Create a text line position modifier, implements `TextLinePositionModifier` protocol.
// 2. Set it to label or text view.

let modifier = TextLinePositionSimpleModifier()
modifier.fixedLineHeight = 24

let label = BSLabel()
label.linePositionModifier = modifier

// Fully control
let modifier = TextLinePositionSimpleModifier()
modifier.fixedLineHeight = 24

let container = TextContainer()
container.size = CGSize(width: 100, height: CGFloat.greatestFiniteMagnitude)
container.linePositionModifier = modifier

guard let layout = TextLayout(container: container, text: text) else {
    return
}
let label = BSLabel()
label.size = layout.textBoundingSize
label.textLayout = layout
异步布局与渲染
// If you have performance issues,
// you may enable the asynchronous display mode.
let label = BSLabel()
label.displaysAsynchronously = true

// If you want to get the highest performance, you should do
// text layout with `TextLayout` class in background thread.
let label = BSLabel()
label.displaysAsynchronously = true
label.ignoreCommonProperties = true

DispatchQueue.global().async {
    // Create attributed string.
    let text = NSMutableAttributedString(string: "Some Text")
    text.bs_font = UIFont.systemFont(ofSize: 16)
    text.bs_color = UIColor.gray
    text.bs_set(color: .red, range: NSRange(location: 0, length: 4))

    // Create text container
    let container = TextContainer()
    container.size = CGSize(width: 100, height: CGFloat.greatestFiniteMagnitude);
    container.maximumNumberOfRows = 0;

    // Generate a text layout.
    let layout = TextLayout(container: container, text: text)

    DispatchQueue.main.async {
        label.frame = CGRect(x: 0, y: 0, width: layout.textBoundingSize.width, height: layout.textBoundingSize.height)
        label.textLayout = layout;
    }
}
文本容器控制
let label = BSLabel()
label.textContainerPath = UIBezierPath(...)
label.exclusionPaths = [UIBezierPath(), ...]
label.textContainerInset = UIEdgeInsets(...)
label.verticalForm = true/false

let textView = BSTextView()
textView.exclusionPaths = [UIBezierPath(), ...]
textView.textContainerInset = UIEdgeInsets(...)
textView.verticalForm = true/false
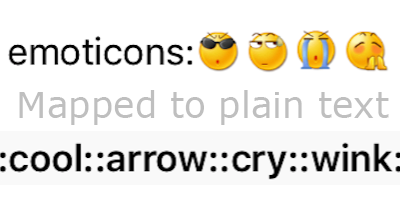
文本解析器
// 1. Create a text parser
let simpleEmoticonParser = TextSimpleEmoticonParser()
var mapper = [String: UIImage]()
mapper[":smile:"] = UIImage.init(named: "smile.png")
mapper[":cool:"] = UIImage.init(named: "cool.png")
mapper[":cry:"] = UIImage.init(named: "cry.png")
mapper[":wink:"] = UIImage.init(named: "wink.png")
simpleEmoticonParser.emoticonMapper = mapper;

let markdownParser = TextSimpleMarkdownParser()
markdownParser.setColorWithDarkTheme()

let parser = MyCustomParser() // custom parser

// 2. Attach parser to label or text view
let label = BSLabel()
label.textParser = parser

let textView = BSTextView()
textView.textParser = parser
调试
// Set a shared debug option to show text layout result.
let debugOption = TextDebugOption()
debugOption.baselineColor = .red
debugOption.ctFrameBorderColor = .red
debugOption.ctLineFillColor = UIColor(red: 0, green: 0.463, blue: 1, alpha: 0.18)
debugOption.cgGlyphBorderColor = UIColor(red: 1, green: 0.524, blue: 0, alpha: 0.2)
TextDebugOption.setSharedDebugOption(debugOption)
更多示例
请参阅Demo/BSTextDemo.xcodeproj了解更多示例

安装
CocoaPods
- 在您的Podfile中添加
pod 'BSText'。 - 运行
pod install或pod update。 - 导入模块
import BSText,在使用OC项目时使用@import BSText;。
Carthage
- 将
github "a1049148527/BSText"添加到您的 Cartfile。 - 运行
carthage update --platform ios并将框架添加到您的项目中。 - 导入模块
import BSText,在使用OC项目时使用@import BSText;。
手动
- 下载
BSText子目录中的所有文件。 - 将源文件添加到您的 Xcode 项目。
- 链接到所需的框架
- UIKit
- CoreFoundation
- CoreText
- QuartzCore
- Accelerate
- MobileCoreServices
- 现在您可以开始使用了。
通知
如果您想支持动画图像(GIF/APNG/WebP),可以将 YYImage 或 YYWebImage 添加到您的项目中。
文档
API 文档与 YYText 相同,您可以在 CocoaDocs 上查看。
您也可以使用 appledoc 在本地安装文档。
要求
此库需要 iOS 8.0+ 和 Xcode 10.0+。
授权
BSText 采用 MIT 许可协议发布。详细信息请参阅 LICENSE 文件。
中文介绍
功能强大的 iOS 富文本编辑与显示框架。
(该项目是 YYText 的 Swift 版本,项目的前缀 'BS' 来自于 BlueSky,即《冰河世纪》系列电影的 BlueSky 工作室)
特性
- API 兼容 UILabel 和 UITextView
- 支持高性能的异步排版和渲染
- 扩展了 CoreText 的属性以支持更多文字效果
- 支持将 UIImage、UIView、CALayer 作为图文混排元素
- 支持添加自定义样式的、可点击的文本高亮范围
- 支持自定义文本解析 (内置简单的 Markdown/表情解析)
- 支持文本容器路径、内部留空路径的控制
- 支持文字竖排版,可用于编辑和显示中日韩文本
- 支持图片和富文本的复制粘贴
- 文本编辑时,支持富文本占位符
- 支持自定义键盘视图
- 撤销和重做次数的控制
- 支持富文本的序列化与反序列化
- 支持多语言,支持 VoiceOver
- 全部代码都有文档注释
架构
本项目架构与 YYText 保持一致
文本属性
BSText 原生支持的属性
| 演示 | 属性名称 | 类 |
|---|---|---|
|
TextAttachment | TextAttachment |
|
TextHighlight | TextHighlight |
|
TextBinding | TextBinding |
|
TextShadow TextInnerShadow |
TextShadow |
|
TextBorder | TextBorder |
|
TextBackgroundBorder | TextBorder |
|
TextBlockBorder | TextBorder |
|
TextGlyphTransform | NSValue(CGAffineTransform) |
|
TextUnderline | TextDecoration |
|
TextStrickthrough | TextDecoration |
|
TextBackedString | TextBackedString |
BSText支持的核心文本属性
| 演示 | 属性名称 | 类 |
|---|---|---|
|
字体 | UIFont(CTFontRef) |
|
间距 | NSNumber |
|
笔画宽度 | NSNumber |
|
笔画颜色 | CGColorRef |
|
阴影 | NSShadow |
|
连字 | NSNumber |
|
垂直字符形式 | NSNumber(BOOL) |
|
书写方向 | NSArray(NSNumber) |
|
Run委托 | CTRunDelegateRef |
|
文本对齐 | NSParagraphStyle (NSTextAlignment) |
|
行中断模式 | NSParagraphStyle (NSLineBreakMode) |
|
行间距 | NSParagraphStyle (CGFloat) |
|
段落间距 段落间距之前 |
NSParagraphStyle (CGFloat) |
|
首行首缩进 | NSParagraphStyle (CGFloat) |
|
首缩进 | NSParagraphStyle (CGFloat) |
|
尾缩进 | NSParagraphStyle (CGFloat) |
|
最小行高 | NSParagraphStyle (CGFloat) |
|
最大行高 | NSParagraphStyle (CGFloat) |
|
行高倍数 | NSParagraphStyle (CGFloat) |
|
基础书写方向 | NSParagraphStyle (NSWritingDirection) |
|
默认制表位间隔 制表位 |
NSParagraphStyle CGFloat/NSArray(NSTextTab) |
用法
基本用法
// BSLabel (和 UILabel 用法一致)
let label = BSLabel()
label.frame = ...
label.font = ...
label.textColor = ...
label.textAlignment = ...
label.lineBreakMode = ...
label.numberOfLines = ...
label.text = ...

// BSTextView (和 UITextView 用法一致)
let textView = BSTextView()
textView.frame = ...
textView.font = ...
textView.textColor = ...
textView.dataDetectorTypes = ...
textView.placeHolderText = ...
textView.placeHolderTextColor = ...
textView.delegate = ...
属性文本
// 1. 创建一个属性文本
let text = NSMutableAttributedString(string: "Some Text, blabla...")

// 2. 为文本设置属性
text.bs_font = UIFont.boldSystemFont(ofSize:30)
text.bs_color = UIColor.blue
text.bs_set(color: UIColor.red, range: NSRange(location: 0, length: 4))
text.bs_lineSpacing = 10

// 3. 赋值到 BSLabel 或 BSTextView
let label = BSLabel()
label.frame = CGRect(x: 15, y: 100, width: 200, height: 80)
label.attributedText = text

let textView = BSTextView()
textView.frame = CGRect(x: 15, y: 200, width: 200, height: 80)
textView.attributedText = text
文本高亮
您可以使用一些封装好的便捷方法来设置文本高亮:
text.bs_set(textHighlightRange: range,
            color: UIColor.blue,
            backgroundColor: UIColor.gray) { (view, text, range, rect) in
    print("tap text range:...")
}
或者使用更为复杂的方法来调整文本高亮的细节:
// 1. 创建一个"高亮"属性,当用户点击了高亮区域的文本时,"高亮"属性会替换掉原本的属性
let border = TextBorder.border(with: UIColor.gray, cornerRadius: 3)

let highlight = TextHighlight()
highlight.color = .white
highlight.backgroundBorder = highlightBorder
highlight.tapAction = { (containerView, text, range, rect) in
    print("tap text range:...")
    // 你也可以把事件回调放到 BSLabel 和 BSTextView 来处理。
}

// 2. 把"高亮"属性设置到某个文本范围
let attributedText = NSMutableAttributedString(string: " ")
attributedText.bs_set(textHighlight: highlight, range: highlightRange)

// 3. 把属性文本设置到 BSLabel 或 BSTextView
let label = BSLabel()
label.attributedText = attributedText

let textView = BSTextView()
textView.delegate = self
textView.attributedText = ...

// 4. 接受事件回调
label.highlightTapAction = { (containerView, text, range, rect) in
    print("tap text range:...")
};
label.highlightLongPressAction = { (containerView, text, range, rect) in
    print("tap text range:...")
};

// MARK: - TextViewDelegate
func textView(_ textView: BSTextView, didTap highlight: TextHighlight, in characterRange: NSRange, rect: CGRect) {
    print("tap text range:...")
}
func textView(_ textView: BSTextView, didLongPress highlight: TextHighlight, in characterRange: NSRange, rect: CGRect) {
    print("tap text range:...")
}
图文混排
let text = NSMutableAttributedString()
let font = UIFont.systemFont(ofSize: 16)

// 嵌入 UIImage
let image = UIImage.init(named: "dribbble64_imageio")
guard let attachment = NSMutableAttributedString.bs_attachmentString(with: image, contentMode: .center, attachmentSize: image?.size ?? .zero, alignTo: font, alignment: .center) else {
    return
}
text.append(attachment)

// 嵌入 UIView
let switcher = UISwitch()
switcher.sizeToFit()
guard let attachment1 = NSMutableAttributedString.bs_attachmentString(with: switcher, contentMode: .center, attachmentSize: switcher.frame.size, alignTo: font, alignment: .center) else {
    return
}
text.append(attachment1)

// 嵌入 CALayer
let layer = CAShapeLayer()
layer.path = ...
guard let attachment2 = NSMutableAttributedString.bs_attachmentString(with: layer, contentMode: .center, attachmentSize: layer.frame.size, alignTo: font, alignment: .center) else {
    return
}
text.append(attachment2)
文本布局计算
let text = NSAttributedString()
let size = CGSize(width: 100, height: CGFloat.greatestFiniteMagnitude)
let container = TextContainer()
container.size = size
guard let layout = TextLayout(container: container, text: text) else {
    return
}

// 获取文本显示位置和大小
layout.textBoundingRect // get bounding rect
layout.textBoundingSize // get bounding size

 // 查询文本排版结果
layout.lineIndex(for: CGPoint(x: 10, y: 10))
layout.closestLineIndex(for: CGPoint(x: 10, y: 10))
layout.closestPosition(to: CGPoint(x: 10, y: 10))
layout.textRange(at: CGPoint(x: 10, y: 10))
layout.rect(for: TextRange(range: NSRange(location: 10, length: 2)))
layout.selectionRects(for: TextRange(range: NSRange(location: 10, length: 2)))

// 显示文本排版结果
let label = BSLabel()
label.frame = CGRect(x: 0, y: 0, width: layout.textBoundingSize.width, height: layout.textBoundingSize.height)
label.textLayout = layout;
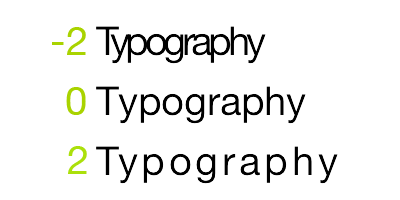
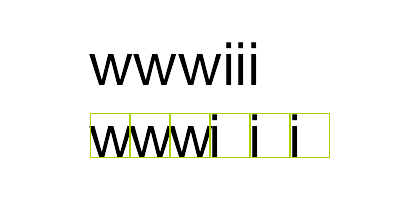
文本行位置调整
// 由于中文、英文、Emoji 等字体高度不一致,或者富文本中出现了不同字号的字体,
// 可能会造成每行文字的高度不一致。这里可以添加一个修改器来实现固定行高,或者自定义文本行位置。

// 简单的方法:
// 1. 创建一个文本行位置修改类,实现 `TextLinePositionModifier` 协议。
// 2. 设置到 Label 或 TextView。

let modifier = TextLinePositionSimpleModifier()
modifier.fixedLineHeight = 24

let label = BSLabel()
label.linePositionModifier = modifier

// 完全控制:
let modifier = TextLinePositionSimpleModifier()
modifier.fixedLineHeight = 24

let container = TextContainer()
container.size = CGSize(width: 100, height: CGFloat.greatestFiniteMagnitude)
container.linePositionModifier = modifier

guard let layout = TextLayout(container: container, text: text) else {
    return
}
let label = BSLabel()
label.size = layout.textBoundingSize
label.textLayout = layout
异步排版和渲染
// 如果你在显示字符串时有性能问题,可以这样开启异步模式:
let label = BSLabel()
label.displaysAsynchronously = true

// 如果需要获得最高的性能,你可以在后台线程用 `TextLayout` 进行预排版:
let label = BSLabel()
label.displaysAsynchronously = true // 开启异步绘制
label.ignoreCommonProperties = true // 忽略除了 textLayout 之外的其他属性

DispatchQueue.global().async {
    // 创建属性字符串
    let text = NSMutableAttributedString(string: "Some Text")
    text.bs_font = UIFont.systemFont(ofSize: 16)
    text.bs_color = UIColor.gray
    text.bs_set(color: .red, range: NSRange(location: 0, length: 4))

    // 创建文本容器
    let container = TextContainer()
    container.size = CGSize(width: 100, height: CGFloat.greatestFiniteMagnitude);
    container.maximumNumberOfRows = 0;

    // 生成排版结果
    let layout = TextLayout(container: container, text: text)

    DispatchQueue.main.async {
        label.frame = CGRect(x: 0, y: 0, width: layout.textBoundingSize.width, height: layout.textBoundingSize.height)
        label.textLayout = layout;
    }
}
文本容器控制
let label = BSLabel()
label.textContainerPath = UIBezierPath(...)
label.exclusionPaths = [UIBezierPath(), ...]
label.textContainerInset = UIEdgeInsets(...)
label.verticalForm = true/false

let textView = BSTextView()
textView.exclusionPaths = [UIBezierPath(), ...]
textView.textContainerInset = UIEdgeInsets(...)
textView.verticalForm = true/false
文本解析
// 1. 创建一个解析器

// 内置简单的表情解析
let simpleEmoticonParser = TextSimpleEmoticonParser()
var mapper = [String: UIImage]()
mapper[":smile:"] = UIImage.init(named: "smile.png")
mapper[":cool:"] = UIImage.init(named: "cool.png")
mapper[":cry:"] = UIImage.init(named: "cry.png")
mapper[":wink:"] = UIImage.init(named: "wink.png")
simpleEmoticonParser.emoticonMapper = mapper;

// 内置简单的 markdown 解析
let markdownParser = TextSimpleMarkdownParser()
markdownParser.setColorWithDarkTheme()

// 实现 `TextParser` 协议的自定义解析器
let parser = MyCustomParser()

// 2. 把解析器添加到 BSLabel 或 BSTextView
let label = BSLabel()
label.textParser = parser

let textView = BSTextView()
textView.textParser = parser
Debug
// 设置一个全局的 debug option 来显示排版结果。
let debugOption = TextDebugOption()
debugOption.baselineColor = .red
debugOption.ctFrameBorderColor = .red
debugOption.ctLineFillColor = UIColor(red: 0, green: 0.463, blue: 1, alpha: 0.18)
debugOption.cgGlyphBorderColor = UIColor(red: 1, green: 0.524, blue: 0, alpha: 0.2)
TextDebugOption.setSharedDebugOption(debugOption)
更多示例
查看演示工程 Demo/BSTextDemo.xcodeproj
安装
CocoaPods
-
在 pod 文件中添加
pod 'BSText'。source 'https://github.com/CocoaPods/Specs.git' platform :ios, '8.0' use_frameworks! target 'MyApp' do # your other pod # ... pod 'BSText', '~> 1.0' end -
执行
pod install或pod update。 -
导入模块
import BSText,OC 项目中使用@import BSText;。
Carthage
- 在 Cartfile 中添加
github "a1049145827/BSText"。 - 执行
carthage update --platform ios并将生成的 framework 添加到您工程中。 - 导入模块
import BSText,OC 项目中使用@import BSText;。
手动安装
- 下载 BSText 文件夹内的所有内容。
- 将 BSText 内的源文件添加(拖放)到您的工程。
- 链接以下 frameworks:
- UIKit
- CoreFoundation
- CoreText
- QuartzCore
- Accelerate
- MobileCoreServices
- 导入模块
import BSText,OC 项目中使用@import BSText;。
注意
您可以添加 YYImage 或 YYWebImage 到您工程中,以支持动画格式(GIF/APNG/WebP)的图片。
文档
本项目目前还没有生成在线文档,您可以在 CocoaDocs 查看YYText的在线API文档,也可以使用 appledoc 本地生成文档。
系统要求
该项目最低支持 iOS 8.0 和 Xcode 10.0。
已知问题
- 与 YYText 类似,BSText 也不能支持所有 CoreText/TextKit 的属性,例如 NSBackgroundColor、NSStrikethrough、NSUnderline、NSAttachment、NSLink 等,但 BSText 中基本上都有对应属性作为替代。详情见上方表格。
- BSTextView 未实现局部刷新,因此在输入和编辑大量文本时(例如,超过约 5000 个汉字或约 10000 个英文字符)可能会出现明显的卡顿现象。
- 在竖排版时,在少数情况下添加 exclusionPaths 可能会导致文本显示为空白。
- 当添加了非矩形的 textContainerPath,并且有嵌入大于文本排版方向宽度的 RunDelegate 时,RunDelegate 之后的文字将无法显示。这是 CoreText 的一个 Bug(或者可以说是 Feature)。
许可证
BSText 使用 MIT 许可证,详情见 LICENSE 文件。