BRCountDownView 0.2.1
| 测试已测试 | ✗ |
| 语言语言 | SwiftSwift |
| 许可证 | MIT |
| 发布最后发布 | 2017年10月 |
| SwiftSwift版本 | echo "4.0" > .swift-version` |
| SPM支持SPM | ✗ |
由BRCountDownView维护。
BRCountDownView 0.2.1
BORING 计时动画 - 可定制UI组件。
这是可定制的UI-View组件,用于通过计时动画进行秒数倒计时。
包括您自己的计时动画在内,许多属性都可以自定义!
- 请用您自己的酷炫东西替换内置的如此无聊的计时动画:(
示例
要运行示例项目,首先克隆仓库,然后从Example目录运行pod install。
要求
iOS 9.0 +
Swift 3.0 +
安装
BRCountDownView可通过CocoaPods获得。要安装
它,只需将以下行添加到您的Podfile中
pod 'BRCountDownView'如何使用
由于此功能的使用非常简单,您可以通过在示例项目中检查ViewController.swift来了解如何使用BRCountDownView。
步骤1.通过编程方式创建BRCountDownView或通过故事板或xib。
通过这样做,您不仅可以创建BRCountDown实例,还可以按自己的方式自定义包括计时动画在内的属性。
请查看下面的示例代码。
- 请注意,BRCountDownView目前只支持固定尺寸。
(固定尺寸:宽度:189 / 高度:74 px)
下面是按编程方式创建BRCountDownView的方法。
(按编程方式创建BRCountDownView是高度推荐的。)>
lazy var countdownView: BRCountDownView = {
let countdownView = BRCountDownView(timeSeconds: /* 30000 */ 5)
countdownView.animationStyle = .slideInFromBottom
/** you can make animate that you would like to perform in this closure if you would.
To do this, you should change animationStyle property to 'true'.
*/
// countdownView.animationStyle = .custom
// countdownView.customAnimation = {
// [unowned self] animateView, duration in
// UIView.animate(withDuration: duration, animations: {
// animateView.alpha = 0.0
// }, completion:{ finished in
// if finished {
// animateView.alpha = 1.0
// }
// })
// }
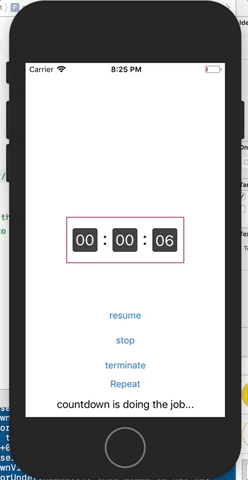
countdownView.didFinish = {
[unowned self] (countdownView) -> Void in
DispatchQueue.main.async {
self.checkTestLabel.text = "countdown is finished..."
}
/** you can again repeat countdown with seconds you want whenever you want. */
// self.countdownView.repeatCountDown(in: 5)
}
countdownView.didRepeat = {
[unowned self] (countdownView) -> Void in
// it is fired when count-down repeat gets started.
DispatchQueue.main.async {
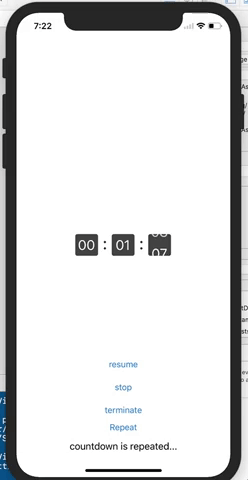
self.checkTestLabel.text = "countdown is repeated..."
}
}
countdownView.didResume = {
[unowned self] (countdownView) -> Void in
/**
do any task here if you need.
*/
print("didResume!")
}
countdownView.didTerminate = {
[unowned self] (countdownView) -> Void in
/**
do any task here if you need.
*/
print("didTerminate!")
}
countdownView.didStop = {
[unowned self] (countdownView) -> Void in
/**
do any task here if you need.
*/
print("didStop!")
}
countdownView.isUserInteractionEnabled = true
countdownView.didTouchBegin = {
[unowned self] sender in
print("didTouchBegin!?")
}
countdownView.didTouchEnd = {
[unowned self] sender in
print("didTouchEnd!?")
}
return countdownView
}()步骤2.将编程方式创建的BRCountDownView实例添加到您需要的视图层次结构中。
override func viewDidLoad() {
  super.viewDidLoad()
  // Do any additional setup after loading the view, typically from a nib.

  self.view.addSubview(countdownView)

  // get center.
  countdownView.center = CGPoint(x: self.view.frame.size.width  / 2,
  y: self.view.frame.size.height / 2)
}
作者
Jang seoksoon, [email protected]
许可证
BRCountDownView根据MIT许可证提供。有关更多信息,请参阅LICENSE文件。