1Password App 扩展


欢迎!只需几行代码,您的应用程序就可以添加 1Password 支持,使用户能够:
- 通过访问他们的 1Password 登录信息来自动填充您的登录页面。
- 使用强大的密码生成器在注册过程中创建唯一的密码,并将新登录信息保存在 1Password 中。
- 快速填充 1Password 登录、信用卡和身份信息到网页视图中。
让您的用户轻松使用强大、唯一的密码。现在让我们开始吧!
应用扩展实战

直接提供代码(TL;DR)
您可能看着这个23KB的README文件,认为要将1Password集成可能非常复杂。实际上并非如此!
如果您只想看到代码,以下是代码示例:
只需将这些两个文件包含在项目中,在视图中添加一个带有 1Password 登录图片 的按钮,设置按钮的动作以调用适当的 OnePasswordExtension 方法,一切就绪!
运行示例应用程序
将1Password支持添加到您的应用程序非常简单。为了演示它的工作原理,我们提供了两个iOS示例应用程序,展示所有1Password功能。
第一步:下载源代码和示例应用程序
要开始,请下载1Password应用程序扩展API项目的zip版本版本或从GitHub克隆它。
在下载的文件夹中,您可以找到与1Password集成的必需资源,例如图像和示例代码。示例代码包括ACME公司的两个应用程序:一个演示如何集成1Password登录和注册功能,以及一个展示网页视图填充功能的网页浏览器。
1Password应用程序扩展API还通过CocoaPods提供。只需将pod '1PasswordExtension', '~> 1.8.5'(用于最新稳定版本)或pod '1PasswordExtension', :git => 'https://github.com/AgileBits/onepassword-app-extension.git', :branch => 'master'(用于最新夜版本)添加到您的Podfile中,然后从您的项目目录运行pod install即可。
1Password应用程序扩展API还通过Carthage提供。只需将github "AgileBits/onepassword-extension" "add-framework-support"添加到您的Cartfile中,然后运行carthage update并添加到您的项目中。
第二步:安装最新的1Password和Xcode版本
示例项目依赖于在您的iOS设备上安装最新版本的Xcode和1Password。
要安装1Password,您需要从App Store下载它。
请告诉我们您是应用程序开发人员并计划添加1Password支持,通过发送电子邮件到[email protected]联系我们。
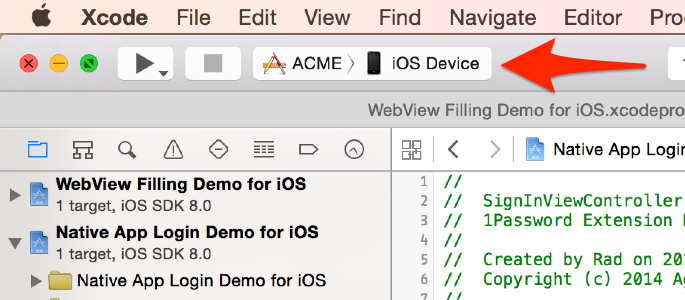
步骤 3:运行应用
使用 Xcode 打开 1Password 扩展示例 的 Xcode 工作空间,然后选择 ACME 目标并设置在 iOS 设备上运行。
鉴于您在 iOS 模拟器中没有运行 1Password,所以在您的设备上运行很重要。
如果一切顺利,ACME 应用将启动,您将能够测试 1Password App 扩展。第一次尝试访问 1Password 扩展时,您需要在共享表单中的 更多 按钮,然后在下拉列表的 活动 中启用 1Password。如果 1Password 图标丢失,这可能意味着您没有安装 1Password。
回到 Xcode,您可以更改方案为 ACME 浏览器来测试网页填充功能。
将 1Password 集成到您的应用中
一旦您通过测试示例应用验证了设置,就动手将 1Password 集成到您的应用中。
然而,请注意,没有多少代码可以修改。如果您在寻找一个需要花费数天生命的 SDK,您会非常失望。
将 1Password 文件添加到您的项目中
将 OnePasswordExtension.h、OnePasswordExtension.m 和 1Password.xcassets 添加到您的项目中,并在实现 1Password 按钮动作的视图控制器中导入 OnePasswordExtension.h。

用例 #1:原生应用登录
在本用例中,我们将了解如何使您的现有用户能够在原生应用的登录表单中填写其凭据。如果您的应用程序使用网页进行登录(即 OAuth),则您需要遵循 用例 #4:网页填充 中的网页集成步骤。
第一步是在登录页面添加一个UIButton。使用从1Password.xcassets目录中已有的1Password图片,以便用户能够识别按钮。
如果没有安装密码管理器,则需要隐藏此按钮(或教育用户了解强大且独特的密码的好处)。您可以使用isAppExtensionAvailable来确定可用性,并在不可用时隐藏按钮。例如:
-(void)viewDidLoad {
	[super viewDidLoad];
	[self.onepasswordSigninButton setHidden:![[OnePasswordExtension sharedExtension] isAppExtensionAvailable]];
}注意,isAppExtensionAvailable会检查是否有任何应用程序安装了支持通用org-appextension-feature-password-management功能的扩展。任何支持密码管理操作的应用程序都可以使用。
重要: isAppExtensionAvailable使用- [UIApplication canOpenURL:]。自iOS 9以来,建议您将自定义URL方案org-appextension-feature-password-management添加到目标项目的info.plist中,如下所示:

有关iOS 9中关于URL方案的更多信息,请参阅WWDC 2015的隐私和您的应用程序会话,大约在9分钟处。
接下来,我们需要将按钮的动作连接到您的UIViewController中的此方法。
- (IBAction)findLoginFrom1Password:(id)sender {
	[[OnePasswordExtension sharedExtension] findLoginForURLString:@"https://www.acme.com" forViewController:self sender:sender completion:^(NSDictionary *loginDictionary, NSError *error) {
		if (loginDictionary.count == 0) {
			if (error.code != AppExtensionErrorCodeCancelledByUser) {
				NSLog(@"Error invoking 1Password App Extension for find login: %@", error);
			}
			return;
		}

		self.usernameTextField.text = loginDictionary[AppExtensionUsernameKey];
		self.passwordTextField.text = loginDictionary[AppExtensionPasswordKey];
	}];
}
此代码相当简单。
- 提供一个唯一标识您服务的
URLString。例如,如果您的应用程序需要Twitter登录,您将传递进@"https://twitter.com"。有关详细信息,请参阅最佳实践。 - 传入您想要展示共享表的
UIViewController。 - 提供一个完成块,当用户完成选择时会被调用。此块保证在主线程上调用。
- 从登录字典中提取所需的信息并更新UI元素。
用例 #2:新用户注册
允许您的用户直接从注册页面访问1Password,以便他们可以生成强大且独特的密码。1Password还会保存登录信息,以便用户可以在其他设备上轻松登录。新保存的登录信息和生成的密码将返回给您,以便您可以更新UI并完成注册。
将1Password添加到注册屏幕的过程与将其添加到登录屏幕的过程非常相似。在这种情况下,您将1Password按钮连接到如下操作:
- (IBAction)saveLoginTo1Password:(id)sender {
	NSDictionary *newLoginDetails = @{
									  AppExtensionTitleKey: @"ACME",
									  AppExtensionUsernameKey: self.usernameTextField.text ? : @"",
									  AppExtensionPasswordKey: self.passwordTextField.text ? : @"",
									  AppExtensionNotesKey: @"Saved with the ACME app",
									  AppExtensionSectionTitleKey: @"ACME Browser",
									  AppExtensionFieldsKey: @{
											  @"firstname" : self.firstnameTextField.text ? : @"",
											  @"lastname" : self.lastnameTextField.text ? : @""
											  // Add as many string fields as you please.
											  }
									  };

	// The password generation options are optional, but are very handy in case you have strict rules about password lengths, symbols and digits.
	NSDictionary *passwordGenerationOptions = @{
												// The minimum password length can be 4 or more.
												AppExtensionGeneratedPasswordMinLengthKey: @(8),

												// The maximum password length can be 50 or less.
												AppExtensionGeneratedPasswordMaxLengthKey: @(30),

												// If YES, the 1Password will guarantee that the generated password will contain at least one digit (number between 0 and 9). Passing NO will not exclude digits from the generated password.
												AppExtensionGeneratedPasswordRequireDigitsKey: @(YES),

												// If YES, the 1Password will guarantee that the generated password will contain at least one symbol (See the list below). Passing NO will not exclude symbols from the generated password.
												AppExtensionGeneratedPasswordRequireSymbolsKey: @(YES),

												// Here are all the symbols available in the the 1Password Password Generator:
												// !@#$%^&*()_-+=|[]{}'\";.,>?/~`
												// The string for AppExtensionGeneratedPasswordForbiddenCharactersKey should contain the symbols and characters that you wish 1Password to exclude from the generated password.
												AppExtensionGeneratedPasswordForbiddenCharactersKey: @"!@#$%/0lIO"
												};

	[[OnePasswordExtension sharedExtension] storeLoginForURLString:@"https://www.acme.com" loginDetails:newLoginDetails passwordGenerationOptions:passwordGenerationOptions forViewController:self sender:sender completion:^(NSDictionary *loginDictionary, NSError *error) {

		if (loginDictionary.count == 0) {
			if (error.code != AppExtensionErrorCodeCancelledByUser) {
				NSLog(@"Failed to use 1Password App Extension to save a new Login: %@", error);
			}
			return;
		}

		self.usernameTextField.text = loginDictionary[AppExtensionUsernameKey] ? : @"";
		self.passwordTextField.text = loginDictionary[AppExtensionPasswordKey] ? : @"";
		self.firstnameTextField.text = loginDictionary[AppExtensionReturnedFieldsKey][@"firstname"] ? : @"";
		self.lastnameTextField.text = loginDictionary[AppExtensionReturnedFieldsKey][@"lastname"] ? : @"";
		// retrieve any additional fields that were passed in newLoginDetails dictionary
	}];
}您会注意到,我们传递到1Password的信息比在登录示例中使用的仅含URLString键要多得多。这是因为,在密码生成过程的结束时,1Password将创建一个全新的登录并保存它。1Password在之后无法要求您的应用程序提供额外信息,所以我们尽可能在显示密码生成屏幕之前传递所有信息。
需要注意的一个重要事项是,URLString设置为在登录场景中使用的确切相同值。这使用户在下一次需要登录时可以快速找到为您应用程序保存的登录信息。
用例 #3: 修改密码
允许用户方便地从您的修改密码页面直接在1Password中更改保存的登录密码。更新后的登录信息以及旧的和新生成的密码都会返回给您,以便您更新UI并完成密码更改过程。如果在1Password中未找到匹配的登录信息,用户将被提示保存新的登录信息。
将1Password添加到您的修改密码界面与将1Password添加到登录和注册界面非常相似。在这种情况下,您将连接1Password按钮到如下操作
- (IBAction)changePasswordIn1Password:(id)sender {
	NSString *changedPassword = self.freshPasswordTextField.text ? : @"";
	NSString *oldPassword = self.oldPasswordTextField.text ? : @"";
	NSString *confirmationPassword = self.confirmPasswordTextField.text ? : @"";

	// Validate that the new password and the old password are not the same.
	if (oldPassword.length > 0 && [oldPassword isEqualToString:changedPassword]) {
		[self showChangePasswordFailedAlertWithMessage:@"The old and the new password must not be the same"];
		return;
	}

	// Validate that the new and confirmation passwords match.
	if (NO == [changedPassword isEqualToString:confirmationPassword]) {
		[self showChangePasswordFailedAlertWithMessage:@"The new passwords and the confirmation password must match"];
		return;
	}

	NSDictionary *loginDetails = @{
									  AppExtensionTitleKey: @"ACME", // Optional, used for the third schenario only
									  AppExtensionUsernameKey: @"aUsername", // Optional, used for the third schenario only
									  AppExtensionPasswordKey: changedPassword,
									  AppExtensionOldPasswordKey: oldPassword,
									  AppExtensionNotesKey: @"Saved with the ACME app", // Optional, used for the third schenario only
									};

	// The password generation options are optional, but are very handy in case you have strict rules about password lengths, symbols and digits.
	NSDictionary *passwordGenerationOptions = @{
												// The minimum password length can be 4 or more.
												AppExtensionGeneratedPasswordMinLengthKey: @(8),

												// The maximum password length can be 50 or less.
												AppExtensionGeneratedPasswordMaxLengthKey: @(30),

												// If YES, the 1Password will guarantee that the generated password will contain at least one digit (number between 0 and 9). Passing NO will not exclude digits from the generated password.
												AppExtensionGeneratedPasswordRequireDigitsKey: @(YES),

												// If YES, the 1Password will guarantee that the generated password will contain at least one symbol (See the list below). Passing NO will not exclude symbols from the generated password.
												AppExtensionGeneratedPasswordRequireSymbolsKey: @(YES),

												// Here are all the symbols available in the the 1Password Password Generator:
												// !@#$%^&*()_-+=|[]{}'\";.,>?/~`
												// The string for AppExtensionGeneratedPasswordForbiddenCharactersKey should contain the symbols and characters that you wish 1Password to exclude from the generated password.
												AppExtensionGeneratedPasswordForbiddenCharactersKey: @"!@#$%/0lIO"
												};

	[[OnePasswordExtension sharedExtension] changePasswordForLoginForURLString:@"https://www.acme.com" loginDetails:loginDetails passwordGenerationOptions:passwordGenerationOptions forViewController:self sender:sender completion:^(NSDictionary *loginDictionary, NSError *error) {
		if (loginDictionary.count == 0) {
			if (error.code != AppExtensionErrorCodeCancelledByUser) {
				NSLog(@"Error invoking 1Password App Extension for find login: %@", error);
			}
			return;
		}

		self.oldPasswordTextField.text = loginDictionary[AppExtensionOldPasswordKey];
		self.freshPasswordTextField.text = loginDictionary[AppExtensionPasswordKey];
		self.confirmPasswordTextField.text = loginDictionary[AppExtensionPasswordKey];
	}];
}
用例 #4: 网页视图填充
1Password应用程序扩展不仅限于填充原生UI。只要有额外的一点点努力,用户就可以在您的应用程序中填充WKWebView视图。
只需在您的UI中添加一个按钮,将其操作分配为您的web视图的UIViewController中的此方法
- (IBAction)fillUsing1Password:(id)sender {
	[[OnePasswordExtension sharedExtension] fillItemIntoWebView:self.webView forViewController:self sender:sender showOnlyLogins:NO completion:^(BOOL success, NSError *error) {
		if (!success) {
			NSLog(@"Failed to fill into webview: <%@>", error);
		}
	}];
}
1Password会处理所有收集当前显示页面信息的细节,允许用户选择所需的登录信息,然后在页面内填充网页表单详细信息。
如果您使用web视图进行登录(即OAuth)且不希望在共享表单和其他项目类别(如信用卡和身份)中出现其他活动,您需要传递YES给参数showOnlyLogins。
SFSafariViewController
如果您的应用程序使用SFSafariViewController,1Password应用程序扩展将在运行iOS 9.2或更高版本的设备上的共享表单中显示,就像在Safari中一样。无需任何实现。
最佳实践
- 在注册和登录期间使用相同的
URLString。 - 确保您的
URLString设置为您的实际服务,以便您的用户可以轻松在1Password主应用程序中找到他们的登录信息。 - 您只能要求您自己的服务或与您的应用特定的登录信息。提供您不拥有或支持的服务URL可能会严重破坏客户对您的服务/应用的信任。
- 如果您没有为您的应用创建网站,您应将捆绑标识符指定为
URLString,例如:app://bundleIdentifier(例如:app://com.acme.awesome-app)。 - 发送图标供我们用于丰富的图标服务,以便用户在创建新项目后可以看到您的可爱图标。请发送一个1024x1024px的图标。确保您还包含了您使用的URL字符串,这样我们就可以将其与我们的丰富图标服务器上的图标关联。
- 请使用
1Password.xcassets资源目录中提供的图标,以便用户了解其功能。如果您需要其他尺寸或具有其他特殊要求,请与我们联系。 - 让用户可以将1Password设置为他们的默认浏览器,用于外部网络链接。
- 在您的注册页面上,在调用1Password之前预先验证字段。例如,如果用户名不可用,请显示一条消息,以便用户在调用1Password扩展程序之前修复它。
参考资料
如果您打开OnePasswordExtension.m并四处看看,您会对这些参考资料感兴趣。
联系我们
请联系我们!我们很高兴听到您如何将1Password集成到您的应用中,我们如何进一步改进,并将您的应用程序添加到与1Password集成的应用中。
您可以通过[email protected]与我们联系,或者如果您更喜欢,可以在Twitter上关注@1Password。